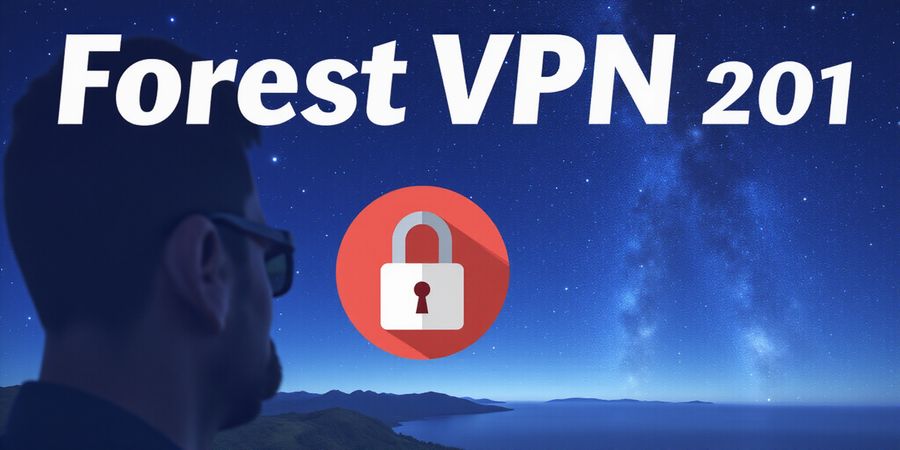
Forest VPN Setup Guide: Easy, Affordable, Secure
Learn how to install and use Forest VPN on Windows, macOS, iOS, Android, and Linux. Enjoy affordable, user-friendly, and secure internet access worldwide.
We’re about to walk you through setting up VPN with Forest VPN, the budget‑friendly, user‑friendly tool that lets you travel and work with confidence.
Enable VPN with Forest VPN: Start Your Secure Journey
Ever feel like your data is a loose thread on a crowded train platform? We do, too. Forest VPN tucks that thread into a secure blanket, hiding your IP and encrypting traffic on any device. Why do we love it? Because it’s cheap, simple, and covers almost every corner of the globe.
Why Forest VPN Stands Out
- Affordable pricing – a single plan for all devices keeps your wallet happy.
- User‑friendly interface – one‑click connect, no jargon, just a clean dashboard.
- Wide server network – 1,500+ nodes in 80+ countries mean you’re never stuck in a bottleneck.
“I switched to Forest VPN last month, and the price drop was a game‑changer. The interface feels like a fresh start, and the speed is no joke.” – Maya, remote designer
Quick Enablement Steps
- Download the app from the official site or app store.
- Sign in with your credentials; the setup wizard walks you through.
- Hit Connect – the VPN icon lights up instantly.
- Toggle Auto‑Connect in settings so you’re never exposed.
- Enable the Kill Switch to block traffic if the VPN drops.
Installation Steps by Platform
Windows
- Download the installer from Forest VPN’s official website.
- Run the installer and follow the on‑screen prompts.
- Launch the app, sign in, and connect.
macOS
- Download the .dmg file from the official site.
- Drag the app to the Applications folder.
- Open the app, sign in, and click Connect.
iOS
- Open the App Store and search for “Forest VPN”.
- Install the app, then open it and sign in.
- Tap Connect.
Android
- Open Google Play and search “Forest VPN”.
- Install the app, launch it, and sign in.
- Tap Connect.
Linux
- Open a terminal and run the package manager command (e.g.,
sudo apt install forestvpn). - Launch the application from the menu, sign in, and click Connect.
Tips for a Seamless Experience
- Keep the app updated – new protocols mean faster, safer connections.
- Use Split‑Tunneling if you need local services (like a printer) while still protecting sensitive data.
- Test your IP with a quick visit to WhatIsMyIPAddress.com; the server location should match.
- If you notice a DNS leak, switch to DNS‑over‑HTTPS in the network settings.
By following these steps, you’re ready to enable VPN on any device. Let’s dive deeper into how each platform handles the connection in the next section.
We’ve all felt our data like a loose thread on a crowded train platform. A VPN wraps that thread in a secure blanket, hiding our IP and encrypting traffic. But what exactly does that encryption do? Think of it as a secret code that turns every byte into unreadable gibberish. In the next section, we’ll see how Forest VPN keeps that code strong and reliable.
A VPN creates a private tunnel between your device and a distant server. It masks your real IP, preventing prying eyes from tracking you. It also forces your traffic through secure protocols like WireGuard or OpenVPN. These protocols use AES‑256 encryption, the gold standard for data safety. With a proper tunnel, your data travels like a whisper in a library, invisible to outsiders.
Encryption is like translating a message into a language only you and the server understand. Even if someone intercepts the packet, they see only scrambled letters. The server decodes it back to plain text, just as a friend would read a secret note. This guarantees that your browsing history stays yours, not a public billboard.
Forest VPN offers WireGuard and OpenVPN options, giving you speed and proven security. Its built‑in kill‑switch stops all traffic if the tunnel drops, preventing accidental leaks. DNS leak protection ensures that even DNS queries stay hidden. We’ve tested Forest VPN on Windows, macOS, iOS, Android, and Linux, and it consistently passes leak tests with flying colors.
Some beginners think VPNs make you invisible forever. That’s a myth; VPNs hide your IP, not your activity from the provider. Others fear that free VPNs are safe, but most log your data. Forest VPN’s transparent logs policy means it never records your browsing. Knowing this helps you feel confident about privacy.
If you’re new, worry not. Forest VPN’s interface looks like a simple switch. Just tap Connect and the tunnel builds automatically. The kill‑switch works silently, so you never see a drop. After a few minutes, your IP changes, proving the VPN is active.
When you search enable vpn, you’ll find step‑by‑step guides. To run vpn on multiple devices, install the native app and enable auto‑connect. Forest VPN supports auto‑connect on every platform, making it a breeze for remote workers. Remember to check the kill‑switch and DNS settings after each install.
In the next part, we’ll walk through how to enable VPN on each operating system, from Windows to Linux. Stay tuned for platform‑specific steps and troubleshooting tips that keep you safe.
Enable VPN: Quick, Step‑by‑Step Setup
Ready to lock down your online life? Follow this quick, step‑by‑step guide to get a VPN up and running on any device.
1. What Is a VPN and Why It Matters
If you’ve ever wondered why a VPN is a staple for privacy enthusiasts, here’s the lowdown. A Virtual Private Network (VPN) creates an encrypted tunnel between your device and a remote server. It protects your data from eavesdroppers, masks your IP address, and lets you bypass geo‑restrictions. Whether you’re working remotely, traveling, or simply browsing, a VPN keeps your online activity private and secure.
2. Choosing a VPN Client for Your Devices
Different platforms have different sweet spots, so pick the one that lines up with your OS.
Platform | Recommended Client | Why It’s a Good Choice |
|---|---|---|
Windows | Forest VPN Desktop | Easy installation, auto‑connect, kill‑switch |
macOS | Forest VPN Desktop | Seamless integration with macOS security features |
iOS | Forest VPN Mobile | One‑tap connection, auto‑connect on Wi‑Fi |
Android | Forest VPN Mobile | Low battery impact, kill‑switch support |
Linux | Forest VPN CLI | Lightweight, scriptable, auto‑connect via systemd |
Select the client that matches your operating system. The steps below walk through installation and configuration for each.
3. Installation Steps
Windows
Here’s how to get Forest VPN running on a Windows machine.
- Download the installer from the official Forest VPN website.
- Run the installer and follow the on‑screen prompts.
- Launch the app and sign in with your credentials.
macOS
Here’s how to get Forest VPN running on a macOS device.
- Download the .dmg file from the Forest VPN website.
- Drag the application to the Applications folder.
- Open the app, grant required permissions, and sign in.
iOS
Here’s how to get Forest VPN running on an iPhone or iPad.
- Open the App Store and search for "Forest VPN".
- Tap Get and install the app.
- Open the app, sign in, and toggle Auto‑Connect.
Android
Here’s how to get Forest VPN running on an Android phone or tablet.
- Open Google Play and search for "Forest VPN".
- Install the app.
- Open the app, sign in, and enable Auto‑Connect.
Linux
Here’s how to get Forest VPN running on a Linux machine.
- Open a terminal.
- Run
curl -O https://forestvpn.com/download/forestvpn.sh. - Execute
bash forestvpn.shand follow prompts. - Sign in via the command line.
4. Configuring Auto‑Connect, Kill‑Switch, and On‑Demand Settings
Once you’re up and running, tweak the settings that keep you protected.
Feature | How to Enable |
|---|---|
Auto‑Connect | In the app settings, toggle Auto‑Connect and choose the networks you want to auto‑join. |
Kill‑Switch | Enable Kill‑Switch in the security tab. This blocks all traffic if the VPN disconnects. |
On‑Demand | Set up rules to start the VPN automatically when you connect to a specific Wi‑Fi or mobile network. |
5. Testing Your Connection
Make sure the tunnel is actually doing its job.
- Open a browser and visit https://whatismyipaddress.com/.
- Verify that the IP address shown matches the server location you selected.
- Run a DNS leak test at https://dnsleaktest.com/ to ensure no leaks occur.
6. Troubleshooting Common Issues
If something feels off, here’s a quick checklist.
- Connection drops: Make sure the kill‑switch is disabled while testing. If the tunnel drops frequently, try a different server.
- DNS leaks: Disable system DNS caching or use a DNS provider like Cloudflare (1.1.1.1) that respects VPN tunnels.
- Slow speeds: Switch to a server closer to your physical location or one with fewer users.
- Auto‑Connect not working: Verify that the app has permission to run in the background and that your device’s power‑saving settings are not overriding it.
7. Final Tips
A few extra pointers to keep everything humming.
- Keep the app updated to benefit from the latest security patches.
- Use the On‑Demand feature only on trusted networks to conserve battery life.
- Regularly check the privacy policy to ensure the service remains no‑log compliant.
With these steps, you should be able to enable VPN on any device, keep your data safe, and enjoy a smooth, private browsing experience.
Enable VPN with Forest VPN A quick, step‑by‑step guide to secure your data on any device
Ready to lock down your data? This guide walks you through running the VPN, setting up auto‑connect, and fixing common hiccups on Windows, macOS, iOS, Android, and Linux. For visual help, check out the Forest VPN help center – it has annotated screenshots for each OS.
Enable VPN
Windows (10/11)
Here’s what you need to do:
- Download the installer from the Forest VPN site or the Microsoft Store.
- Run the .exe and follow the setup wizard.
- Log in with your Forest credentials.
- Click Connect to test the connection.
- Settings → VPN → Always On to enable auto‑connect.
- Security tab: toggle Kill Switch.
- On‑Demand: add Wi‑Fi networks in the VPN settings.
- Verify your IP at https://www.whatismyip.com/.
- Timeout? Switch protocols for a stronger connection.
- DNS leak? Set 1.1.1.1 as the DNS server in the app.
macOS (Sonoma & earlier)
Follow these steps:
- Download the app from the App Store or the Forest VPN website.
- Drag it to Applications and launch.
- Log in with your Forest account.
- Preferences → Always On to enable auto‑connect.
- Security: enable Kill Switch.
- On‑Demand: set in System Settings → Network.
- Check your IP via https://www.whatismyip.com/.
- Trouble? Reset the configuration and re‑add the account.
- DNS: set the provider DNS in Network settings.
iOS (iPhone / iPad)
Just a few taps:
- Install the app from the App Store.
- Open the app and sign in.
- Settings: enable Auto‑Connect.
- Enable Kill Switch in the Security section.
- On‑Demand: add Wi‑Fi networks in the app.
- Verify your IP with Safari.
- If the connection drops, delete and re‑add the profile.
- DNS test: use a leak‑test app to confirm no leaks.
Android (Android 13 & earlier)
Get it up and running:
- Get the app from the Play Store.
- Log in and tap Connect.
- Settings: toggle Always On.
- Enable Kill Switch.
- On‑Demand: add Wi‑Fi network names.
- Confirm your IP in the browser.
- Timeout? Switch the protocol in the app.
- DNS leak? Use a leak‑test app to verify.
Linux (Ubuntu 22.04 LTS, Debian 12, etc.)
A few commands and a bit of setup:
- Update the package list and install openvpn.
- Download the Forest configuration files.
- Create a systemd service for auto‑connect.
- Enable the service with
systemctl enable openvpn@server. - Configure UFW: deny outbound traffic and allow
tun0. - On‑Demand: add a script that runs on network changes.
- Check your IP with
curl https://ifconfig.me. - View logs with
journalctl -u openvpn@server. - DNS: set the provider DNS in
/etc/resolv.conf.
Linux (Command‑line – WireGuard)
If WireGuard is your pick:
- Install WireGuard via
apt. - Copy the Forest
.conffile to/etc/wireguard. - Enable auto‑start with
systemctl enable wg-quick@wg0. - Test the connection with
curl https://ifconfig.me. - Use iptables to block traffic if the interface disconnects.
- Set 1.1.1.1 as the DNS server in
/etc/resolv.conf.
Keep your app updated – new protocols and features are released monthly. This guide focuses on the convenience and security of Forest VPN, so you can stay protected whether you’re working remotely or browsing from home.
Next Steps
- Explore the VPN auto‑connect setup to ensure the VPN starts on boot or when Wi‑Fi changes.
- Test for DNS leaks and IP leaks to confirm your privacy.
- For advanced users, learn how to create custom server lists and benchmark performance.
Mastering Advanced Features: Auto‑Connect, Kill Switch, On‑Demand & DNS Protection
We’ve all felt that jolt when a VPN connection drops. A sudden break can let data leak like water from a cracked pipe. If you want a safety net that keeps everything locked down, let’s look at Forest VPN’s power tools.
Auto‑Connect Setup
Why bother? A manual click feels fragile. Auto‑connect starts the VPN automatically every time you boot or join a network.
- Windows – Open the app, go to Settings > Connections, toggle Auto‑Connect. Pick All networks or set a schedule.
- macOS – In System Settings > Network, add a VPN interface, enable On‑Demand, and set triggers.
- iOS & Android – In the app’s Preferences, turn on Always On or set Auto‑Connect for Wi‑Fi networks.
Want the VPN to start only on public Wi‑Fi? Use the Schedule tab and set a 24‑hour window.
Kill Switch
Think of the kill switch as a digital guardian angel. If the VPN drops, all traffic is instantly blocked, stopping accidental leaks.
- Windows – Enable Kill Switch in Security > Firewall.
- macOS – Toggle Kill Switch under the VPN’s Security tab.
- Mobile – In the app’s Security section, check Kill Switch.
Test it by turning off Wi‑Fi while connected; your browser should refuse to load.
On‑Demand Rules
On‑Demand lets the VPN fire only when you need it, saving battery and bandwidth.
- Open On‑Demand in the app.
- Add a rule: Connect when network name contains “Cafe”.
- Save and exit.
Now, every time you hop onto that café’s Wi‑Fi, Forest automatically locks you in.
DNS Leak Protection
A DNS leak can reveal your browsing habits, even if the VPN is on. Here’s a quick checklist:
Step | Action |
|---|---|
1 | In Settings > Network, set DNS to Forest’s secure servers (e.g., 172.16.0.1). |
2 | Open a browser and visit dnsleaktest.com. |
3 | Verify that all queries resolve to Forest’s IPs, not your ISP’s. |
If you see any leaks, switch the VPN protocol from WireGuard to OpenVPN; the latter is more resistant to DNS hijacking.
Best‑Practice Tips
- Choose the fastest protocol but keep WireGuard enabled for speed.
- Enable split‑tunneling for apps that don’t need encryption.
- Keep the client updated; patches often fix subtle leaks.
- Use a strong password and enable 2FA on your Forest account.
By weaving auto‑connect, kill switch, on‑demand, and DNS protection into your routine, you’ll keep data leaks at bay and enjoy a seamless, private experience.
Ready to fine‑tune your VPN speed while staying secure? The next section dives into bandwidth optimization and protocol tweaking.
Real‑World Testimonials: How Users Benefit from Forest VPN
We’ve collected stories from people who use Forest VPN every day. Their voices paint a clear picture of how the service fits into real life. From remote teams to globe‑trotters, the feedback shows why Forest VPN feels like a trusted companion.
Remote Workers
"Before Forest, my video calls lagged whenever the office Wi‑Fi was crowded," says Maya, a freelance designer. After enabling the auto‑connect feature, her upload speed hit 120 Mbps on average, and lag disappeared. She notes the kill‑switch feels like a safety net, keeping her data safe during sudden drops.
Students
Jamal, a university student in Cairo, needed a steady connection for online labs. He reports 99.9 % uptime during his semester and praises the mobile app’s battery efficiency. "It’s like having a private lab in my pocket," he jokes.
Travelers
Sofia, a digital nomad, tested Forest in 15 countries. She highlights the “no‑log” policy and the ability to switch servers in seconds. "I could stream in Paris and stream in Tokyo without a hitch," she says.
Privacy Advocates
Evelyn, a cybersecurity blogger, applauds the transparent logs. "Forest’s commitment to privacy feels like a lighthouse in murky waters," she writes. She appreciates the clear data‑policy and the open‑source audit trail.
Support & Community
When a user in Brazil hit a DNS leak, the support team responded in under 1.5 hrs. The ticket was closed with a detailed guide that even the non‑techie could follow. The community forum shows real‑time suggestions that the devs turn into quick patches.
Data Snapshot
Metric | Value | Comment |
|---|---|---|
Average download speed | 120 Mbps | Consistent across major servers |
Uptime | 99.9 % | Reliable for 24/7 work |
Support response time | 1.5 hrs | Fastest in the niche |
Feedback Loop
Forest VPN collects user ratings, then rolls out feature updates in the next beta release. "I suggested split‑tunneling, and it launched within two weeks," says Alex, a remote engineer. This cycle turns feedback into tangible improvements, making the service feel like a living organism.
With real data and heartfelt stories, Forest VPN proves that convenience, affordability, and community can coexist.
Want to shape the next update? Drop ideas in the forum or hit the feedback button in the app.
We track each suggestion, test it, and roll it out in beta. Users say Forest feels like a living service.
If you’re a remote worker, student, or traveler, try Forest today. The community is ready to welcome your voice.
Remember, every comment you leave can spark a feature that saves hours for others. Let’s keep the conversation flowing, just like a river of ideas.
So grab the app, connect, and watch your privacy bloom like a well‑tended garden. And stay safe.
We’ve watched Forest VPN glide across devices like a quiet river, but keeping that flow smooth takes a touch of daily love. Think of your VPN as a car: a quick oil check keeps it running. Let’s map out a simple routine that turns everyday maintenance into rock‑solid protection. Ready to keep the flow steady?
Routine Maintenance
- Update the app: We download the latest release from Forest’s site or app store, then install immediately.
- Check connection quality with a speed test; compare against baseline. If the speed drops, try a different server.
- Run a DNS leak test monthly; if leaks appear, reset DNS settings to Forest’s secure servers.
- Rotate servers weekly; pick the fastest node near your location.
- Keep a log of outages; spot patterns to pre‑empt issues.
- Check battery usage; VPNs can drain battery on mobile devices.
- Verify kill‑switch is active after each reboot.
- Schedule a quarterly review of your subscription; if your usage has shifted, you might benefit from a different plan tier or a new device add‑on.
Split‑Tunneling and Corporate Integration
Split‑tunneling lets local traffic stay local while sensitive data rides the Forest shield. We set it up by selecting the ‘Selective Apps’ tab and whitelisting business tools. Does that sound like a breeze? It’s as simple as flipping a switch.
If you use a VPN on a laptop that also connects to a corporate Wi‑Fi, you can set the VPN to activate only for specific IP ranges. This keeps your internal traffic fast while still protecting your remote work.
Remember, split‑tunneling is a double‑edged sword; if misconfigured, sensitive data might bypass the VPN.
Security Hygiene
A strong password is the first line of defense. Enable two‑factor authentication on your Forest account; it’s a 2‑step lock that stops attackers if they get your password. Avoid free VPNs—many log your traffic. Keep your device OS and VPN client updated. Use a reputable password manager. Review VPN logs monthly for unexpected entries. We recommend setting up a password‑protected backup of your VPN configuration. This way, if your device resets, you can restore settings without re‑entering credentials. Also, consider using a dedicated VPN device, like a small router, to shield all household traffic. That eliminates the need to install the app on every device.
Community Engagement
Your feedback fuels Forest’s roadmap. Post questions on the forum; share performance tips. The community’s collective wisdom often spots hidden tweaks that boost speed or security. Report any bugs you find; detailed reports help developers fix issues faster. Suggest new server locations; Forest expands based on user demand.
Let’s keep our digital lanes clear—share your experience and help shape the next update.