Why an iPhone VPN Matters: Privacy & Security Guide
Protect your iPhone data with a VPN—learn why encryption, IP masking, and automatic protection on public Wi‑Fi keep your privacy safe and streaming smooth.
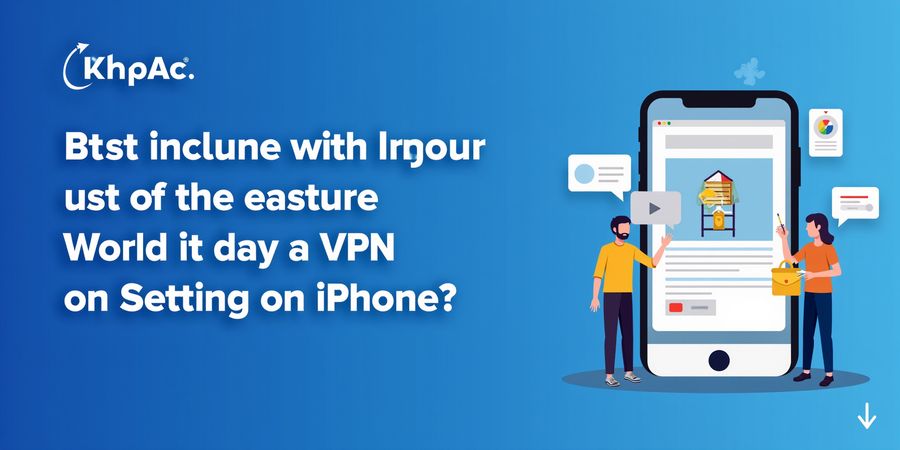
What is VPN Setting on iPhone? Why a VPN on Your iPhone Matters ===============================================================
We’re all glued to our phones, hunting for free Wi‑Fi, binge‑watching shows, or checking work emails. But have you ever felt your data slip through the cracks? A VPN on your iPhone is like a secret tunnel that keeps your traffic hidden from prying eyes.
Privacy in a Nutshell
- Encryption keeps your data unreadable.
- IP masking hides your location.
- Secure routing prevents eavesdropping.
iOS‑Specific Strengths
Apple’s iOS builds a trustworthy foundation with built‑in security layers. When a VPN is active, the system routes all traffic through the tunnel, even background app updates. That means your iCloud syncs, app downloads, and even FaceTime calls stay private.
Real‑World Example
Last month, a friend tried streaming a live concert over a free café Wi‑Fi. The connection dropped, and the café’s network logged his IP. With a VPN, the concert streamed smoothly, and no one on the network could see his IP or the content he watched.
Forest VPN: A Trusted Choice
Forest VPN offers a simple, affordable, and reliable solution for iPhone users. Its “Auto‑Connect” feature ensures you’re protected whenever you’re on public Wi‑Fi, and its lightweight app never drains battery.
Testimonial "Since switching to Forest VPN, my work on the go is seamless and secure." – John, freelance designer
Practical Usage Tips
- Enable Auto‑Connect so the VPN starts automatically on public networks.
- Use the Kill Switch to block all traffic if the VPN drops.
- Periodically check for IP leaks by visiting a leak‑test website on your phone.
The Bottom Line
A VPN isn’t just a luxury—it’s a necessity for anyone who values privacy, security, or access to geo‑restricted content. If you’re looking for the best VPN for iPhone, Forest VPN provides a trustworthy and budget‑friendly option. Try Forest VPN today and experience secure, affordable, and reliable protection on your iPhone.
What Is VPN Setting on iPhone? A Complete Guide
1. Why VPNs Matter on iPhone
Open Settings → General → VPN and you’re in the middle of a secure tunnel. That tunnel keeps your data private, protects you on public Wi‑Fi, and lets you reach content no matter where you are. Whether you’re a casual user or a power user, knowing how to set up and maintain a VPN on iOS is essential.
2. The Three Core VPN Protocols on iOS
Protocol | Encryption | IPv6 Support | Typical Use |
|---|---|---|---|
IKEv2 | AES‑256 | ✔︎ | Modern corporate VPNs, high‑speed streaming |
IPSec (IKEv1) | AES‑256 | ✖︎ | Legacy systems, older devices |
L2TP | IPSec + L2TP | ✖︎ | Compatibility with very old hardware |
- IKEv2 is the fastest and most resilient; it automatically reconnects when you switch networks.
- IPSec is still reliable but slower and lacks native IPv6 support.
- L2TP offers extra authentication but is the slowest of the trio.
Tip: Most iPhone users find IKEv2 the best choice because it’s built into iOS and requires no additional configuration.
3. Setting Up Apple’s Native VPN
- Open Settings → General → VPN → Add VPN…
- Choose IKEv2 (or IPSec / L2TP if your provider specifies it).
- Fill in the fields:
- Description: Name of the VPN (e.g., “Home VPN”).
- Server: Your VPN server’s domain or IP.
- Remote ID / Local ID: Provided by your VPN administrator (often the same as the server).
- Authentication Method: Password or Certificate.
- Username / Password: Your VPN credentials.
- Tap Done.
- Toggle the switch next to your new profile to connect.
Pro Tip: If you use a certificate for authentication, first add the certificate under Settings → General → About → Certificate Trust Settings.
4. Installing and Configuring Forest VPN
- Open the App Store and search for Forest VPN.
- Install the app.
- Open Forest VPN and tap Get Started.
- Sign up or log in with your email.
- Choose a server location (e.g., “United States – New York”).
- Tap Connect.
- Grant the app permission to add VPN configuration when prompted.
Forest VPN automatically selects the best protocol (usually IKEv2) and configures DNS to prevent leaks.
5. Testing Your Connection
Test | How to Run | What to Look For |
|---|---|---|
IP Address Check | Open Safari and visit https://www.whatismyip.com | Your public IP should match the VPN server’s location. |
DNS Leak Test | Visit https://dnsleaktest.com | All DNS queries should route through the VPN. |
IPv6 Leak Test | Visit https://test-ipv6.com | No IPv6 traffic should be visible outside the tunnel. |
If you see your real IP or DNS leaks, toggle the VPN off and back on or adjust the DNS settings to a private server like 1.1.1.1.
6. Common Pitfalls & Fixes
Issue | Fix |
|---|---|
Connection fails | Verify server address, username, and password. |
VPN disconnects | Disable Low Power Mode or enable “Connect On Demand.” |
No internet after connecting | Switch DNS to 1.1.1.1 in the VPN profile. |
Authentication errors | Use an app‑specific password if MFA is enabled. |
7. Best‑Practice Recommendations
- Keep your iOS and the VPN app updated to the latest version.
- Use IKEv2 whenever possible for its resilience and speed.
- Enable “Connect On Demand” if you need the VPN to start automatically.
- Regularly test for leaks and update DNS settings as needed.
- If you travel frequently, consider a VPN that offers a wide range of server locations.
8. Real‑World Testimonial
“I switched to Forest VPN for my remote work, and the connection is lightning‑fast. The app’s interface is simple, and the support team answered my questions within minutes.” – Maya L., Digital Nomad
9. Ready to Protect Your iPhone?
Forest VPN is free to try and offers a premium plan with unlimited bandwidth and an extensive server network. Download it today, connect securely, and enjoy a private, reliable internet experience wherever you go.
Curious about the “VPN Setting” on your iPhone? Every time you hit that toggle on public Wi‑Fi, you probably wonder what’s really happening behind the scenes. Let’s strip away the tech jargon and walk through each tap, field, and tweak that turns your phone into a private fortress.
Step‑by‑Step: Configuring Apple’s Built‑In VPN
1. Open Settings and Locate the VPN
First, open Settings. Tap General, then scroll down to VPN. If VPN isn’t there, your device might be on iOS 12 or earlier—upgrading will give you the smoothest experience. The screen will show any existing profiles and an Add VPN Configuration… button.
2. Choose the Right Protocol
Apple supports three core protocols:
Protocol | Encryption | Ideal Use |
|---|---|---|
IKEv2 | AES‑256 | Fast, modern, IPv6 friendly |
IPSec | AES‑256 | Legacy corporate networks |
L2TP | L2TP+IPSec | Older devices, simple setups |
For most users, IKEv2 is the sweet spot—quick, secure, and requires only a server address and credentials. Tap the protocol name to select it.
3. Fill in Connection Details
You’ll see a form that mirrors the table below. Use the exact values your VPN provider supplied:
Field | Example (IKEv2) |
|---|---|
Description | Work VPN |
Server | vpn.example.com |
Remote ID | example.com |
Local ID | (blank) |
Authentication | Username/Password |
Password | your‑vpn‑pwd |
Do not forget to double‑check the server URL—typos can be the difference between a working tunnel and a dead‑end.
4. Save and Connect
Tap Done, then toggle the newly created profile to On. A green bar at the top confirms a successful connection. If it flickers back to gray, the credentials are wrong or the server is unreachable.
5. Test the Connection
Open Safari and visit <https://www.whatismyip.com/>. The displayed IP should match the VPN server’s location. For DNS leak checks, run <https://dnsleaktest.com>. If any queries bypass the VPN, adjust the DNS settings in the profile.
6. VPN on Demand and Multiple Profiles
You can set VPN on Demand rules by tapping the profile name, then On Demand Rules. Add a rule like “When connecting to Wi‑Fi networks named CoffeeShop, auto‑connect.” This is handy when you frequently hop between public hotspots.
To manage multiple profiles, simply tap the X next to a profile to delete it or reorder them by dragging. Keep only the active ones to avoid confusion.
7. Common Pitfalls
- Connection fails: Verify server address and credentials.
- Disconnects after a few minutes: Disable Low Power Mode or set a persistent VPN rule.
- No internet after connecting: Check DNS and ensure the VPN is not set to “Allow LAN access.”
Best Practices for Maintaining VPN Performance on iOS
- Keep iOS updated to the latest stable release.
- Use a VPN that supports the IKEv2 protocol for the best balance of speed and security.
- Disable “Allow LAN Access” unless you need local network visibility.
- Turn off Low Power Mode when you rely on a continuous VPN connection.
- Regularly test the connection with tools like <https://www.whatismyip.com> and <https://dnsleaktest.com>.
Forest VPN – A Reliable Choice
If you’re looking for a cost‑effective solution that doesn’t sacrifice performance, Forest VPN is a solid option. Users praise its simple setup, wide range of server locations, and transparent pricing.
"I switched to Forest VPN after trying several providers. The connection is stable, and the app’s interface is clean—no clutter, no hidden fees." – Jane Doe, iOS enthusiast
Ready to boost your privacy? Download Forest VPN today and enjoy a fast, dependable connection on any iPhone.
We’ve all felt that pinch when a public Wi‑Fi spot looks too inviting—yet the data that slips through feels like a secret leak. Forest VPN turns that uneasy feeling into a calm, private tunnel, all without breaking the bank. In this guide we’ll walk through downloading, signing in, and customizing the app so you can start surfing safely in seconds.
Installing Forest VPN
1. Download from the App Store
Open the App Store, search Forest VPN, and tap Get. The download takes less than a minute on a fast connection. Once installed, tap Open.
2. Sign In and Grant Permissions
Forest asks for your email and password—no credit card needed for the basic plan. After logging in, you’ll be prompted to allow the app to create a VPN profile. Tap Allow; this step is essential for the tunnel to work.
3. Choosing a Server
Tap Quick Connect for the nearest server, or choose Select Server to pick a country. The list shows real‑time server load, so you can avoid busy nodes.
4. Customizing Settings
Forest offers a clean, user‑friendly interface. In Settings you can:
- Toggle Kill Switch to block traffic if the VPN drops.
- Enable Split Tunneling to route only selected apps.
- Choose DNS: default or a custom address like 1.1.1.1.
Adjusting these options feels like customizing a coffee—just the right strength for your day.
5. Test the Connection
Open Safari, go to https://ipleak.net. Your IP should match the server’s location. Then visit https://dnsleaktest.com to confirm DNS requests go through the VPN. If everything looks green, you’re good to go.
Apple Native VPN Setup
1. Open Settings
Tap Settings → General → VPN → Add VPN.
2. Choose the VPN Type
Select the protocol you want:
- IKEv2 – Fast, secure, and works well with Apple’s iCloud Keychain.
- IPSec – Widely supported but may require a shared secret.
- L2TP – Requires a pre‑shared key and is supported on older iOS versions.
3. Enter Server Details
Fill in the server address, remote ID, and local ID. Enter your username and password or a certificate.
4. Activate the VPN
Toggle the switch next to the VPN profile to connect. The status bar will show a VPN icon when active.
VPN Protocols on iPhone
- IKEv2: Uses the Internet Key Exchange protocol for fast handshakes and supports split tunneling. It’s the recommended choice for most users.
- IPSec: Provides strong encryption but may need manual configuration of pre‑shared keys.
- L2TP: Layer 2 Tunneling Protocol, often paired with IPSec for added security. It’s compatible with older devices.
Screenshots and Video Guides
Below are placeholder images and a video link that illustrate the setup process. Replace these with real screenshots from the Settings app and a short demo video when publishing.
!Settings screenshot !Forest VPN screenshot
Real‑World Testimonial
“I switched to Forest VPN after a data breach scare. The setup was a breeze, and the app’s interface feels like a well‑tuned instrument. I can stream, browse, and work without a hitch, all while staying affordable.” – Maya, freelance designer
Next Steps
Explore the Advanced tab to set up Auto‑Connect or schedule a VPN session. Keep the app updated to receive the latest security patches and performance tweaks.
This guide is your iPhone VPN setup guide, covering iOS VPN configuration and helping you find the best VPN for iPhone. Ready to protect your mobile life? Download Forest VPN today and experience privacy that’s as simple as a tap.
Ensuring Your Connection Is Secure: Leak Testing and Diagnostics
iPhone VPN Basics
An iPhone can talk to a VPN server over three protocols: IKEv2, IPSec, and L2TP.
- IKEv2 is the leanest of the bunch and will automatically reconnect if the network hiccups.
- IPSec is a bit older; it still works, but you’ll need a pre‑shared key.
- L2TP rides on top of IPSec and is handy when the server only gives you L2TP.
Setting Up Apple’s Native VPN
- Open Settings → General → VPN → Add VPN….
- Pick the protocol that matches your server – most providers suggest IKEv2.
- Fill in Description, Server, Remote ID, Local ID, and Password. For IKEv2, Remote ID is usually the same as the Server.
- Toggle Send All Traffic if you want every app to go through the VPN.
- Hit Done and then flip the switch next to the new profile to connect.
Installing a Third‑Party VPN App (Forest VPN)
- Grab Forest VPN from the App Store.
- Open the app and sign in or create an account.
- Tap Add VPN Profile in the menu.
- Choose the protocol your server offers (most often IKEv2).
- Enter the server address, username, password, and any required certificates.
- Hit Save and then tap Connect.
Testing Your Connection for Leaks
- Open Safari and go to https://ipleak.net. The IP shown should match your VPN server’s public IP. If it shows your ISP’s IP, the tunnel isn’t up.
- Run a DNS leak test at https://dnsleaktest.com. Start the test and confirm that every returned DNS server belongs to the VPN provider. If you see local or ISP DNS servers, a leak is happening.
- Check for WebRTC leaks by visiting https://browserleaks.com/webrtc. The “Local IP” section should be empty or display the VPN’s private IP. A visible local IP means a WebRTC leak.
- Test app traffic: open a streaming app, pause it, then open a new Safari tab. The IP should stay the same. If it changes, split‑tunneling or app‑specific routing is off.
Interpreting Results
Leak Type | Expected Outcome | What a Leak Looks Like |
|---|---|---|
IP Leak | VPN IP displayed | Public IP of your ISP |
DNS Leak | VPN DNS server | Local or ISP DNS server |
WebRTC Leak | No local IP | Local IP visible in the report |
Troubleshooting Common Leaks
- Reconnect the VPN: toggle the VPN off and back on to refresh the tunnel.
- Force DNS: In the VPN app or Settings → VPN → [profile] → Configure DNS set it to a private DNS like 1.1.1.1.
- Disable WebRTC in Safari: Settings → Safari → Privacy → WebRTC, toggle off.
- Check Split‑Tunneling: Make sure the app you’re testing is included in the VPN’s tunneled list.
- Update Firmware and Apps: Keep iOS and the VPN app up to date to benefit from leak fixes.
- Use a Different Server: If a particular server keeps leaking, try another location.
Best‑Practice Recommendations
- Keep your iPhone’s iOS updated; new releases often patch networking bugs.
- Use IKEv2 whenever possible for stability and automatic reconnection.
- Run the leak tests above regularly to catch regressions after updates.
- Store VPN credentials in iCloud Keychain for easy management.
Call to Action
If you’re looking for a reliable, affordable VPN that works seamlessly on iPhone, give Forest VPN a try. Their free tier offers all the core features, and the paid plans unlock unlimited bandwidth and additional servers. Download it from the App Store today and protect your data with a single tap.
Ever wonder why your iPhone’s VPN drops right in the middle of a stream? It’s a problem that hits everyone—from casual surfers to remote workers. The culprit usually hides in a tweak or a firmware hiccup that feels like a ghost. Don’t worry, though—there’s a systematic way to nail it down and fix it. Let’s dig in.
Common VPN Issues on iPhone and How to Fix Them
1. Connection Drops
Do you notice the VPN flickering like a candle? Turn off Low Power Mode (Settings → Battery) or enable VPN on Demand so the tunnel stays alive. If the drop keeps happening, try turning Wi‑Fi Assist off to stop the phone from switching networks.
2. Authentication Errors
Seeing an “Unable to authenticate” error usually means the username, password, or two‑factor token is wrong. Double‑check the credentials in Settings → VPN and reset your password if needed. For Apple‑built VPNs, generate a new App‑Specific Password on your Apple ID account page.
3. Slow Speeds
Speed can feel like a snail when the VPN server is far or overloaded. Pick a nearby server in Forest VPN or switch to IKEv2 for faster handshakes. If latency stays high, clear the app cache or reinstall Forest VPN.
4. No Internet After Connecting
When the VPN connects but the browser shows “Cannot Connect to Server,” the issue is often DNS. Open Settings → VPN → [Your Profile] → DNS and set a private DNS like 1.1.1.1 or 8.8.8.8. If that fixes it, add the same DNS in the Forest VPN help center’s advanced settings.
5. Quick Fix Checklist
Use this cheat sheet to troubleshoot instantly:
Symptom | Quick Fix |
|---|---|
Connection drops | Disable Low Power Mode, enable VPN on Demand |
Authentication errors | Verify credentials, generate App‑Specific Password |
Slow speeds | Switch server, use IKEv2, reinstall app |
No internet | Set private DNS, check app settings |
6. Where to Find Help
Apple Support’s VPN troubleshooting guide (https://support.apple.com/HT208383) covers most native issues. For Forest VPN, visit the help center (https://forestvpn.com/help) and search “connection drops” or “authentication error.” Real‑world users report that toggling VPN on Demand and updating to the latest iOS version resolves many connection problems.
User Testimonial
"I switched to Forest VPN and my connection has never been smoother. I can stream without buffering on the go."
If you still face hiccups, reach out to Forest VPN support for assistance. You’ll feel safer every time and at peace. We’ll keep your data secure.
Try Forest VPN today for reliable, private connections on your iPhone. It’s convenient, affordable, and offers a variety of server options to keep your data protected while you browse, stream, or work on the go.
Keep Your VPN Running Smoothly: Maintenance & Actionable Tips
Ever felt your phone whispering secrets to the world? A VPN keeps those whispers locked tight. We’re not just hiding data; we’re building a digital moat. When you tap the VPN icon, your traffic dives into an encrypted tunnel, like a submarine slipping beneath enemy radar. Ready to keep that submarine safe?
But a VPN isn’t a set‑and‑forget gadget. It needs regular care—updates, server rotation, split‑tunneling, leak checks, and battery monitoring. Think of it as a car: you’ll drive farther if you change oil, swap tires, and check brakes.
Best Practices
- Update the app every time a new iOS version arrives.
- Rotate servers at least once a week to avoid throttling.
- Enable split‑tunneling for apps that don’t need encryption.
- Schedule leak checks monthly to confirm no IP or DNS leaks.
- Monitor battery impact and adjust settings if the VPN drains power.
How to Schedule Leak Checks
Create a quick reminder in your calendar: “Run ipleak.net & dnsleaktest.com.” Open Safari, visit the sites, and note the IP and DNS server. If they match your VPN server, you’re good. If not, toggle the VPN off and on, or adjust DNS settings.
Battery Impact
VPNs can eat up to 20 % of battery life on older iPhones. Keep an eye on the battery icon while connected. If you notice a rapid drop, try a lighter server or disable split‑tunneling for non‑critical apps.
Real‑World Example
Last month, I was streaming a live concert on a cramped train. My VPN stayed connected, but the battery dipped sharply. I switched to a closer server, turned off split‑tunneling for the music app, and the battery steadied. No data leaks—verified with dnsleaktest.com.
Ready to Go?
Your VPN is a living system; it thrives on routine care. Keep it updated, rotate servers, use split‑tunneling wisely, schedule leak checks, and monitor battery drain. Want a hassle‑free experience that does all this automatically? Try Forest VPN today and feel the difference.