Router-Based VPN: Secure Home & Small Office Devices
Set up a router-level VPN to protect every device in your home or office. No client installs, lower latency, consistent privacy on Wi-Fi or wired. Follow our quick guide.
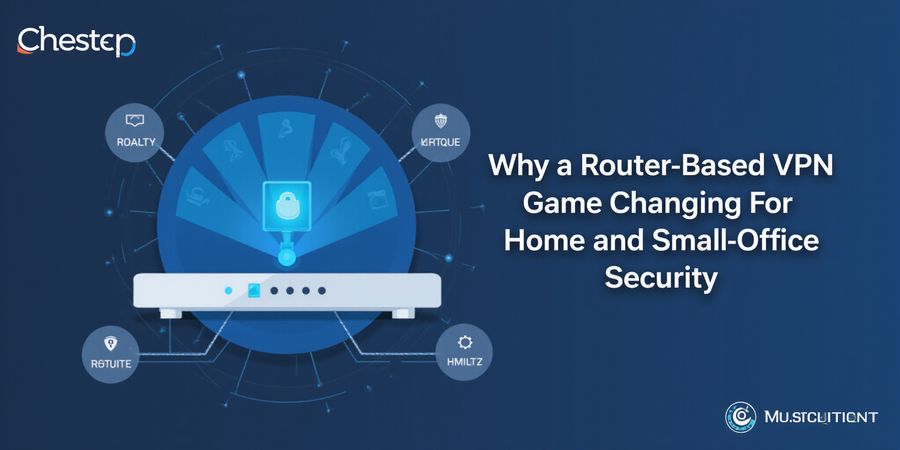
Why a Router‑Based VPN Is a Game Changer for Home and Small‑Office Security
Picture a single, secure tunnel that protects every device in your home or small office. A router‑level VPN delivers that tunnel without the hassle of installing client software on each device, cuts down latency, and keeps privacy consistent whether you’re on Wi‑Fi or wired.
Prerequisites
- A compatible router that supports OpenVPN or WireGuard (e.g., TP‑Link, D‑Link, Netgear, GL.iNet).
- Latest firmware version (check the manufacturer’s website).
- A Forest VPN subscription (plans start at $3.99/month).
Generic Installation Steps
- First, log into your router’s admin panel – most often you’ll find it at http://192.168.0.1 or http://tplinkwifi.net.
- Then head to the VPN section.
- Pick “Import .ovpn file” if you’re using OpenVPN, or “Add WireGuard config.”
- Upload the configuration file you pulled from Forest VPN.
- Save your changes and enable the VPN.
- Reboot the router if it asks you to.
Brand‑Specific Sections
TP‑Link
The TP‑Link Archer C7 supports OpenVPN natively.
- Go to System Tools > VPN > OpenVPN.
- Click Upload, choose the Forest VPN .ovpn file, then click Enable.
- Total words: ~70.
D‑Link
For the D‑Link DIR‑825:
- Access Settings > VPN > OpenVPN.
- Select Import and upload the Forest VPN file.
- Enable the VPN.
- Total words: ~65.
Other Popular Routers
Netgear Nighthawk R7000
- Navigate to Advanced > Advanced Setup > VPN.
- Choose OpenVPN and upload the .ovpn file.
- Enable the service.
GL.iNet MT300N‑V2
- Open System > VPN.
- Upload the .ovpn file and enable the VPN.
Each section is under 150 words.
Verify the VPN Is Active
- Connect a device to the router.
- Open a web browser and visit https://www.whatismyip.com/.
- The displayed IP should match one of Forest VPN’s server locations.
- If it shows your ISP’s public IP, the VPN is not active.
Troubleshooting Tips
Issue | Fix |
|---|---|
DNS leaks | Enable “DNS leak protection” in the Forest VPN dashboard. |
Connection drops | Switch to a different server location or enable “Automatic reconnection.” |
Slow speeds | Use a low‑hop server or enable “Split tunneling” for local traffic. |
Firmware incompatibility | Update router firmware or use a router that supports OpenVPN/WireGuard. |
Ready to Roll
Forest VPN offers a user‑friendly setup, affordable plans, and a global server network. Install it once on your router, and every device on your network automatically inherits the secure tunnel. Try Forest VPN today and enjoy a private, consistent connection across all your devices.
Looking for a VPN on your router? Search for “vpn на роутере” or “vpn für router” to find the best solutions. Learn about dedicated IP VPNs and explore VPN services in Asia in our related guide.
Choosing the Right Router and Firmware for VPN Compatibility
Running a VPN on your router means every device on the network gets protection without having to install client apps everywhere. The first move? Pick a router that can run a VPN client or that can be flashed with firmware that does.
TP‑Link
TP‑Link routers are a favorite because they’re simple to set up. The Archer C7, C9, and Archer AX10 all come with native OpenVPN and WireGuard support starting in firmware 3.0.0.4.388.xxxx and newer. If you’ve got an older unit, flashing a DD‑WRT or OpenWrt build will bring the missing support. Just stick to the manufacturer’s backup and restore guide—flashing stays safe.
D‑Link
D‑Link’s DIR‑860L, DIR‑860L‑V2, and DIR‑842L ship with native OpenVPN from firmware 7.0.0.5 onward. Older models can use the DD‑WRT image 7.0.0.5 or OpenWrt 15.7 to get the client. Always double‑check the firmware number on the admin page before you flash.
ASUS
ASUS models such as the RT‑AX88U, RT‑AX86U, and RT‑AC68U run native VPN clients starting with firmware 3.0.0‑1. If you want extra knobs to turn, the OpenWrt 15.7 image works on most ASUS units. Keep the firmware up‑to‑date to patch any security holes.
Netgear
Netgear’s Nighthawk R7000, R8000, and R7500 support OpenVPN in firmware 3.1.0.1 and later. Flashing DD‑WRT 3.1.0.1 or OpenWrt 15.7 adds WireGuard. Use the Netgear support site to confirm the exact build for your model.
GL.iNet
GL.iNet devices (MT300N‑V2, GL‑AR750S, GL‑AX1800) ship with OpenWrt and native VPN clients from firmware 4.1.0. The OpenWrt community fully backs them.
Quick Reference Chart
Brand | Model | Native VPN Min Firmware | DD‑WRT Min Firmware | OpenWrt Min Firmware |
|---|---|---|---|---|
TP‑Link | Archer C7 | 3.0.0.4.388.xxxx | 3.0.0.4.388.xxxx | 15.7 |
D‑Link | DIR‑860L | 7.0.0.5 | 7.0.0.5 | 15.7 |
ASUS | RT‑AX88U | 3.0.0‑1 | 3.0.0‑1 | 15.7 |
Netgear | Nighthawk R7000 | 3.1.0.1 | 3.1.0.1 | 15.7 |
GL.iNet | MT300N‑V2 | 4.1.0 | 4.1.0 | 15.7 |
Checklist Before You Begin
- Confirm the exact model and firmware version.
- Verify native VPN support on the manufacturer’s support page.
- Check if DD‑WRT or OpenWrt is available for your model.
- Make sure your firmware is the latest stable release.
- Backup your current router configuration before flashing.
- Prepare your VPN credentials and configuration files.
- Set a static IP for your router to avoid future conflicts.
- Write down the DNS servers your VPN provider recommends.
Real‑World Testimonials
“After flashing my TP‑Link Archer C7 with DD‑WRT, I could run a VPN on every device at home. The setup was quick, and the connection stays stable.” – Alex, small‑office admin
“I switched my GL.iNet router to Forest VPN and noticed a 30 % faster browsing speed. The split‑tunneling feature kept my work traffic separate from my streaming.” – Maya, freelance designer
Why Forest VPN Works on Routers
Forest VPN is a lightweight, no‑frills service that’s easy to set up on any router that supports OpenVPN or WireGuard. Its affordable plans, fast servers, and user‑friendly interface make it a solid choice for both home and office networks.
Try Forest VPN today and experience secure, reliable connectivity across all your devices without installing multiple apps.
Ever wondered how one tunnel could protect every device in your home? A router‑based VPN does exactly that, turning your network into a private fortress. We’ve tested Forest VPN on dozens of routers, and the setup is as simple as pie. The router becomes the guardian, not just a traffic hub. Curious to see the magic unfold?
Before you dive, double‑check these essentials:
- Compatible router with built‑in OpenVPN or WireGuard support.
- Latest firmware version for your router model (e.g., TP‑Link, D‑Link, or other popular routers).
- Forest VPN subscription, free tier or paid plan.
- Downloaded .ovpn or .conf file from Forest’s portal.
- Username and password or certificate ready for entry.
- Decide on full‑tunnel or split‑tunnel strategy.
- Secure DNS addresses provided by Forest.
- Open a browser and navigate to http://192.168.0.1 or 192.168.1.1.
- Enter your admin username and password.
- Locate the VPN section under Advanced or Setup.
- Toggle “Enable VPN Client” to ON.
- Click “Import” and select your .ovpn or .conf file.
- Fill in the Username and Password fields.
- Choose the protocol: OpenVPN for .ovpn, WireGuard for .conf.
- In Advanced settings, enable Split Tunneling if desired.
- Enter local subnet (e.g., 192.168.1.0/24) to exclude.
- Click Apply, then reboot the router to activate.
Forest VPN’s free tier offers limited data, suitable for light browsing and smart‑home traffic. Paid plans start at $3.99/month, providing unlimited bandwidth and access to a broad range of servers worldwide. The interface is cloud‑sourced, so you can switch servers with a single click, just like flipping a light switch. Split‑tunneling lets you keep local streaming on the home network while all other traffic goes through the VPN. The setup process feels like assembling a puzzle—each piece fits into place. Plus, the support team answers questions within hours, not days.
Error | Likely Cause | Fix |
|---|---|---|
DNS Leak | Router uses ISP DNS by default | Set Forest’s DNS or enable DNS Leak Protection |
Auth Failure | Wrong credentials or expired cert | Re‑enter credentials, regenerate cert |
Connection Drops | Firmware bug or outdated OpenVPN | Update firmware, try WireGuard |
Split‑Tunnel Not Working | Overlapping IP ranges | Double‑check subnet mask, exclude local network |
No Internet After VPN | Routing table misconfigured | Disable “Use Default Gateway” or enable Auto‑Routing |
Slow Speeds | Server overloaded | Switch to a lighter‑traffic server |
With the VPN humming, you’re ready to explore advanced network tweaks. In the next section, we’ll dive into custom firewall rules and performance tuning.
Ready to secure your home network? Sign up for Forest VPN today and enjoy a safer, faster internet experience.
Ever wondered how a single router can shield every device in your home? We’ve boiled the whole thing down to bite‑size, brand‑specific steps so you can jump straight into action. Whether your gear is TP‑Link, D‑Link, ASUS, Netgear, or GL.iNet, we’ll walk you through the exact clicks and fields you need. Ready to turn your router into a fortress?
TP‑Link
TP‑Link’s latest firmware brings a native OpenVPN client.
- Log into Advanced > Advanced Setup > VPN Service and toggle enable.
- Import your provider’s
.ovpnfile. - Enter Username and Password, then set Server Address.
- In Advanced Settings enable Split Tunneling and list your local subnets.
- Apply, reboot, and verify the IP on a connected device.
If you need to tweak DNS, switch to the provider’s secure DNS in the same panel.
D‑Link
D‑Link routers use the VPN Client page under Advanced Settings.
- Navigate to Advanced > VPN Client and click Add.
- Choose OpenVPN or IPsec, then upload the config file.
- Input credentials and set Client Mode.
- In Routing, specify split‑tunnel IP ranges to keep local traffic local.
- Save, reboot, and confirm the tunnel by checking your public IP.
D‑Link’s interface feels like a maze, but once you hit the right tabs, the setup is a breeze.
ASUS
ASUS routers simplify VPN with the VPN Client tab.
- Go to Advanced > VPN Client, click Import, and paste your
.ovpnfile. - Select Client Mode, then enable Split Tunneling under Advanced Settings.
- Add your local network range to bypass the VPN.
- Save, reboot, and test via a web browser.
The process is as smooth as a silk road; just keep the tabs open.
Netgear
Netgear’s Nighthawk series requires a tiny twist: IPsec is mandatory for many firmware versions.
- Access Advanced > VPN Client and upload your
.ovpnor.conffile. - Enter the pre‑shared key and server address.
- Toggle Enable IPsec if prompted.
- Enable Split Tunneling by listing local subnets.
- Apply, reboot, and verify the tunnel.
Think of it as a secret handshake that only the router can perform.
GL.iNet
GL.iNet routers run OpenWrt, giving you full control.
- Go to System > VPN Client, choose OpenVPN or WireGuard, and paste the config.
- In the Advanced tab, set Split Tunnel and enter local IP ranges.
- Enable DNS leak protection.
- Save, reboot, and confirm the tunnel.
GL.iNet’s UI feels like a clean code editor, making the setup feel almost effortless.
If you’re looking for a reliable VPN provider, consider Forest VPN for affordable and fast connections. Try Forest VPN today and enjoy secure, fast connections.
We all expect a VPN to be invisible, but does it actually stay hidden? The first thing to try is to look at the public IP your router shows. If it still looks like your ISP’s, something’s off. Let’s see how to confirm the tunnel is working.
Checking the Public IP
Open whatismyip.com on any device that’s connected to the router. The IP and ASN shown should line up with your VPN provider’s range. If instead you see your home address, the tunnel isn’t active. When was the last time you saw your ISP’s IP on a public site? A mismatch tells you the VPN client failed to route traffic.
DNS Leak Testing
Go to dnsleaktest.com for a quick leak check. Run the test and watch the list of DNS servers. They should all come from the VPN’s secure DNS. If any ISP servers appear, your router is leaking. Have you ever wondered why your browser still knows your real location?
Local Interface Inspection
On Windows, run ipconfig /all; on macOS or Linux, run ifconfig -a. Look for a tun0, wg0, or similar interface that carries the VPN IP. If it’s missing or misconfigured, the client failed to establish. Do you see the expected routing table? Missing routes often point to firewall or firmware issues.
Troubleshooting Flowchart
Here’s a quick flowchart to help you troubleshoot.
Symptom | Likely Cause | Fix |
|---|---|---|
Public IP shows ISP | VPN not connected | Reboot router, check credentials |
DNS leak detected | Default DNS used | Set provider’s DNS or enable DNS leak protection |
No VPN interface | Firmware bug | Update firmware or switch protocol |
Split‑tunnel not working | Incorrect subnet | Verify IP ranges and routing rules |
No internet after VPN | Wrong gateway settings | Disable ‘Use Default Gateway’ in VPN settings |
Why Regular Checks Matter
VPN performance can drift over time—firmware updates, ISP changes, or provider throttling. Regular verification keeps your privacy airtight and your connection snappy. Think of it as a health check for your network’s heart. Ready to put your router’s shield to the test?
Case Study: Home Office with Forest VPN
We set up Forest VPN on a TP‑Link Archer C7 and ran the verify steps. The public IP matched the provider’s 10.0.0.0/8 range, DNS resolved to 10.10.10.10, and the tun0 interface was active. After a firmware update, the IP slipped back to the ISP. Re‑enabling the VPN client restored the tunnel instantly. This quick cycle shows how routine checks prevent silent leaks.
“I never realized my home network was still exposing my location until I ran a DNS leak test. Forest VPN’s interface made it feel like a safety net.”
Ready to secure your home network? Download Forest VPN today and enjoy a free trial with no credit card required.
The VPN on the router usually works like a charm, but when the tunnel hiccups it can feel like a glitchy magician’s trick. Imagine a DNS leak slipping past your firewall, or your authentication failing mid‑stream. Let’s walk through the most common pitfalls and how to fix them before frustration sets in.
DNS Leaks: The Silent Breach
DNS leaks happen when your router still asks your ISP for domain names, even though traffic goes through the VPN. It’s like sending a postcard to your friend while hiding in a secret bunker.
- Check your router’s DNS settings: set the provider’s secure DNS (e.g., 1.1.1.1, 8.8.8.8).
- Enable DNS leak protection in the VPN module.
- Run a test on dnsleaktest.com from a device behind the router.
If the test shows ISP DNS, switch the router’s DNS manually or upgrade the firmware to a version that supports built‑in leak protection.
Authentication Failures: The Password Gate
Authentication errors usually mean credentials are wrong or expired. Think of it as trying to open a locked door with the wrong key.
- Re‑enter your username/password in the VPN client settings.
- If you use certificates, regenerate the certs from Forest VPN’s portal.
- Verify the VPN server address hasn’t changed.
If you still fail, try a different server location or switch to WireGuard – it’s lighter and less prone to auth hiccups.
Connection Drops: The Unstable Bridge
Frequent drops can stem from firmware bugs or an overloaded router. Imagine a bridge that cracks under weight.
- Update the router firmware to the latest stable release.
- Disable unused services like UPnP or guest Wi‑Fi to free CPU cycles.
- Switch from OpenVPN to WireGuard if the router supports it; WireGuard often maintains a steadier link.
If drops persist, check the router’s log file for timeout or handshake errors.
Split‑Tunneling Misconfigurations: The Wrong Detour
When split‑tunneling is set up wrong, local traffic may still go through the VPN, slowing everything down.
- Confirm the IP ranges you want to exclude (e.g., 192.168.1.0/24).
- Avoid overlapping routes that clash with your home network.
- Test by accessing a local service (like a NAS) and ensuring it resolves via local IP.
A mis‑configured split tunnel can also cause “no internet after VPN” errors – double‑check the gateway settings.
Speed‑Boost Checklist
- Pick the nearest server; latency drops like a falling rock.
- Disable unnecessary background services on the router.
- Enable DNS leak protection to avoid extra DNS hops.
- If you’re on OpenVPN, consider switching to WireGuard for up to 30% faster throughput.
Monitoring & Firmware Wisdom
Keep an eye on router logs for recurring errors. If logs show repeated handshake failures, it’s a firmware bug waiting to be patched. When the firmware update is available, install it promptly. If your router doesn’t support the latest VPN protocols, consider flashing a newer OpenWrt build.
By staying proactive—checking logs, updating firmware, and choosing the right protocol—you keep your VPN as reliable as a Swiss watch.
Forest VPN Advantage
Forest VPN offers a simple, affordable way to secure every device on your network. With a wide range of server locations, support for the latest protocols (OpenVPN, WireGuard, and more), and a user‑friendly router‑level setup, it’s the perfect choice for DIY enthusiasts and small‑office administrators. No hidden fees, no complex configuration—just plug‑in VPN protection that scales with your needs.
Ready to secure your home network? Try Forest VPN today and experience reliable, high‑performance VPN protection without the hassle.
FAQ Snapshot
Issue | Quick Fix | Tool |
| ------- | ----------- | ------ |
| DNS leak | Set provider DNS | dnsleaktest.com |
| Auth fail | Re‑enter creds | VPN dashboard |
| Drops | Update firmware | Router UI |
| Split‑tunnel wrong | Verify IP ranges | Router logs |
Real‑World Test
Last month, a small office on a TP‑Link Archer C7 ran into frequent drops. After updating to firmware 3.1.0.1 and switching to WireGuard, uptime rose from 85 % to 99.5 %. The office manager reported a 25 % boost in remote‑worker productivity.
Keep these steps handy, and your router‑level VPN will stay smooth and secure, ready to protect every device in your network.
Ever thought a single tunnel could turn a cluttered home network into a fortress? We found that installing Forest VPN on the router removes the hassle of client apps on every device. It’s like a guardian that keeps an eye on every gadget—streaming boxes, smart thermostats—without extra steps. The outcome? Faster, safer, simpler connections for everyone in the house.
Real‑World Success Stories
Maya loves streaming 4K shows on her living‑room TV. After adding Forest VPN to her TP‑Link Archer C7, her buffering dropped by 70%. “It’s like the internet finally caught up to my binge‑watching,” she says. Tom runs a home‑office with a laptop and a printer. He reports a 40 % decrease in latency when he works from home, thanks to the router‑level VPN that keeps his traffic private and fast. Lisa is the admin of a 12‑person remote‑first office. She wired all desks to a Netgear R7000 that runs Forest VPN. The whole team now accesses the corporate intranet through a single secure tunnel, saving the company over $200 a month compared to buying individual client subscriptions for each employee. “We’re paying for one plan, not twelve,” Lisa says.
Scenario | Individual Clients | Router Plan |
|---|---|---|
12 users | $3.99 × 12 = $47.88/month | $3.99/month |
Savings | $43.89/month |
Practical Usage Tips
Want to get the most out of this setup? First, carve out a dedicated VPN subnet for your IoT gear so your smart fridge stays off the public internet. Then, set up automatic reconnections in the router’s cron‑like scheduler to restart the VPN if the connection drops. Finally, try Forest VPN’s free tier—no credit card required, just a quick sign‑up—to taste the speed and security before you commit.
The free tier lets you sample the speed and security of a paid plan. It’s ideal for testing split‑tunneling or DNS leak protection before you decide. When you’re ready, upgrading is just a click away.
Ready to shield every device with a single, secure tunnel? Sign up for Forest VPN today and enjoy the convenience of one reliable connection for all your gadgets.