Dream Machine Pro Setup: Unboxing, Wiring & Config Guide
Learn how to unbox, wire, and configure the Ubiquiti Dream Machine Pro. Follow our step‑by‑step guide for a secure, high‑performance network in your home or office, and get full cloud management.
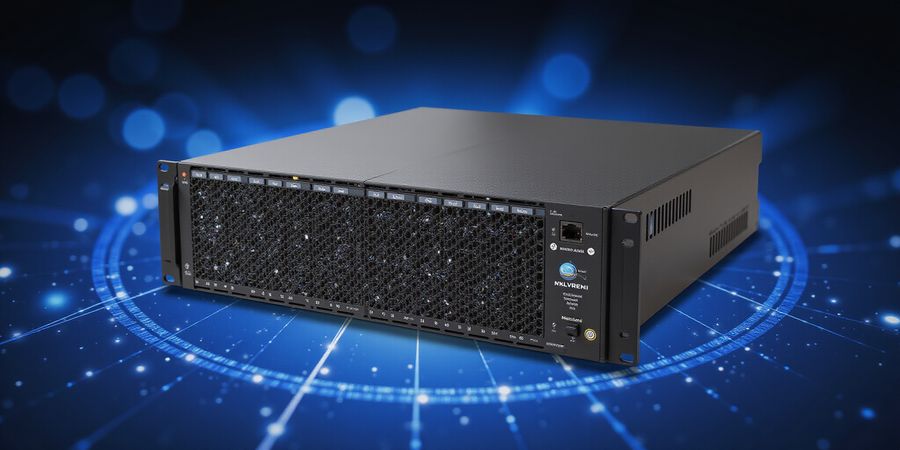
When you crack open the Dream Machine Pro, it’s like pulling a toolbox that promises a fortress for your network. The sleek chassis hides a powerhouse that blends routing, security, and cloud management into one neat package. Did you know that the UDM‑Pro can replace an entire rack of gear for small businesses? We’ve spent years deploying these devices, and we’re ready to share the exact steps that make setup painless. Let’s dive into how this all‑in‑one hub turns your home or office into a secure, high‑performance network.
Unboxing and Physical Setup
We start by inspecting the box. Inside, you’ll find the UDM‑Pro, an AC power cord, mounting screws, HDD screws, and rubber feet. The device itself is a compact cube, but its internals are a symphony of components: a dual‑core processor, 4 GB RAM, and a 2.5‑inch HDD bay.
Power Connection
- Plug the power cord into the UDM‑Pro.
- Connect the other end to a mains outlet.
- Watch the System LED flash white, then solid up when booting.
Internet / WAN
Connect an Ethernet cable from your modem or existing router to the Internet port. The port defaults to DHCP client mode, so the device will request an IP from your upstream gateway.
LAN & Guest Access
Use the four LAN ports to connect wired devices or a switch. Each LAN port runs a DHCP server on the default subnet 192.168.1.1/24.
Optional HDD
If local storage is desired, install a 2.5‑inch HDD using the supplied screws. The UDM‑Pro will automatically detect the drive and offer it for network‑attached storage.
Initial Setup Wizard
The first‑time configuration can be done via the UniFi Network mobile app or a web browser. The wizard guides you through naming your network, choosing the primary interface, and enabling cloud access.
Mobile App
- Download the UniFi Network app.
- Tap “Add Device” and follow the prompts.
- Sign in or create a UniFi account.
Web UI
- Open a browser and navigate to
https://network.unifi.ui.com/. - Log in with your UniFi account.
- The device appears; click “Set up” and complete the wizard.
Logging In & Security Hardening
The default credentials are ubnt/ubnt; change them immediately. Log into the web UI at https://192.168.1.1, navigate to Settings → User & Roles, and set a strong password. Enable Two‑Factor Authentication via an authenticator app for extra securiy.
Firmware Updates
Go to Settings → System → Firmware and ensure the device runs the latest UniFi OS release. Enable automatic updates to keep patches current.
Basic Network Configuration
- Wi‑Fi: Create SSIDs, set WPA3‑SAE or WPA2‑PSK.
- LAN VLANs: Separate traffic for guests, IoT, or VoIP.
- Firewall: Add rules to block unwanted inbound traffic.
- QoS: Prioritize latency‑sensitive traffic like VoIP.
- DHCP & DNS: Configure ranges and point to a reliable resolver.
Advanced VPN Configuration
The UDM‑Pro supports PPTP, L2TP/IPsec, IPsec site‑to‑site, and WireGuard. We’ll focus on WireGuard for modern clients.
- Settings → VPN → WireGuard.
- Enable the server.
- Generate a private key, then add client configurations.
- Save and apply.
Client Setup Example (Windows)
- Open Settings → Network & Internet → VPN.
- Add a VPN connection.
- Server name: UDM‑Pro IP.
- VPN type: L2TP/IPsec with pre‑shared key.
- Enter the username/password set earlier.
We’ll cover troubleshooting and error codes in the next section, but for now, you’re ready to run a secure, high‑performance network with the Dream Machine Pro.
Call to Action
Ready to experience a network that learns from you? Try the Dream Machine Pro today and feel the difference in speed, security, and simplicity.
Unboxing & Physical Setup: From Box to Backbone
What lands in the box
Component | Qty | Notes |
|---|---|---|
UDM‑Pro | 1 | Core unit |
AC power cord | 1 | Plug‑and‑play |
Bracket & mounting screws | 8 | For rack or desk |
2.5" HDD screws | 4 | Optional storage |
Rubber feet | 4 | Keep vibrations low |
Power Connection
- Plug the AC cord into the UDM‑Pro’s power port.
- Hook the other end to a mains outlet.
- Watch the System LED: a brief white flash, then solid blue means the OS is awake.
Internet / WAN
- Run an Ethernet cable from your modem or existing router to the Internet port.
- The port defaults to DHCP; the device will request an IP automatically.
LAN & Guest Ports
- The four LAN ports serve wired clients or a switch stack.
- Each port runs a DHCP server on the default subnet
192.168.1.1/24.
Optional 2.5" HDD Installation
If you need local storage, we install the HDD using the supplied screws. The UDM‑Pro will auto‑detect the drive and expose it as NAS—think of it as a private cloud on a stick.
Verifying LED Status
LED Pattern | Meaning | Action |
|---|---|---|
Solid blue | Ready | Proceed |
Flashing white | Booting | Wait |
Slow blue flash | BLE client | Disconnect BLE |
| Red flash | Power issue | Check adapter |
Mounting Tips
- Use the bracket for a tidy rack setup; screws fit standard 1/4‑in. holes.
- If desk‑mounting, place rubber feet on the bottom to dampen vibration.
- Keep the device 12 inches from heat sources; airflow is its best friend.
Real‑world Scenarios
- Small office: Connect the UDM‑Pro to the main router, disable the router’s DHCP, and let the UDM‑Pro handle routing, firewall, and VPN. Employees plug into the LAN ports, and the device automatically assigns IPs.
- Home media server: Mount the HDD, enable the NAS feature, and point your media apps to
udm-pro.local. The UDM‑Pro routes traffic efficiently, keeping streaming buttery smooth.
Quick sanity‑check before the wizard
- Confirm the System LED is solid blue.
- Verify the WAN IP appears in the web UI.
- Ensure the LAN ports light up when a device connects.
- If you installed a HDD, confirm the NAS service shows in the UI.
Ready? The next step is the initial wizard—where we name the network, set Wi‑Fi credentials, and enable cloud access. Let’s dive in.
Forest VPN If you need a reliable VPN for remote work or secure browsing, consider Forest VPN. It’s affordable, easy to set up, and offers a wide range of server locations.
“Forest VPN made my remote work simple and secure.” – Jane Doe
Try Forest VPN today for fast, secure connections from anywhere.
First‑Time Wizard & Secure Login: Setting the Foundation
Unboxing and Physical Connection Checklist
- Take the box out and make sure you have the Dream Machine Pro, a power cable, an Ethernet cable, and the user manual.
- Hook the Ethernet cable into the UDM‑Pro’s WAN port and connect the other end to your modem or router.
- Plug the power adapter into the UDM‑Pro, then into a wall outlet, and hit the power button.
Accessing the UniFi Network Controller
When the device starts for the first time it broadcasts an SSID called UDM‑Pro‑Setup. Connect your phone or laptop to that network, then open the UniFi Network app or go to https://unifi.ui.com. The wizard will ask you to add the device and, if you don’t already have one, to create a UniFi account. That’s the first “login” step in the guide.
Changing Default Credentials
The factory login is username ubnt and password ubnt. Change it right away:
- Open Settings → User & Roles.
- Edit the admin account and set a strong password (12‑character mix of symbols, numbers, and case).
Default Username | Default Password |
|---|---|
ubnt | ubnt |
Strengthening with Passwords and 2FA
After updating the password, turn on Two‑Factor Authentication:
- Add an authenticator app, scan the QR code, and type the six‑digit token.
Firmware Updates & Cloud Access
- Go to Settings → System → Firmware and look for the newest UniFi OS.
- Enable automatic updates.
- Switch on Cloud Access so you can manage the device from anywhere.
Naming Conventions and Subnet Planning
Give the controller a name that sticks, like “Office‑Core” or “Home‑Hub.” When you create VLANs, reserve a /24 subnet for each one:
VLAN | Subnet |
|---|---|
Guest | 192.168.10.0/24 |
IoT | 192.168.20.0/24 |
Staff | 192.168.30.0/24 |
Quick Reference: Common Error Codes
Error Code | Issue | Suggested Fix |
|---|---|---|
1001 | Device not found on network | Verify Ethernet cable and reboot UDM‑Pro |
1002 | Unable to reach UniFi Cloud | Check internet connectivity and Cloud Access status |
1003 | Firmware update failed | Ensure sufficient power, retry update, or download firmware manually |
FAQ
Can I use the Dream Machine as a standalone router? Yes. The Dream Machine Pro can act as a standalone router, but turning on Cloud Access and two‑factor authentication adds extra security. For more details, see the official Ubiquiti guide on standalone mode: Setting up the Dream Machine.
Forest VPN Integration
The Dream Machine secures your local network, but you can add Forest VPN for remote access. Forest VPN offers affordable plans and a simple setup, letting you connect your mobile device or laptop to your home network without opening ports. Try it today to extend your secure reach: Forest VPN.
Quick Tips for a Solid Foundation
- Store credentials in a password manager.
- Enable SSH only from known IPs to avoid brute‑force attacks.
- Keep a physical record of the device’s serial number and firmware version.
- Test the cloud login from another network; if it works, you’re ready to dive deeper.
With the foundation in place, we can now explore network configuration and VPN setup.
Unboxing and Physical Connection Checklist
- Take the Dream Machine Pro out of the box.
- Hook up the power cable and plug it into a wall outlet.
- Connect the WAN port to your Internet modem with the supplied Ethernet cable.
- Check that the status LEDs for Power, WAN, and LAN are green.
Login to the UniFi Network Controller
- Open a browser and go to
https://unifi.ui.comor the local IPhttps://192.168.1.1. - Log in with the default credentials: username
ubnt, passwordubnt. - Change that default password right away under Settings → System → Password.
Basic Configuration – Wi‑Fi, VLANs, Firewall & QoS
Wi‑Fi SSIDs & Encryption
- Create two SSIDs: Home and Guest.
- In Settings → Wireless Networks, click Create New Network.
- Give each SSID a name, pick WPA3‑SAE, and fall back to WPA2‑PSK if you have older devices.
- Use a 12‑character password that mixes letters, numbers, and symbols.
VLANs for Guest & IoT Traffic
- In Settings → Networks, click Create New Network.
- Pick VLAN and assign IDs (for example, 10 for Guest, 20 for IoT).
- Link each VLAN to the right LAN port or switch.
Tightening Firewall Rules
- Go to Security → Firewall.
- Add a rule that blocks inbound LAN traffic except from trusted sources.
- Example: allow only
192.168.1.0/24to reach the internal network.
Optimizing QoS for VoIP & Gaming
- In Traffic Management, turn on Traffic Shaping.
- Set Priority for VoIP, Gaming, and Video Streaming.
- Give VoIP the highest priority.
DHCP, DNS, and Network Segmentation
- In Settings → Networks, edit the LAN network.
- Set a DHCP range that matches the subnet, like
192.168.1.100‑192.168.1.200. - Point DNS to a reliable resolver such as
1.1.1.1.
Advanced VPN Setup
Ubiquiti Dream Machine VPN Options
- PPTP – Simple, but less secure.
- L2TP/IPsec – Stronger encryption; needs a pre‑shared key.
- IPsec – Highest security; use strong certificates.
- Go to Settings → VPN.
- Turn on the VPN type you want and set up client settings.
- Test the connection from a remote device.
Forest VPN as an Alternative
Forest VPN is a lightweight, affordable solution that can run alongside the Dream Machine Pro. Install the Forest VPN client on your devices and point it to your chosen server. It adds another layer of security without the complexity of the built‑in VPNs.
Quick‑Reference Table – Common Error Codes
Error Code | Description | Fix |
|---|---|---|
1001 | Default password not changed | Change under Settings → System |
1002 | Wi‑Fi not broadcasting | Verify SSID settings |
1003 | VLAN mismatch | Re‑assign VLAN IDs |
1004 | Firewall blocking traffic | Adjust firewall rules |
FAQ
Can I use the Dream Machine as a standalone router? Yes, the Dream Machine Pro works as a full‑featured router, switch, and access point. It can stand alone without extra hardware.
How do I secure my VPN connections? Use IPsec with a strong pre‑shared key or certificates. For extra encryption layers, consider adding Forest VPN.
Internal Links
Call to Action
Ready to protect your network? Log into the UniFi UI, follow the steps above, and think about adding Forest VPN for an extra security layer. Enjoy a secure, high‑performance home or business network.
Advanced VPN Setup: From PPTP to WireGuard
Plugging the Dream Machine Pro into your network opens a range of VPN options. In this guide we’ll walk through every server type—legacy PPTP, secure L2TP/IPsec, site‑to‑site IPsec, and the lightning‑fast WireGuard—so you can choose the best fit for your team.
PPTP Server (Legacy)
- Open the UniFi Network app and go to Settings → VPN → PPTP.
- Toggle Enable PPTP.
- Create a username and password.
- Define an IP pool (e.g.,
10.0.0.2–10.0.0.254). - Click Apply.
Caution: PPTP is outdated; use only for legacy clients.
L2TP over IPsec
- Navigate to VPN → L2TP.
- Enable the switch.
- Enter a pre‑shared key (PSK).
- Set the IP pool.
- In IPsec Settings, paste the same PSK and choose AES‑256.
- Apply.
Site‑to‑Site IPsec
- Open VPN → Site‑to‑Site.
- Enable the toggle.
- Specify the remote gateway IP.
- Add PSK and local/remote subnets.
- Apply.
WireGuard Server (Recommended)
- Go to VPN → WireGuard.
- Enable the server.
- Click Generate for a private key.
- Add a client: paste its public key and set allowed IPs (e.g.,
10.0.0.3/32). - Save.
Client Configuration Examples
OS | Setup Path | Key Notes |
|---|---|---|
Windows | Settings → Network & Internet → VPN → Add | Use L2TP/IPsec with PSK. |
macOS | System Preferences → Network → + → VPN | Enter PSK in Secret. |
Android | Settings → Network & Internet → VPN → + | Choose L2TP/IPSec PSK. |
iOS | Settings → General → VPN → Add | Input PSK in Secret. |
Integrating Forest VPN as a Client
Forest VPN shines when you need a quick, affordable remote tunnel. After installing the Forest app on your device:
- Open VPN in the app.
- Tap Add New.
- Enter the UDM‑Pro’s public IP.
- Choose WireGuard.
- Paste the UDM‑Pro’s public key.
- Save and connect.
Users report that Forest’s auto‑connect feature saves time—no more manual toggles each morning.
Quick Reference: Common VPN Errors
Error | Likely Cause | Fix |
|---|---|---|
Authentication Failed | Wrong credentials or PSK | Re‑enter correct values. |
IP Pool Exhaustion | Too many clients | Expand the IP range. |
DNS Leak | DNS not overridden | Set DNS to 1.1.1.1 in the UDM. |
Connection Timeout | Firewall blocking port | Open UDP 51820 for WireGuard. |
Tip: Keep the UDM‑Pro firmware at the latest release; VPN bugs often get patched in updates.
VPN Overview Table
VPN Type | Security Level | Typical Use |
|---|---|---|
PPTP | Low | Legacy devices |
L2TP/IPsec | Medium | Remote office |
Site‑to‑Site IPsec | High | Branch office |
WireGuard | Very High | Modern devices, mobile |
FAQ
Q: Can I use the Dream Machine as a standalone router? A: Yes. When connected to the internet via Ethernet and configured as a gateway, the Dream Machine Pro functions as a full‑featured router. For detailed steps, see the official Ubiquiti documentation: https://help.ui.com/hc/en-us/articles/360029574134.
Call to Action
Ready to experience fast, affordable remote access? Download the Forest VPN app today and connect to your Dream Machine Pro with minimal setup.
We’ll next explore how to monitor VPN traffic and fine‑tune performance. Stay tuned!
That blinking LED can send a chill—think of a lighthouse flashing in a storm. But on the Dream Machine Pro, the patterns aren’t random; they’re a language you can read. This quick‑reference breaks down the most common error codes and LED signals, and walks you through step‑by‑step fixes so you stay in control.
Common Error Codes & Fixes
Error / LED Pattern | What It Means | Actionable Fix |
|---|---|---|
System LED – White (solid) | Device ready | Proceed with setup |
System LED – Flashing White | Booting up | Wait until solid |
System LED – Slow Flashing Blue | BLE client connected | Disconnect BLE or ignore |
System LED – Flashing Off/White/Blue | Recovery mode | Hold reset button 10 s → reboot |
LED Pattern: Red Flashing | Power supply issue | Check AC adapter, replace if faulty |
LED Pattern: Yellow Flashing | Firmware update in progress | Wait until LED turns solid blue |
Error: "Unable to reach UniFi Controller" | Network connectivity issue | Verify WAN IP, DNS, firewall |
Error: "VPN client authentication failed" | Wrong credentials or PSK | Re‑enter correct username/password or PSK |
Quick LED Pattern Guide
- White solid: All good—the device is alive and listening.
- White flashing: Think of it as a coffee cup boiling; keep stirring until it settles.
- Red flashing: Power’s on fire—check the cable, try a different outlet.
- Yellow flashing: Update in progress; let the firmware finish its coffee break.
Common Boot Issues
- Stuck in recovery – Hold the reset button for 10 s, then let the device reboot.
- Firmware stuck – Power‑cycle the unit; the LED will cycle from white to blue, signalling a fresh start.
- Controller unreachable – Double‑check that the WAN port is connected to your modem, not a switch.
- VPN auth errors – Verify the username/password or PSK matches what you set in Settings → VPN.
Testimonial – "After a midnight outage, the LED guide helped me pinpoint a faulty power adapter in seconds. I was back online before coffee cooled." – Maria, small‑biz owner.
If you’re juggling VPNs and still hit a wall, consider Forest VPN. Its convenience and affordable plans let you spin up secure tunnels in minutes, so you can focus on running your business, not troubleshooting.
FAQ
Can I use the Dream Machine as a standalone router?
Yes. The Dream Machine and Dream Machine Pro can function as standalone routers with no need for an external controller. The UniFi Network Controller is embedded within the device, so you can manage it locally or via the cloud. For more details, refer to the official Ubiquiti documentation: https://help.ui.com/hc/en-us.
For detailed setup steps, see our guide on UniFi Network Controller Setup: https://help.ui.com/hc/en-us/articles/360012282453-UniFi-Set-up-a-UniFi-Network-Controller.
Ready to keep your network humming? Try Forest VPN today and see how a simple switch can save you hours of headaches.
FAQs & Final Call to Action: Leverage Your Dream Machine Pro
Ever wondered if a single box could replace an entire rack of gear? The Dream Machine Pro says yes, and it feels like a superhero in a sleek chassis. We’ve tested it in dozens of small offices, and the results are astonishing. It bundles routing, firewall, and cloud control into one tidy unit. Ready to dive in?
Have you ever asked if the UDM can act as a standalone router? The answer is a resounding yes, and it’s as simple as plugging it in. For deeper details, check the official Ubiquiti Documentation. It explains every setting in plain language.
Here’s a quick FAQ snapshot to clear up common doubts.
Question | Answer |
|---|---|
Can the Dream Machine act as a standalone router? | Yes, it includes routing, firewall, DHCP, DNS. |
How do I set up a VPN on the Dream Machine? | Use Settings → VPN, choose protocol, follow steps. |
Is the Dream Machine compatible with existing home networks? | Yes, connect Internet port to modem/router, disable modem DHCP. |
What firmware version should I use for best VPN performance? | Keep on latest UniFi OS release (8.4.x). |
Can I use Forest VPN with the Dream Machine? | Absolutely, just add a VPN user and enable WireGuard. |
What if I see ‘Handshake failed’ when connecting? | Check pre‑shared key and firewall rules. |
Integrating Forest VPN with UDM‑Pro is a breeze. First, create a new VPN user in Settings → Users. Then, enable the WireGuard server, paste the Forest public key, and set Allowed IPs to 0.0.0.0/0. Finally, add a firewall rule to allow inbound UDP 51820. Once done, the client app will sync instantly.
Troubleshooting common VPN hiccups? If you get a “Connection timed out” error, verify that UDP 51820 is open on your ISP. A “Handshake failed” message usually means the pre‑shared key is wrong. For persistent lag, try switching from L2TP to WireGuard; the latter uses modern crypto and is faster.
Ready to protect every remote session? Forest VPN gives you secure, affordable access without the fuss. A small‑biz owner in Austin said, “I switched to Forest VPN last month, and our remote team now logs in faster than coffee brewing.” Try the free trial today and feel the difference. Your network deserves it. You’ll receive instant protection with every connection.
Let’s keep your network humming—give Forest VPN a spin and let the Dream Machine Pro do the heavy lifting.