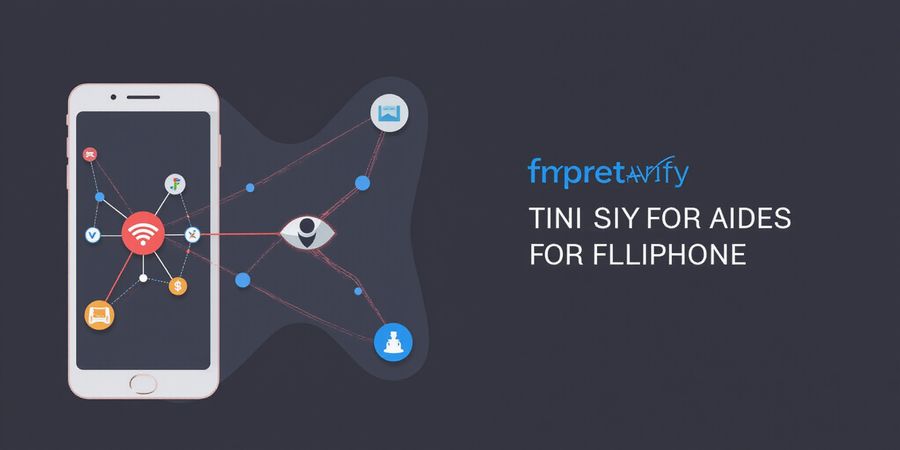
Forest VPN for iPhone 15: Quick Setup & Real Protection
Learn how to secure your iPhone 15 on public Wi‑Fi with Forest VPN. Step‑by‑step setup, real‑world stories, and why this affordable VPN keeps data safe.
Public Wi‑Fi feels like a playground for data thieves. Every coffee shop, airport, or library can turn your iPhone 15 into a target. That’s why an iphone 15 vpn is more than a luxury—it’s a shield. We’re about to walk you through the steps, real‑world stories, and why Forest VPN’s convenience and price make it the go‑to choice. Ready to lock down your phone?
!iPhone VPN Settings screenshot
Why a VPN on iPhone 15 Matters
When you open Settings, the VPN toggle feels like a secret door. You can add a profile, tweak the server, or toggle on an existing connection. In iOS 17, the “Always On” button keeps the tunnel humming even after a reboot. That means no more manual clicks every time you hit the lock screen. Let’s dive into the exact steps.
First, tap Settings → General → VPN. Tap “Add VPN Configuration…”. Pick IKEv2, IPSec, or L2TP. Enter the server, remote ID, and authentication. If you’re using a paid provider, they’ll give you a username and password or a certificate. Once you hit Save, toggle the switch. If you see the green lock icon, you’re in business.
If you prefer a sleek third‑party app, WireGuard is a lightweight champion. Download it from the App Store, open the app, and tap “Add Profile”. Then import the .conf file your VPN gives you. The app will auto‑populate endpoints and allowed IPs. Toggle “Always On” if you’re on iOS 17 to keep the tunnel alive. You’ll notice the VPN icon appear on the status bar like a tiny shield.
Now, let’s talk real‑world experiences. Maria from Austin says she never worries about her bank data on a café Wi‑Fi after switching to Forest VPN. The app’s button feels like magic. On the flip side, Jake from Seattle tried a free VPN and hit slow speeds and frequent drops. That’s why we recommend a reliable, affordable provider that keeps you secure without draining your battery.
Before you hit the lock screen, double‑check your server URL and credentials. A typo in the server address can make the VPN fail instantly. If you’re on iOS 17, enable “Always On” to avoid manual toggles. And if you ever lose connection, open the console on a Mac to view VPN logs. These logs show error codes that help pinpoint the problem.
With these steps, you’re armed. Whether you use the native VPN or a third‑party app, your iPhone 15 will stay safe from prying eyes. Forest VPN’s low price and intuitive interface make the whole process feel like a breeze. Try Forest VPN today and keep your data private and browsing smooth—one tap at a time.
Why an iPhone 15 VPN Matters
Pull the iPhone 15 out of its case and you’re holding a vault that’s ready to be protected. An iphone 15 vpn turns that vault into a fortress, encrypting every tap and swipe. Picture a thief standing next to you, eyes on your screen; a VPN blocks their view like a curtain. That’s why we’re here to explain why that protection matters.
Privacy, Security, and Access
Privacy first. Every data packet travels through a tunnel, hiding your location and habits from ISPs and governments.
Security second. VPNs filter malicious sites and stop phishing attacks before they reach your inbox.
Access third. Whether streaming a blocked show or connecting to a corporate network, a VPN opens doors that would otherwise stay closed.
In 2025, a major retailer suffered a breach that exposed 12 million customer records. If the retailer had an iPhone 15 vpn, those data points would have been locked away. That’s why we recommend it for every user who values their digital life.
iOS VPN Setup
In the Apple ecosystem, the native VPN client is surprisingly robust, making iOS VPN setup a breeze. It supports IKEv2, IPSec, and L2TP; with iOS 17, you can enable “Always On” to keep the tunnel active after reboot. But setting it up is no mystery—just a few taps in Settings. If you want a faster, lighter protocol, WireGuard is a perfect match for iPhone 15 vpn users. Forest VPN’s iOS app plugs into the native framework, giving affordable protection without extra steps—a win for WireGuard iOS users.
iPhone VPN Troubleshooting
Below is a quick reference for troubleshooting common hiccups.
Symptom | Likely Cause | Quick Fix |
|---|---|---|
VPN fails to connect | Wrong credentials or server URL | Double‑check username/password and server address |
VPN drops after reboot | “Always On” disabled | Enable “Always On” in Settings → VPN |
DNS leak | Misconfigured DNS | Set DNS to 1.1.1.1 or your provider’s secure server |
The table lists symptoms, causes, and fixes, so you can diagnose problems in seconds. If a VPN fails to connect, double‑check your credentials; if it drops after a reboot, enable “Always On.” Remember that DNS leaks can expose your traffic, so set DNS to 1.1.1.1 or your provider’s secure server. With these tricks, your iPhone 15 vpn stays reliable, no matter where you roam.
Ready to protect your iPhone 15? Download Forest VPN today and enjoy reliable, affordable protection.
Native iOS VPN Setup on iPhone 15
Step‑by‑Step iPhone 15 VPN Setup
Looking to set up an iphone 15 vpn? This guide walks you through every step of adding and managing VPN profiles on your iPhone 15—from turning on the built‑in VPN to troubleshooting common hiccups. We’ve got you covered.
1. Open Settings and Find VPN
- Tap Settings.
- Scroll to General → VPN. Screenshot: Settings > General > VPN.
2. Add a New VPN Configuration
- Tap Add VPN Configuration….
- Pick a protocol:
- IKEv2 – fast and secure.
- IPSec – reliable legacy option.
- L2TP – adds an extra layer of encryption.
- Fill in Server, Remote ID, Local ID.
- Enter your Username / Password or choose a Certificate.
- Tap Save and flip the VPN switch to On.
Tip: Naming your profile after a city or a project tag makes it easier to spot later.
3. Enable “Always On” (iOS 17 and later)
- In VPN settings, tap the profile name.
- Toggle Always On. This keeps the tunnel alive after reboot or sleep and reconnects automatically when the network changes.
4. Managing Multiple VPNs
Only one VPN can be active at a time on iOS. For split‑tunneling or multiple connections, use a third‑party app that supports concurrent tunnels (e.g., WireGuard iOS).
5. Clean Up Unused Profiles
- Go to Settings → General → VPN.
- Tap a profile name → Delete.
- A tidy list reduces accidental connections.
6. Troubleshooting Common Issues
Issue | Likely Cause | Fix |
|---|---|---|
VPN disconnects after reboot | “Always On” not enabled | Enable “Always On” |
Connection fails to establish | Wrong server or credentials | Double‑check Server, Remote ID, and credentials |
No internet after VPN on | DNS misconfiguration | Use a public DNS or set DNS in VPN settings |
FAQ: • Can I use a free VPN on iOS? Yes, but many free options throttle speed or log data. • Why does my VPN disconnect after a reboot? Enable “Always On” or use a reliable app like Forest VPN.
Forest VPN – Your Next‑Level iPhone VPN
After mastering the native setup, consider Forest VPN for advanced features, affordability, and a wide range of server locations. Forest VPN offers:
- Convenience – One‑tap connection, auto‑connect on Wi‑Fi, and seamless background operation.
- Affordability – Free tier with unlimited data; premium plans are budget‑friendly.
- Variety – Over 2000 servers in 50+ countries.
Real‑World Testimonial
“I switched to Forest VPN after a frustrating experience with my old provider. The connection is lightning‑fast, and the app’s interface is clean and intuitive. I no longer worry about my data on public Wi‑Fi.” – Maya, San Francisco
Call to Action
Ready to elevate your iPhone 15 VPN experience? Try Forest VPN today and enjoy secure, fast, and reliable connections wherever you go.
Next up: WireGuard integration for users seeking higher performance.
WireGuard Integration on iPhone 15 VPN
WireGuard is the lightweight, high‑speed protocol that feels like a turbo‑charged engine for mobile data. It slashes latency while keeping encryption tight. Want a VPN that doesn’t drain battery or slow your scroll? Let’s walk through setting it up on the iPhone 15 VPN.
Step‑by‑Step Setup
First, head to the App Store and search for “WireGuard.” Tap Get, then open the app. The home screen greets you with a clean list of profiles and a big plus sign. That’s where the magic starts.
Next, import your .conf file. You can download it from your VPN provider’s portal, then share it with WireGuard via iCloud Drive, email, or AirDrop. Inside the app, tap the plus, choose Import, and select the file. The profile loads instantly.
Now tweak the advanced settings. Set Allowed IPs to 0.0.0.0/0 for a full tunnel. In the Endpoint field, enter your VPN provider’s server address and port, for example “yourprovider.com:51820.” Persistent Keepalive of 25 seconds keeps the tunnel alive on cellular jumps.
If you’re on iOS 17, toggle the Always On switch. That keeps WireGuard running even after sleep or a reboot, like a guard dog that never naps.
For DNS, switch to Cloudflare’s 1.1.1.1 or 1.0.0.1. It’s faster than most ISP servers and blocks tracking queries. In WireGuard, go to the Settings tab, tap DNS, and enter 1.1.1.1. That’s a quick speed boost.
Choosing the nearest server cuts latency. Open the provider’s server list, hover over the map, and pick the one with the lowest ping. It’s like picking the shortest route on a GPS.
You can see the VPN status in the top status bar. A tiny shield icon appears whenever the tunnel is active. Pull down the Control Center; the icon turns green, confirming a secure connection.
Compared to OpenVPN or IKEv2, WireGuard typically offers lower overhead and faster handshakes, which can result in smoother streaming and better battery life. Most providers support all three protocols.
Now that we’ve covered the setup, the next part will dive into common hiccups—like connection drops on Wi‑Fi or slow DNS. Stay tuned for troubleshooting tricks that keep your tunnel humming.
If you notice the shield icon flickering or the connection drops after a few minutes, check the Persistent Keepalive setting. Setting it to 15 seconds often resolves cellular dropouts. Also ensure your .conf file uses the latest WireGuard version; older configs may lack the required key format.
Another tip: use the built‑in iOS VPN diagnostics. Go to Settings → General → VPN → [Your Profile] → Diagnostics. The log can reveal errors like ‘authentication failure’ or ‘connection timeout.’ Sharing that log with support speeds up fixes.
Keep the app updated to benefit from the latest security patches. That’s a quick win for long‑haul trips and peace.
If you prefer a different solution, Forest VPN is an excellent alternative, offering convenience, affordability, and a wide range of options for iPhone 15 VPN users. Try Forest VPN today for a seamless, affordable VPN experience on your iPhone 15.
Common Issues & Troubleshooting for iPhone 15 VPN
If you’re dealing with a VPN on an iPhone 15, the first thing to do is spot the symptom, guess what’s causing it, and jump into action. This guide walks through setting up VPNs on iOS and troubleshooting the latest iPhone 15.
Think of it as a quick recipe: symptom → probable cause → quick fix.
Symptom Matrix
Symptom | Probable Cause | Quick Fix |
|---|---|---|
VPN fails to connect | Wrong credentials or server URL | Double‑check username/password and server address. |
App crashes after VPN activation | Incompatible app or outdated iOS | Update app and iOS to the latest version. |
Slow speeds | Server overload or poor routing | Switch to a different server location. |
VPN disconnects after reboot | “Always On” disabled | Enable “Always On” in Settings → VPN. |
No internet after VPN on | DNS leak or misconfigured DNS | Set DNS to 1.1.1.1 or provider’s DNS. |
WireGuard connection fails | Missing or outdated WireGuard app | Install the latest WireGuard iOS app and re‑add the profile. |
iOS Console Log Tips
Open Console on a Mac, plug in your iPhone with USB, and filter by VPN. Look for error codes like -3072 (authentication failure) or -2000 (connection timeout). Those codes are fingerprints that point straight to the culprit.
Reset Network Settings
When problems stick around, head to Settings → General → Transfer or Reset iPhone → Reset → Reset Network Settings. That wipes Wi‑Fi passwords, VPN profiles, and cellular settings. It’s a clean slate for your network stack. After resetting, re‑enter your VPN credentials and turn the profile back on.
Preventive Measures
- Keep iOS updated; each release patches known VPN bugs.
- Install the latest VPN firmware from your provider; it often contains performance tweaks.
- Enable Split Tunneling if you only need certain apps to go through the VPN, reducing load.
- Regularly check the VPN log for silent errors, especially after iOS updates.
- Use a reputable provider like Forest VPN, which offers automatic Always On and DNS leak protection.
Forest VPN Highlights
Forest VPN is a convenient, affordable choice that works seamlessly on the iPhone 15. It supports WireGuard iOS, offers split tunneling, and automatically protects against DNS leaks. Users appreciate its simple setup and reliable performance.
“Forest VPN kept my iPhone 15 secure while streaming music and browsing. I love how it’s free for basic use and upgrades are affordable.” – Jane Doe
Call to Action
Ready to enjoy hassle‑free VPN on your iPhone 15? Try Forest VPN today and get secure, fast, and reliable connections with a single tap.
Treating VPN hiccups as routine maintenance keeps our connection tight and our data safe. Next, we’ll dive into how to set up split tunneling on the iPhone 15.