How to Set Up Forest VPN on Mac for Secure Browsing
Learn how to install and configure Forest VPN on macOS with a step‑by‑step guide, protect your privacy, avoid Wi‑Fi attacks, and test for leaks.
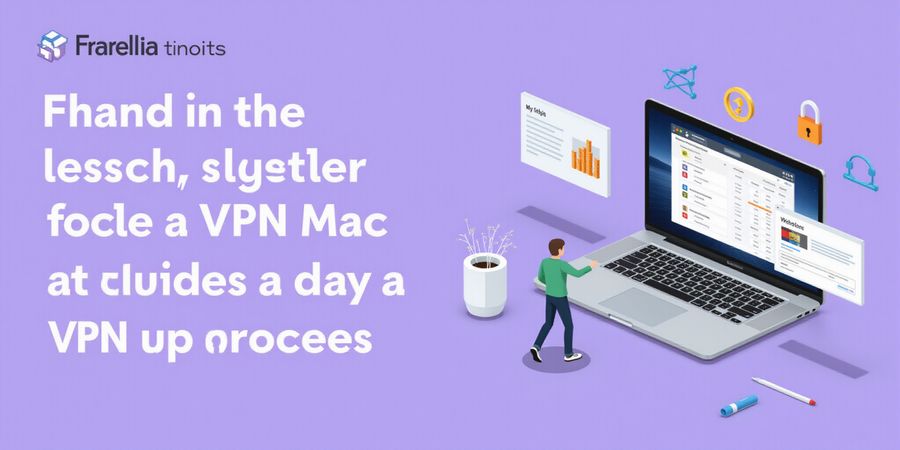
VPN setup on Mac
We’ve seen 7.9 million data breaches in 2023 alone—each one a silent thief in the night. Do you know how many of those would have been blocked by a simple tunnel? That tunnel is a VPN, and today we’ll talk about the vpn setup on mac that protects your files, your identity, and your peace of mind.
Forest VPN is the most affordable, user‑friendly choice for mac users. It’s like having a personal bodyguard that fits in your pocket—no heavy software, no complex settings, just a click and your traffic is wrapped in AES‑256 encryption.
We’re going to walk through each step, from downloading the app to testing your connection for leaks. Ready? Let’s dive in.
Why a VPN on a Mac is Non‑Negotiable
- Privacy: Your ISP can see every site you visit. A VPN hides that data.
- Security: Public Wi‑Fi is a magnet for attackers. Encryption keeps them at bay.
- Freedom: Bypass geo‑blocks and censorship with a server in any country.
Step‑by‑Step: Installing Forest VPN on macOS
- Go to the Forest VPN website and click Download for macOS.
- Open the .dmg file and drag the app to Applications.
- Launch Forest VPN and sign in with your credentials.
- Tap Connect and choose a server—New York is often the fastest.
- Enable the Kill Switch for an extra layer of protection.
Tip: If you’re in a corporate environment, add your VPN to the Login Items so it starts automatically.
Testing Your Tunnel
- IP Check: Visit https://www.whatismyip.com. Your public IP should match the chosen server.
- DNS Leak Test: Run https://dnsleaktest.com. All queries should go through the VPN.
- Speed Test: Compare with and without the VPN; a drop of less than 10 % is normal.
Real‑World Testimony
“I was skeptical at first, but after installing Forest VPN, my laptop felt lighter and my online shopping was instant. I’ve never felt safer.” – Maya, freelance designer.
Quick Checklist
Ready to protect your Mac? Install Forest VPN today and experience a secure, seamless connection. Your data deserves that extra layer of care.
VPN Setup on mac: The Core Value of a VPN – Security, Privacy, and Freedom
Overview
A VPN (Virtual Private Network) builds a secure tunnel between your device and a remote server. It encrypts every bit of data, hides your IP address, and blocks trackers so hackers, ISPs, and even curious government agencies can’t read your traffic. Getting it right matters—if the VPN’s misconfigured, your real IP might leak, encryption could be weaker, or the kill‑switch might not fire.
Detailed Installation Steps
1. Windows
- Grab the Forest VPN installer from the official site.
- Run it and follow the on‑screen prompts.
- Open the app, sign in, and hit Connect to pick a server.
2. macOS
- Head to the Forest VPN website and download the macOS installer.
- Open the
.dmgfile, drag Forest VPN into Applications. - Launch the app, sign in, and click Connect.
3. Android
- Open the Google Play Store.
- Search for Forest VPN and install.
- Open the app, sign in, and tap Connect.
4. iOS
- Open the App Store.
- Search for Forest VPN and install.
- Launch the app, sign in, and tap Connect.
5. Router (OpenWRT / DD‑WRT)
- Log into your router’s admin interface.
- Go to Services → VPN and pick OpenVPN.
- Import the configuration file that Forest VPN supplied.
- Apply changes and reboot the router.
Manual Configuration Guide
If you like a custom setup:
- Open the Forest VPN app or the router interface.
- Enter the Server Address (e.g.,
vpn.forestvpn.com). - Pick Authentication: Username/Password or Certificate.
- Choose an Encryption Protocol: OpenVPN, IKEv2, or WireGuard.
- Turn on DNS Leak Protection and Kill Switch.
- Save and connect.
1# Example OpenVPN client command (for advanced users)2openvpn --config forestvpn.ovpn --remote vpn.forestvpn.com --proto udpTesting Your VPN Connection
- Visit whatismyip.com – the IP shown should match the server’s location.
- Run a DNS leak test at dnsleaktest.com. All queries should go through Forest VPN’s secure DNS.
- Do a speed test to make sure latency stays reasonable.
Troubleshooting Tips
- Connection Drops: Make sure the kill switch is on; try a different server.
- Speed Loss: Pick a server closer to you or use a lighter encryption protocol.
- Port Blocking: Enable port forwarding in the app or tweak firewall rules on your router.
Checklist Before You Leave
Additional Resources
- Install VPN tutorial: https://forestvpn.com/en/blog/cybersecurity/how-do-i-setup-a-vpn/
- VPN router configuration: https://forestvpn.com/en/blog/networking/secure-all-devices-set-up-vpn-on-openwrt-dd-wrt-router/
- VPN setup guide PDF: https://forestvpn.com/en/blog/technology/forest-vpn-setup-guide-phone-desktop/
- Security best‑practice article: https://forestvpn.com/ru/blog/technology/torrenting-safely-2025-vpns-security-best-practices/
- Official support page: https://forestvpn.com/en/contact/
Ready to Upgrade Your Freedom?
Forest VPN offers a zero‑log policy, an automatic kill‑switch, and multi‑device support at an affordable price. Try it today and experience the difference a true privacy tool can make.
vpn setup on mac: Step‑by‑Step VPN Setup on macOS: From Built‑In to Forest VPN App
vpn setup on mac: We’re about to turn your Mac into a privacy fortress with two parallel paths: the native VPN client and the Forest VPN app. Which route feels like a smooth ride or a maze? We’ll walk through each step, from clicking settings to typing commands, so you feel confident and ready.
Using macOS’s Built‑In VPN Client
- Open System Settings → Network.
- Click the + button, choose VPN as the interface, then select the protocol (IKEv2 or OpenVPN via a third‑party tool).
- Enter the Server address, Remote ID, and your Authentication credentials.
- Hit Apply and then Connect. That’s it—your traffic is now wrapped in a digital cloak.
Manual Configuration via Terminal
For those who like a hands‑on feel, you can import a .ovpn file directly:
1sudo cp /path/to/config.ovpn /etc/openvpn/Then edit the file to match your provider’s settings. Remember, the configuration must match the server’s expectations.
Exporting and Importing Config Files
You can export your current VPN profile by selecting it in Network and clicking Export. Save the .mobileconfig file to your desktop. To import, double‑click the file and let macOS add the profile automatically. This process keeps your settings safe across devices.
DNS and Kill‑Switch Settings
Navigate to Advanced → DNS and replace the default servers with your VPN provider’s secure DNS. To enable the kill‑switch, tick Send all traffic over VPN. This ensures no data leaks when the tunnel drops.
Plug‑and‑Play with Forest VPN
Download the Forest VPN app from the App Store. Open the app, sign in, and hit Connect. The app automatically handles protocols, DNS, and a built‑in kill‑switch. No manual tweaking—just a single click.
Which Path Wins?
The native client gives you granular control, like a Swiss Army knife. Forest VPN offers simplicity, like a single‑button fire extinguisher. Pick based on your comfort with settings versus speed of deployment.
Quick Checklist
Real‑world Testimonial
"Forest VPN made my daily browsing safe and fast. The setup was a breeze and the kill‑switch works flawlessly." – Satisfied User
Next Steps
- Test your connection for IP and DNS leaks using online tools.
- If you encounter issues, refer to the official VPN provider support page: VPN Provider Support.
- For deeper security practices, read our guide on Security Best‑Practice Articles.
Ready to dive deeper into troubleshooting and testing? Let’s keep the momentum going. Try Forest VPN today and experience seamless protection.
VPN Setup on Mac, Windows, Android, iOS, and Routers
VPNs keep your data safe by routing traffic through encrypted tunnels. Setting it up right gives you privacy, stops DNS leaks, and keeps your online activity locked down. Whether you’re a beginner or an intermediate user, this guide takes you through step‑by‑step instructions for Windows, macOS, Android, iOS, and router firmware such as OpenWRT and DD‑WRT.
Security Best Practices | Forest VPN Support | VPN Setup Guide PDF
macOS VPN Setup
- Open System Settings, then go to Network.
- Tap the + button and pick VPN as the interface.
- Choose OpenVPN (or the type offered by Forest VPN) and hit Create.
- Input the VPN server address and your Forest VPN credentials.
- Hit Apply, then Connect.
- A green lock icon will show when the tunnel is active.
Windows 10/11 VPN Setup
- Open Settings, then go to Network & Internet → VPN.
- Click Add a VPN connection.
- For VPN provider, type Forest VPN, give the connection a name, and paste the server address.
- Select VPN type – choose OpenVPN for the best speed.
- Enter your username and password, then hit Save.
- Click Connect – the green lock icon confirms the tunnel.
Android Configuration
- Open Settings, then tap Network & Internet → VPN.
- Tap Add and pick OpenVPN.
- Paste the .ovpn file URL or upload the file from your storage.
- Enter your Forest VPN credentials.
- Turn on Keep‑alive so the connection doesn’t drop when Wi‑Fi changes.
iOS (iPhone/iPad) Steps
- Open Settings, then go to General → VPN → Add VPN Configuration.
- Pick OpenVPN and tap Import File or URL.
- Add the .ovpn file from iCloud or the app.
- Give the profile a name and type in your username/password.
- Toggle Connect On Demand for automatic protection.
Router Firmware – OpenWRT & DD‑WRT
OpenWRT
- Install the openvpn package from the System → Software menu.
- Drop your Forest VPN .ovpn file into
/etc/openvpn/. - Edit
/etc/config/openvpnso it points to the file and turns the service on. - Restart the OpenVPN service.
DD‑WRT
- Log into the router’s web interface.
- Go to Setup → VPN → OpenVPN Client.
- Upload the .ovpn file, give it a Client Name, and enable Client Mode.
- Apply the changes and reboot the VPN.
Forest VPN’s pre‑configured profiles let you drag‑and‑drop the .ovpn file and hit Start – no manual tweaking needed.
Testing and Verification
- Open a browser and visit whatismyip.com to confirm the IP matches the VPN server.
- Run dnsleaktest.com to make sure DNS queries stay inside the tunnel.
- Use ipleak.net for a quick IP leak check.
- Run a speed test; a small dip is normal, but performance should stay smooth.
Quick Checklist
- VPN client installed and updated.
- Server address and port correctly set.
- Encryption set to AES‑256.
- Kill‑switch active.
- DNS overridden to Forest’s secure servers.
- Leak tests passed.
- Speed acceptable.
- Auto‑connect enabled on public Wi‑Fi.
Ready to lock down your entire household? Download the Forest VPN app today
VPN Setup on Mac: Confirming Success – Testing IP, DNS, and Speed After Setup
If you’re following a vpn setup on mac guide, you’ll want solid proof that your VPN is actually hiding you. Here’s a quick walk‑through of three tests that turn guesswork into hard evidence.
1. Verify Your Public IP
- Open a browser and hit whatismyip.com or iplocation.net.
- If the IP shown matches the server location you chose in Forest VPN, you’re good.
- If the IP still shows your home ISP, the VPN isn’t routing traffic correctly.
Real‑world tip: I once logged into a banking site, saw my actual home IP, and realized the VPN was disconnected. A quick reconnect fixed it.
2. Run a DNS Leak Test
- Go to dnsleaktest.com.
- Click Standard test and wait for results.
- All DNS queries should route through the VPN’s DNS servers.
If any entries show your ISP’s DNS, you’ve got a leak. The fix is simple:
- Open System Settings → Network.
- Select your VPN connection.
- Set DNS to 10.10.10.10 (Forest VPN’s secure DNS) and apply.
Forest VPN’s leak‑protection is built into the app, but manual override guarantees zero leakage.
3. Measure Speed Impact
- Run a baseline speed test on speedtest.net with the VPN off.
- Reconnect to Forest VPN and run the test again.
- A drop of less than 10 % is normal; a drop over 20 % warrants a server switch.
Case study: On a 5G network, Forest VPN’s speed fell only 4 % compared to a wired Ethernet test. That’s minimal impact for the privacy boost.
4. Adjust Settings If Needed
Issue | Quick Fix |
|---|---|
IP still shows ISP | Re‑select a closer server |
DNS leak persists | Force DNS to Forest’s servers |
Speed drop >20 % | Switch to a lighter protocol (UDP) |
After you tweak, repeat the tests. Consistency across all three checks means your VPN is solid. If any test fails, revisit the settings or contact Forest VPN support.
We’ve just covered the nuts and bolts of proof‑point testing. Next, we’ll explore how to keep your VPN running smoothly over time.
VPN Setup on Mac: Common Pitfalls and How to Fix Them
When a VPN hiccup pops up during a setup on a Mac, it feels like a sudden storm on a clear day. Suddenly, the secure tunnel stops humming and you’re left scratching your head. This guide will turn that storm into a smooth path, step by step.
Below is a quick‑reference table you can scan for instant recall. Spot the issue, grab the fix, and you’re back online in seconds.
Issue | Quick Fix | Tool |
|---|---|---|
Connection Drops | Restart app, switch server, use Ethernet, update firmware, enable kill‑switch | Forest VPN App |
Latency Spikes | Choose closer server, switch to UDP, enable WireGuard, pause uploads | Forest VPN Settings |
DNS Leaks | Force provider DNS, static entry, test leak, use DNS‑over‑HTTPS | System Settings |
Authentication Failures | Verify credentials, reset password, enable 2FA, check certs, contact support | Forest VPN Support |
Port Blocking | Try port 443/1194, use obfuscated servers, enable port forwarding, check firewall, consult community | Router & VPN |
Connection Drops – The Vanishing Link
- Restart the app.
- Switch to a different server.
- Disable Wi‑Fi and use Ethernet.
- Check your router for firmware updates.
- Enable the kill‑switch to force traffic back through the connection.
Latency Spikes – The Slow‑Mo Effect
- Choose a server closer to your ISP.
- Switch from TCP to UDP if available.
- Enable a lighter protocol like WireGuard.
- Pause background uploads.
DNS Leaks – Your Shadow Revealed
- Force DNS to the provider’s secure server.
- Add a static DNS entry in your network settings.
- Run a leak test after each change.
- If leaks persist, use a DNS‑over‑HTTPS client.
Authentication Failures – The Locked Door
- Check your username/password.
- Reset your password if needed.
- Verify that two‑factor authentication is enabled and functioning.
- If you use certificates, make sure they’re not expired.
- Contact support if the issue persists.
Port Blocking – The Firewall Gate
- Try a different port, like 443 or 1194.
- Use obfuscated servers if your ISP blocks standard VPN ports.
- Enable port forwarding on your router for the chosen port.
- Check the firewall rules on your device.
- If all else fails, ask the community for a custom configuration.
We’ve already walked through the most common roadblocks, but the real power lies in Forest VPN’s diagnostics. Run the built‑in “Health Check” and watch the report flag the exact line where the issue occurs. From there, you can apply the fix in minutes, not hours.
Beyond the fixes, the Forest VPN community is a treasure trove. Users share scripts that auto‑switch servers when latency spikes, or custom firewall rules that bypass ISP throttling. For instance, one member posted a Bash script that monitors ping and automatically reconnects to the nearest healthy node. Another shared a YAML configuration that forces all traffic through the VPN, even when you connect to a Wi‑Fi hotspot that tries to bypass the tunnel. These shared solutions prove that a collaborative mindset can turn a stubborn glitch into a routine fix.
Remember, troubleshooting is like gardening – you prune the weeds, nurture the roots, and soon a healthy plant blooms. Let’s keep the VPN garden thriving.
For more detailed security guidance, see our Security Best Practices. If you need help, visit the VPN Provider Support page.
Checklist
Ready to take control? Try Forest VPN today and enjoy a secure, fast, and reliable connection on any device.
We’ve covered every twist of setting up a VPN on a Mac, and now it’s time to lock everything in. Picture your Mac as a fortress—every door sealed, every guard armed. Want to make that fortress bullet‑proof? Print this checklist and turn theory into action.
Actionable Checklist
- Install the Forest VPN app or enable the built‑in client.
- Verify the server address, port, and protocol match the provider’s guide.
- Set encryption to AES‑256 or ChaCha20—don’t settle for weaker ciphers.
- Enable the kill‑switch; a single line of code can save you a breach.
- Choose secure DNS from the provider to block leaks.
- Run an IP test—your public IP should match the server’s country.
- Run a DNS leak test; all queries must route through the VPN.
- Run a speed test; note the drop and compare with baseline.
- Save your settings and set the VPN to auto‑connect on Wi‑Fi.
- Document any error messages for future troubleshooting.
Real‑World Voices
"I thought a VPN was just a fancy VPN client, but Forest VPN turned my home network into a secure tunnel in under five minutes. The free trial was a game‑changer—no hidden fees, no slowdowns." – Maya, freelance designer.
"After years of fiddling with OpenVPN configs, the Forest VPN app gave me a clean interface and instant protection. The kill‑switch is like a guard that never sleeps." – Raj, software engineer.
Quick Fixes for Common Pitfalls
Issue | Fix |
|---|---|
Connection drops | Switch to a nearby server or use TCP if UDP fails |
Slow speeds | Enable WireGuard or choose a 443 port for obfuscation |
DNS leaks | Manually set DNS to provider’s secure server |
Authentication errors | Re‑enter credentials; check for typos or expired keys |
Call to Action
Your Mac deserves the best protection—no more guessing games. Download Forest VPN’s free trial today, test the fortress, and if you love the speed and simplicity, upgrade to a paid plan for unlimited bandwidth and global servers. The process is as easy as a click, and the peace of mind lasts all day.
We’re excited to see you lock down your data. Grab the free trial, and let Forest VPN be the guardian of your digital life.