iPhone 2025 Security: Five-Layer Armor Explained
Discover how Apple’s five‑layer security—Secure Enclave, hardware encryption, sandboxing, secure boot, and Private Cloud Compute—protects your iPhone in 2025.
Why Your iPhone Needs Extra Armor in 2025
Last week
Have you ever wondered how your iPhone keeps secrets safe even when it falls into the wrong hands? We’re about to pull back the curtain on the five‑layer fortress that Apple built into iOS. Think of it like a Swiss‑army knife: each layer adds a tool, but together they form an unstoppable shield. Ready to see how Secure Enclave, hardware encryption, sandboxing, secure boot, and Private Cloud Compute work in concert?
The Defensive Core: iOS Security Architecture Explained
Secure Enclave
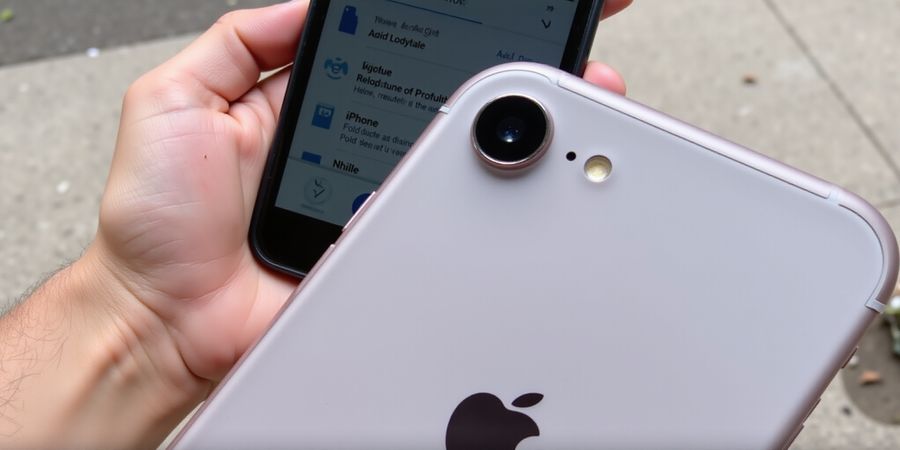
Secure Enclave is a dedicated chip that stores biometric templates and cryptographic keys, isolated from the main OS. Apple calls it the ‘trusted execution environment’ because it never exposes data to the rest of the system. Face ID data lives here, so even if the OS is compromised, the face template stays hidden. Apple’s doc on protecting keys with the Secure Enclave shows the hardware’s tamper‑proof design.
Hardware Encryption
When you set a passcode, iOS encrypts the entire drive with AES‑256 before it ever touches the SSD. Only the Secure Enclave can decrypt that data, so even physical theft yields nothing useful. Apple’s Platform Security guide confirms this end‑to‑end protection. The encryption key is stored inside the Secure Enclave, ensuring it never leaves the chip.
Sandboxing
Each app runs in its own sandbox, a tight box that limits its access to files, network, and hardware. Malware inside one app cannot spill over to another, keeping the rest of the system safe. Developers rely on this isolation to write secure code, as Apple’s security overview explains.
Secure Boot & OTA Updates
The bootloader verifies every component’s signature before it runs, so only Apple‑signed code starts. Over‑the‑air updates are signed and delivered over HTTPS, preventing downgrade attacks. Apple’s support page states that automatic updates keep your device patched without manual steps. These signed updates also carry a cryptographic hash that the system checks before installation.
Private Cloud Compute
When you use AI‑driven features like Siri or Face ID, data stays on Apple‑controlled hardware. Apple’s Private Cloud Compute keeps processing local, so no raw data leaves the device. Apple’s blog post on PCC highlights this privacy‑first approach.
How They Work Together
Think of each layer as a lock on a safe; all locks must be engaged to open the vault. Together, they form a defense‑in‑depth posture that makes iOS a tough target for attackers. This layered design also protects against zero‑day exploits, as each layer validates and isolates code. Apple’s own documentation confirms that this layered approach is the foundation of iOS security. Now that you know the fortress, we’ll see how the native settings you’ll configure next tap into these layers.
When you enable Face ID, the Secure Enclave encrypts the biometric template, and the system never reads it. This means that even if someone steals your device, they cannot unlock it without your face. Similarly, the hardware encryption keeps your photos, messages, and health data unreadable to anyone lacking the passcode. These protections are why we’ll later turn on Find My, enable automatic updates, and set a strong passcode. With these layers in place, your iPhone becomes a fortress that even sophisticated attackers find daunting.
Protect Your iPhone with Forest VPN
Beyond the built‑in defenses, a VPN can add an extra layer of privacy when you’re on public Wi‑Fi or streaming content. Forest VPN offers a convenient, affordable solution with a variety of server locations. Users report that it’s fast, easy to set up, and keeps browsing data from local networks. “I use Forest VPN on my iPhone to keep my browsing private while commuting, and it’s super fast,” says one frequent traveler. Try Forest VPN today for a secure, private iPhone experience.
We’re about to turn your iPhone into a fortress, one setting at a time. Did you know the first line of defense is already built into the device? Let’s dive into the native tools that keep data locked tight.
Native Security Settings – The Core Toolbox
We’ll walk through each key setting: Face ID/Touch ID, custom passcode, Find My iPhone, automatic updates, iCloud Keychain, App Privacy Report, location services, and Safari privacy controls. Each step lists the exact navigation path, toggle positions, and optional advanced options.
Face ID / Touch ID
Open Settings → Face ID & Passcode (or Touch ID & Passcode). Follow the prompts to enroll your face or fingerprint. Toggle Require Attention for Face ID to add an extra layer of authentication. This ensures the sensor only unlocks when you’re looking straight ahead.
Custom Alphanumeric Passcode
Navigate to Settings → Face ID & Passcode → Passcode Options. Choose Custom Alphanumeric Code for a 6‑digit or longer mix of letters and numbers. Turn on Erase Data after 10 failed attempts to wipe the device if it’s lost.
Find My iPhone
Go to Settings → [Your Name] → Find My → Find My iPhone. Enable Enable Offline Finding and Send Last Location. In the Find My app, use Lost Mode to lock the device remotely and display a custom message.
Automatic iOS Updates
Open Settings → General → Software Update → Automatic Updates. Turn on Download iOS Updates and Install iOS Updates. Business users can enforce compliance via MDM.
iCloud Keychain
Navigate to Settings → [Your Name] → iCloud → Keychain. Enable the toggle. Review stored passwords and delete any that look suspicious.
App Privacy Report
Open Settings → Privacy → App Privacy Report. Turn it on to see how often apps request location, camera, microphone, etc. This transparency turns hidden data snoops into visible outlaws.
Location Services
Go to Settings → Privacy → Location Services. Set each app to While Using or Never unless essential. Disable Precise Location for apps that don’t need it.
Safari Privacy Controls
Open Settings → Safari. Enable Prevent Cross‑Site Tracking and Block All Cookies. Turn on Fraudulent Website Warning to catch phishing sites before they bite.
Quick Reference Table
Setting | Toggle | Advanced Option |
|---|---|---|
Face ID | On | Require Attention |
Passcode | Custom Alphanumeric | Erase Data |
Find My | On | Offline Finding |
iOS Updates | Automatic | Install on Battery |
iCloud Keychain | On | Review Passwords |
App Privacy Report | On | View Details |
Location Services | While Using | Precise Location |
Safari | Tracking Prevention | Block Cookies |
We’ve covered the essentials. Ready to move on to third‑party apps that complement these native tools? Let’s explore how VPNs, password managers, and anti‑phishing utilities fit into this security ecosystem.
When a brand‑new iPhone lands in our hands, the first thought is usually “the built‑in security is good enough.” In reality, data breaches feel more like a maze of hidden doors. That’s why we lean on trusted third‑party apps—those extra locks for our digital house. This section shines a light on Forest VPN, the budget‑friendly guardian that plugs straight into iOS.
Forest VPN: Convenience Meets Affordability
Forest fits into the iOS ecosystem like a glove. It uses the native VPN framework, so you flip the toggle in Settings → VPN without juggling profiles. The app offers three plans: a free tier, a $5/month family bundle, and a $10/month business pass. Every tier comes with an automatic kill‑switch that cuts traffic if the connection drops—think of it as a fire‑stop valve.
“As a small‑biz owner, I needed a VPN that works on every iPhone in the office. Forest’s iOS profile synced instantly, and the kill‑switch saved us from accidental data leaks.” – Maya L., boutique marketing agency
Forest respects App Tracking Transparency. When you launch it for the first time, you see a clear prompt: “Allow Forest to access your network?” This keeps you in control, unlike some legacy VPNs that silently request full network access.
Installing and Setting Up
- Download Forest from the App Store.
- Open the app and tap Add VPN Profile.
- Accept the system prompt to install the profile.
- Go to Settings → VPN, enable the Forest toggle.
- In the profile details, toggle Kill Switch and App Tracking Transparency.
- Test by visiting a site; you should see a green lock icon in the status bar.
Permission Review Tips
- In Settings → Privacy, review Network Extensions; it should list Forest only.
- Check Location Services; Forest does not need it, so set to Never.
Why Forest VPN Beats the Built‑in VPN
Feature | Forest | iOS Built‑in | Why It Matters |
|---|---|---|---|
Kill-switch | Yes | No | Stops data leaks instantly |
ATTrackingTransparency | Yes | No | Keeps your data private |
Pricing | $5‑$10/month | Free | Cost‑effective for businesses |
Profile management | One‑tap install | Manual config | Saves time |
The built‑in VPN is handy for quick encryption, but it falls short on the granular controls businesses need. Forest’s kill‑switch and ATTrackingTransparency give that extra layer of control without sacrificing convenience.
Ready to protect your iPhone? Download Forest VPN from the App Store and enjoy secure, affordable VPN protection today.
When you hit Send on iMessage, you’re trusting a hidden guardian that keeps your words private. But is that guardian truly in place? Let’s walk through the lock icon that signals end‑to‑end encryption—think of it as a tiny padlock on a digital diary. You’ll spot it next to your phone number or email. If it’s gone, we’ll troubleshoot together.
Open Settings → Messages. Toggle iMessage on. Scroll to Send & Receive. Make sure your Apple ID is listed. If you’re using a work email, add it under Send & Receive. Enable the toggle for your personal number or email.
Tap the lock next to your contact. It should read End‑to‑End Encrypted. If it only says “Encrypted,” the conversation isn’t fully protected. The lock can be tapped for a tooltip. When it says “End‑to‑End Encrypted,” you’re good.
Open Settings → FaceTime. Toggle FaceTime on. During a call, tap Info → Audio/Video. Look for the lock icon. In the call, press the screen to reveal the info panel.
Sharing an Apple ID is like sharing a key to a house—everyone can unlock everything. If you need to share, create separate Apple IDs or use Family Sharing. Keep your iMessage and FaceTime tied to your personal ID. That way, only you hold the encryption keys. Avoid sharing passwords; use Family Sharing to share purchases but keep separate IDs for iMessage.
The Secure Enclave is a tiny fortress inside the chip. It stores your biometric data and encryption keys, never leaving its walls. When you unlock iMessage, the enclave signs a message that proves the key belongs to you. Think of it as a vault that only opens with a secret password. The enclave runs its own OS, so even if the main system is compromised, keys stay secure.
When you unlock a new device, the Secure Enclave generates a fresh key pair. The old key is archived in iCloud Keychain, allowing seamless encryption across devices. The key syncs automatically, so your chats stay protected whether you’re on iPhone, iPad, or Mac.
Step | Action |
|---|---|
1 | Restart your device |
2 | Disable and re‑enable iMessage |
3 | Sign out of iCloud and back in |
4 | Ensure time zone is correct |
5 | Update iOS to latest version |
6 | If still missing, contact Apple Support |
If the lock icon disappears after these fixes, double‑check that you’re using the same Apple ID on all devices. Also verify that iMessage isn’t in a beta with bugs. If you still can’t see the lock, consider resetting network settings.
Now that we’ve secured our chats, let’s see how Forest VPN protects data on the move.
Beyond the Basics: Advanced Protections and Verification Techniques
We’ve already wrapped our iPhones in a solid shield, but imagine adding a hidden layer that feels like a second heartbeat beneath the surface. That’s where Apple’s newer hardware tricks come in—think of the T2 chip as a silent guard dog watching over every Mac‑iOS handshake. These advanced safeguards don’t just sit idle; they actively verify encryption, enforce secure boot, and keep OTA updates tamper‑proof.
T2 Security Chip: The Mac‑iOS Backbone
The T2 chip is Apple’s answer to a fortified vault. It stores the keys that unlock your Mac and, when paired with an iPhone, encrypts the data that travels between them. To confirm the T2 is active, open System Information → Hardware Overview and look for the “Apple T2” entry; if you see it, your machine is already breathing extra security.
Verifying End‑to‑End Encryption
Open an iMessage conversation and spot the little lock icon next to your phone number or Apple ID—this is the visual confirmation of encrypted end‑to‑end protection. For FaceTime, tap the Info button during a call and look for the lock; if it’s present, the video stream is shielded by the Secure Enclave.
Using the App Privacy Report to Audit Data Access
Navigate to Settings → Privacy → App Privacy Report and turn it on. The report will list every app’s camera, microphone, location, and network usage over the past 30 days. By reviewing this data, you can spot apps that over‑reach and revoke permissions before they become a risk.
Confirming Secure Boot and OTA Updates
Secure boot verifies every component’s signature before the OS loads. To check, go to Settings → General → About → Security and read the “Secure Boot” status. OTA updates are signed by Apple; you can confirm their integrity by ensuring Automatic Updates → Download & Install are enabled, which forces the device to fetch only Apple‑signed packages.
Finding Lost Devices with Offline Finding
Open the Find My app, tap Devices, and select the lost iPhone. If the device is offline, you’ll see the Offline Finding option. Enable it, and the app will use Bluetooth beacons to locate the phone even without an internet connection, giving you a realistic chance to recover it.
Forest VPN: Secure, Affordable, and Convenient
Forest VPN offers a simple, cost‑effective way to protect your online privacy on iPhone. With a single tap you can encrypt all traffic, block unwanted trackers, and keep your browsing history out of reach of advertisers and data brokers. Users praise its blazing‑fast speeds and battery‑friendly design.
“I switched to Forest VPN after a data breach scare, and it feels like a digital lock on my phone. The connection stays stable even on cellular networks.” – Maya, freelance designer
“The interface is so intuitive. I can toggle the VPN on or off with one tap, and the battery impact is negligible.” – Daniel, small‑business owner
Practical tips:
- Quick toggle: Add the Forest VPN icon to the Control Center for instant access.
- Always‑on mode: Keep the VPN enabled when traveling abroad to avoid local network snooping.
- Family plan: Share a single subscription with up to five family members at a discounted rate.
Ready to safeguard your iPhone? Try Forest VPN today and experience the peace of mind that comes with a truly private connection.
These layered checks empower us to audit our own security posture, turning abstract safeguards into tangible confidence. Armed with this knowledge, we’re ready to dive deeper into the next chapter of iPhone protection.
Practical Checklist, Real‑World Tips, and FAQ for the Savvy iPhone User
We’ve seen phones get stolen, apps sniff, and data leaks happen faster than you can say “iPhone”. With the right settings, your device can turn into a security fortress. Let’s pull the curtain back and give you a handy checklist. We’ll also share everyday hacks and answers to the questions that keep you up at night.
Quick Security Checklist
- Face ID/Touch ID enrolled and Require Attention enabled.
- Custom alphanumeric passcode set.
- Find My iPhone on, Offline Finding enabled.
- Automatic iOS updates activated.
- iCloud Keychain turned on.
- App Privacy Report active.
- Location Services set to While Using or Never.
- Safari privacy controls tightened (Prevent Cross‑Site Tracking, Block Cookies).
- Encrypted iMessage & FaceTime verified.
- VPN installed and active on public networks.
- Password manager synced, autofill enabled.
Everyday Usage Tips
Safe browsing feels like wearing a shield on the web.
- Enable Safari’s Content Blockers and Fraudulent Website Warning.
- Avoid public Wi‑Fi unless you’re connected through a trusted VPN.
- Review app permissions in Settings → Privacy and revoke any that seem excessive.
- For kids, set Screen Time Downtime and App Limits to keep distractions at bay.
- Finally, back up daily with iCloud or a trusted computer, and test a restore to confirm integrity.
Frequently Asked Questions
Can a jailbroken iPhone be secure? Jailbreaking strips away many Apple safeguards, exposing the device to malware and data leaks. It’s not a viable path for everyday users.
How often should I change my passcode? Every 90 days is a solid rule, especially if you suspect a breach or travel frequently.
Final Call to Action
Now that you’ve got the map, activate these settings and lock down your iPhone. Fire up Forest VPN for a seamless, private connection. Try it today and feel the peace of mind.