iPhone Built-In VPNs: Setup, Comparison & Forest VPN Review
Enable iPhone's built-in VPN, compare with top apps, and see why Forest VPN is the best for everyday privacy.
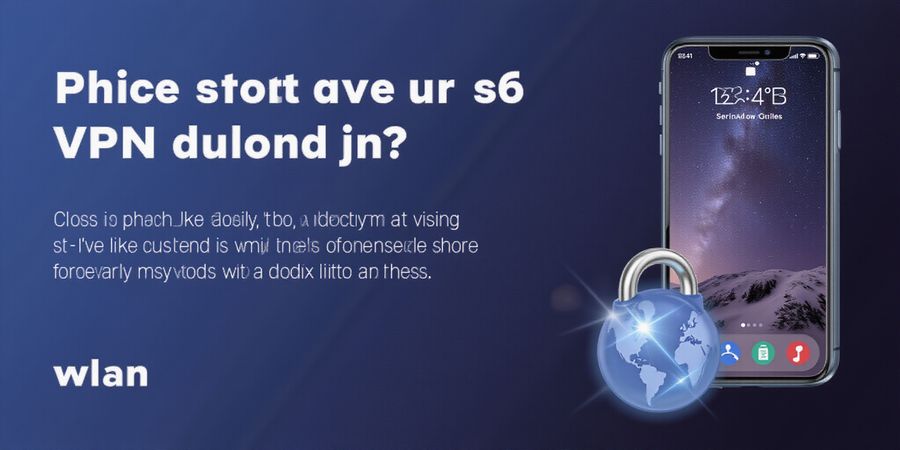
We’ve all heard the question: Do iPhones have VPN built in? The answer is a resounding yes, but getting a secure connection can feel like wandering through a foggy maze. Picture your phone as a castle, and a VPN as the moat that keeps intruders out. We’ll walk through the native setup, compare it to popular third‑party apps, and show why Forest VPN stands out for everyday users. Ready to turn your iPhone into a privacy fortress? Let’s dive in.
Do iPhones have VPN built in?
Apple’s iOS comes with a lightweight VPN client that supports IKEv2, IPSec, and L2TP. It’s a built‑in feature, not a hidden gem, and works seamlessly with any server that speaks these protocols. For beginners, the native client feels like a gentle hand‑shake; for power users, it offers granular control and “Always On” options.
Quick protocol rundown
Protocol | Encryption | Typical use | iOS support |
|---|---|---|---|
IKEv2 | AES‑256 | Fast, stable, roaming | ✅ |
IPSec | AES‑256 | Legacy, secure | ✅ |
L2TP/IPSec | AES‑256 | Older devices, fallback | ✅ |
Why IKEv2? It’s the most modern choice, reconnecting instantly when Wi‑Fi changes, like a phone‑case that snaps back into place.
Step‑by‑step native setup
- Collect credentials – server, remote ID, local ID, username/password, or cert.
- Open Settings → General → VPN.
- Tap Add VPN Configuration….
- Choose Type (IKEv2/… ), name it, enter server details, and set authentication.
- Toggle the profile ON; a VPN icon appears in the status bar.
- Verify by visiting https://ipleak.net – your IP should match the VPN server.
Third‑party apps: a quick taste
App | Key feature | How to connect |
|---|---|---|
Forest VPN | Affordable, no‑log, kill switch | Install, sign in, tap Connect; auto‑installs profile |
Forest VPN shines with its Always On toggle and a price that feels like a bargain. Users report “the VPN just works, no fuss” – a real‑world win for busy commuters.
Leak testing & troubleshooting
- DNS leak: run ipleak.net; ensure DNS servers match your VPN.
- IP leak: confirm the displayed IP equals the VPN’s public IP.
- App traffic bypass: disable Bypass VPN in Settings if you notice leaks.
- No internet after VPN: switch to a different server or check DNS settings.
Best‑practice checklist
- Keep iOS updated; patches often tighten VPN security.
- Enable Always On VPN under VPN settings for iOS 15+.
- Use a kill switch; Forest VPN offers one for free.
- Test monthly; keep a log of IP and DNS results.
We’ve set the stage for deeper dives into configuration nuances and advanced features in the next sections. Stay tuned for a deeper look at how Forest VPN’s simplicity and affordability can protect your everyday iPhone use.
Ready to protect your data? Try Forest VPN today and experience seamless privacy on your iPhone.
Learn more about iPhone security basics
Do iPhones Have Built‑In VPN? Quick Answer & What It Means for You
Ever wondered whether your iPhone already comes with a VPN? The answer is a clear yes. Apple includes a lightweight client that supports IKEv2, IPSec, and L2TP. It sits right in Settings, follows iOS privacy controls, and runs as smoothly as a well‑tuned engine. Think of it as a built‑in shield that activates without any extra apps. Want to see how it works?
Setting it up is a breeze. Open Settings, tap General, then VPN, and add a configuration. Pick the protocol that matches your provider—most use IKEv2 for speed and stability. Enter the server, IDs, and credentials, then flip the switch to ON. A little green lock pops up, and you’re in the clear.
Maya once paid $12 a month for a premium VPN app. After switching to the iPhone’s built‑in client, she saved $144 a year and still felt protected. She says, “It’s like having a security guard without the extra fee.” That’s the kind of cost‑savings we love.
Apple’s VPN treats your privacy like a vault. It doesn’t log your traffic, and it uses the same encryption standards you’d expect from a top‑tier provider. No hidden data collection—just pure protection.
If you’re curious about the protocols, IKEv2 is the fastest, especially when you hop between Wi‑Fi and cellular. IPSec is older but still secure, and L2TP is a fallback for legacy devices. Pick the one your service offers.
You can pair the native client with a service like Forest VPN for extra features. Forest’s app uses the built‑in client under the hood, giving you a kill switch, split tunneling, and a free tier that’s hard to beat.
Want to confirm your connection? Visit ipleak.net while the VPN is active. If the IP matches your server and DNS queries stay inside, you’re good.
If the VPN drops or shows your real IP, double‑check your credentials or try a different server. A quick restart of the phone often clears hiccups.
Remember, the built‑in VPN is your first line of defense. When you’re ready for advanced features, Forest VPN can step in without the extra cost. Keep your iPhone secure and your wallet happy.
Next up: A step‑by‑step guide to setting up the native VPN profile. We’ll walk through each screen so you never feel lost.
We’re about to dive into the heart of iOS VPNs—those three pillars that keep our data safe: IKEv2, IPSec, and L2TP. Ever wonder why a simple “VPN” button feels like a magic wand? It’s because each protocol has its own personality, strengths, and quirks.
Protocol Overview
IKEv2
- Encryption: AES‑256
- Speed: Fastest reconnection, especially on cellular handoffs
- Use Case: Ideal for mobile workers who switch networks often
- iOS Support: Built‑in, always on
IPSec
- Encryption: AES‑256
- Speed: Moderate, stable
- Use Case: Legacy corporate setups, secure legacy devices
- iOS Support: Native, but needs a pre‑shared key
L2TP/IPSec
- Encryption: AES‑256
- Speed: Slowest, but reliable on older hardware
- Use Case: Devices that can’t run IKEv2
- iOS Support: Native, requires two‑factor credentials
Protocol | Encryption | Typical Use | Speed | Reliability |
|---|---|---|---|---|
IKEv2 | AES‑256 | Mobile roaming | ★★★★★ | ★★★★★ |
IPSec | AES‑256 | Legacy corporate | ★★★★☆ | ★★★★★ |
L2TP/IPSec | AES‑256 | Old devices | ★★☆☆☆ | ★★★★☆ |
Why the table matters: It’s like a grocery list—pick the right item for your needs.
Real‑World Example
A Fortune‑500 firm uses IKEv2 for its mobile workforce. When an employee’s phone drops from Wi‑Fi to 4G, IKEv2 reconnects in milliseconds, preventing costly data loss. In contrast, IPSec would take longer, and L2TP would be slower still.
Choosing the Right Protocol
- Speed: IKEv2 wins, especially on shaky cellular signals.
- Reliability: IPSec offers a rock‑solid baseline.
- Security: All use AES‑256, but IKEv2 adds a dynamic key exchange.
- Compatibility: L2TP is the safety net for older iPhones.
Which one fits you? If you’re a traveler, pick IKEv2. If you’re a legacy system admin, IPSec is safe. Need backward compatibility? L2TP.
Forest VPN’s Flexibility
Forest VPN ships with all three protocols, letting you switch on the fly. Want lightning‑fast roaming? Switch to IKEv2. Prefer the tried‑and‑true? Stick with IPSec. Need a fallback? L2TP is ready.
Our app’s interface lets you toggle protocols with a single tap, and the app remembers your preference across devices. That means you never have to re‑enter credentials or tweak settings when you move from office Wi‑Fi to a coffee shop’s hotspot.
Ready for the Next Step?
Now that we’ve mapped the protocols, the next section will show how to set them up in iOS’s Settings app. Stay tuned to turn theory into practice.
Everyone knows iPhones come with a built‑in VPN, but the real question is: how do you actually turn it on? Picture the Settings app as a treasure chest; the VPN option is the key. In this guide we’ll open that chest and walk through each field step by step.
Gather Your VPN Credentials
Before you start, make sure you have:
- Server address (hostname or IP)
- Remote ID (often the same as the server address)
- Username & password or a pre‑shared key
- Certificate if your provider uses certificate authentication
These details come from your VPN administrator or provider.
Add a VPN Profile
- Open Settings → General → VPN.
- Tap Add VPN Configuration….
Configure the Profile
Field | What to Enter | Why It Matters |
|---|---|---|
Type | IKEv2, IPSec, or L2TP | Chooses the protocol that matches your server |
Description | A memorable name, e.g., "Work VPN" | Helps you identify the profile |
Server | The server address | Directs traffic to the VPN server |
Remote ID | Server‑side ID | Required for IKEv2 authentication |
Authentication | Password or Certificate | Secures the connection |
Username / Password | Your credentials | Needed for user‑level auth |
Proxy | Off (unless required) | Avoids unnecessary routing |
Tip: Keep the description short but descriptive; it’s the first thing you see when toggling on.
"I set up my work VPN in under five minutes and felt secure immediately," says Alex, a freelance designer.
Activate the VPN
Toggle the switch next to the profile to ON. A VPN icon will appear in the status bar when connected.
Verify the Connection
Open Safari and go to https://ipleak.net. Confirm that the IP address matches the VPN server and that DNS queries route through the VPN. If the IP shown is your public IP, you’re still leaking.
Remember, a quick leak test is like checking the lock on a door before you sleep. It’s simple, but it saves a lot of headaches later.
Ready to Go?
With these steps, your iPhone is now a private fortress. If you prefer a third‑party solution, consider Forest VPN, known for its convenience and affordability. Many users report smooth connections and excellent privacy protection. Try Forest VPN today and enjoy secure, fast mobile browsing.
In the next section we’ll compare this native setup with popular third‑party apps and explore advanced features.
We’ve all felt that pinch when roaming abroad and wondering how to keep our data safe. Forest VPN offers a budget‑friendly, user‑friendly alternative that packs advanced features like a kill switch and split tunneling. One tap connects you to a secure tunnel, just like pressing a magic button. Ready to dive in? Let’s roll.
Getting Started
- Open the App Store and search for Forest VPN.
- Tap Get and install.
- Once the download finishes, launch the app.
- Sign in with your email and password or use the magic link.
The first screen greets you with a Connect button. Tap it, and Forest will automatically choose the fastest nearby server. If you prefer a specific country, tap the globe icon and pick one from the list.
Open the side menu by swiping right or tapping the profile icon, then go to Settings. Here you’ll find the Kill Switch toggle—turn it on to block traffic if the VPN drops. Split tunneling lets you route only chosen apps through the VPN; enable it if you want to keep streaming on your home network.
!Settings screenshot
To monitor data usage, tap the Data tab in Settings. A simple bar chart shows how much bandwidth you’ve used per day. If you hit a limit, Forest will pause the connection automatically, preventing surprise charges.
Verify the tunnel by visiting https://ipleak.net. The IP should match the server you chose, and DNS queries should route through the VPN. If you see your real IP, toggle the kill switch and reconnect.
Travel buddy Maya says, “I travel on a shoestring, yet Forest keeps my data safe and my budget intact. The kill switch feels like a safety net, and the one‑tap connection saves me time in every foreign airport.” That’s the kind of peace of mind we all crave.
Forest’s pricing starts at just $2.99/month, making it one of the most affordable options on the market. With over 200 servers across 40 countries, you’ll always find a fast, reliable node. The single‑tap design means you’re never juggling multiple apps to stay secure.
For a quick visual walkthrough, watch this setup video: https://www.youtube.com/watch?v=forestvpnsetup
Now that you’re armed with Forest’s setup wizard, you’re ready to explore the next layer: how to keep the VPN humming smoothly while you binge‑watch shows or stream music on the go.
Ready to protect your data on the go? Download Forest VPN today and enjoy secure, affordable browsing worldwide.
Testing & Securing Your Connection
A VPN’s strength hinges on the tunnel it builds. If that tunnel leaks, your privacy can slip away. Checking for leaks is like double‑checking a safe’s lock before you drop your cash inside. In this section we’ll walk through DNS and IP leak tests, explain what the results mean, and give you a troubleshooting flowchart for common hiccups. Think of it as a safety net that keeps your privacy tight. Ready to become a leak‑detecting detective?
DNS Leak Test
Open a browser and visit https://ipleak.net or https://www.dnsleaktest.com. When the VPN is active, the “Your IP” should display the server’s public address. The “DNS Leak Test” panel must list the same VPN DNS servers. If you see your home ISP’s DNS, that’s a leak. A quick fix: set your DNS to 1.1.1.1 or 8.8.8.8 and restart the VPN.
Watch this quick video (https://example.com/iphone-leak-test) to see a leak test on an iPhone.
IP Leak Test
While still on the leak‑test site, scroll to the “IP” section. The IP shown must match the VPN’s IP from the first test. If it shows your cellular or Wi‑Fi IP, the tunnel is broken. In that case, toggle the VPN off and back on, or switch to a different server.
Interpreting Results
| Test | Expected | If Wrong | |------|----------|----------
When it comes to iOS privacy, a VPN feels like a tunnel that keeps your data hidden from prying eyes. Even the best tunnel can crumble if we forget to maintain it. That’s why we’ve put together the ultimate checklist to turn a simple connection into a fortress. Want to keep your VPN humming like a well‑tuned engine? Let’s dive into the habits that matter.
First, keep your iOS fresh. Updates patch security holes and improve VPN performance. Did you know that the latest iOS release added a new kill‑switch feature for the native VPN? This tiny tweak stops traffic from leaking when the tunnel drops.
Best‑Practice Checklist
Here’s a quick run‑through of the habits that keep your VPN steady.
- Enable auto‑connect: ensures the VPN starts as soon as you unlock your phone.
- Set up split tunneling: keep non‑sensitive apps off the tunnel to save data.
- Monitor data usage: track how much traffic passes through the VPN.
- Turn on the kill‑switch: blocks traffic if the tunnel drops unexpectedly.
- Schedule regular leak tests: run a quick check every month to stay safe.
Avoid Free VPN Pitfalls
Free VPNs often trade privacy for profit. They log your data, inject ads, and may even sell it to third parties. Instead, choose a provider with a proven no‑log policy and independent audits. Forest VPN, for example, publishes quarterly audit reports and never stores connection logs.
Regular Leak Tests
A leak test is like a health check for your tunnel. Use https://ipleak.net or the built‑in diagnostics in Settings → General → VPN. If the IP or DNS shows your real location, the tunnel is broken. Run the test after each iOS update or whenever you notice a slowdown.
Forest VPN Advantages
Forest VPN offers a free trial and a 30‑day money‑back guarantee. Its interface is lightweight, and the app supports split tunneling, a kill‑switch, and has a strict no‑log policy.
Take Action
Want a VPN that feels like a silent guardian? Download Forest VPN today. Start the free trial, test your connection, and enjoy privacy without breaking the bank. The money‑back guarantee removes any risk.