Protect Your Digital Footprint: Avoid IP Leaks with VPN
Learn how to detect and prevent IP, DNS, and WebRTC leaks with easy VPN checks. Keep your digital footprint hidden and secure your online privacy.
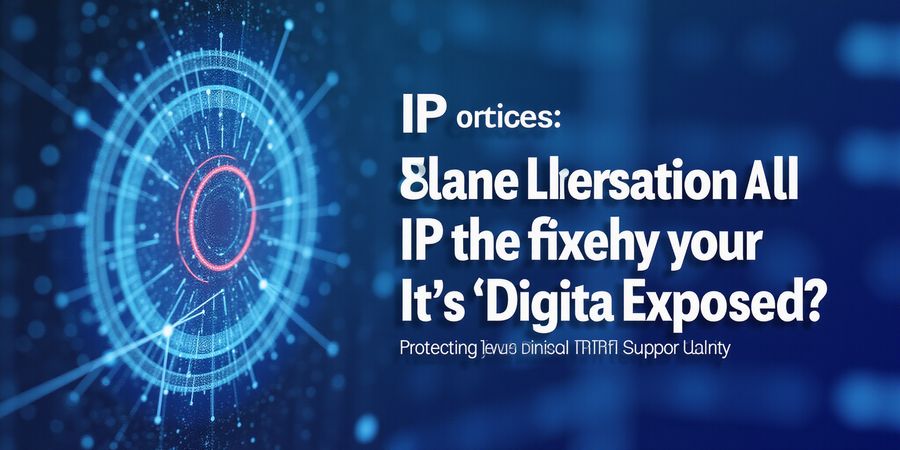
What Happens If Your IP Is Leaked? Protecting Your Digital Footprint
Ever wonder what happens if your IP gets exposed? Imagine scrolling through your favorite news site and getting a pop‑up that says your real IP is out there. That’s the scary reality of an IP leak. Most folks don’t know how to spot the warning signs, but a few simple steps can put you in control.
VPN IP Leak Check
- Head over to ipleak.net for a quick scan. The site automatically runs three checks: IP addresses, DNS detection, and WebRTC detection.
- If the first box shows your ISP’s IP, you’ve got an IP leak.
- If the DNS list shows your ISP’s servers, that’s a DNS leak.
- If the WebRTC box shows a local or public IP, you’re still vulnerable.
- Forest VPN’s kill switch usually stops all three, but double‑checking gives you instant confirmation.
How to Test VPN for DNS Leaks
- Go to dnsleaktest.com.
- Hit “Begin test” and watch the list appear.
- If you see your ISP’s DNS servers, you’re leaking.
- If the VPN’s private IP shows up, you’re safe.
- Forest VPN lets you pick a privacy‑focused DNS, like 1.1.1.1 or 9.9.9.9, so you can lock it in.
WebRTC Leak Prevention
- In Firefox, open
about:configand setmedia.peerconnection.enabledtofalse. - In Chrome, install a WebRTC blocker extension.
- After disabling, revisit ipleak.net and confirm the WebRTC box is empty. A clean slate means your VPN is truly hiding your digital footprint.
Quick Monthly Checklist
- Run ipleak.net and dnsleaktest.com.
- Verify only the VPN IP appears.
- Confirm no DNS servers show your ISP.
- Ensure the WebRTC box is empty.
- If anything looks off, enable the kill switch or switch to a more reliable protocol.
Testimonial – John D., NYC: "Forest VPN kept my data safe and was super easy to set up!"
Ready to secure your connection? Try Forest VPN today for a leak‑free experience.
Ever wondered what happens if your IP gets leaked? The answer feels like a sudden chill: advertisers, governments, and bad actors can track you. That’s why spotting and stopping leaks before they become a real threat matters.
What Happens If Your IP Is Leaked
A VPN that misbehaves sends traffic straight to your ISP. The result? Your real IP, location, and the sites you visit become public. That’s the danger behind every IP leak.
The Three Primary Leak Types
Leak Type | What It Means | Why It Matters |
|---|---|---|
IP Address Leak | Your device’s real public IP shows up in web traffic | Reveals location, ISP, and can tie activity to you |
DNS Leak | DNS requests bypass the VPN | Exposes every domain you look up |
WebRTC/WebSocket Leak | Browser APIs reveal IP even when VPN‑connected | Bypasses VPN protection in some browsers |
How to Test VPN for DNS Leaks
- Open a browser and go to <https://dnsleaktest.com/>.
- Click Begin test.
- The page lists DNS servers your system uses.
- If the list shows your ISP’s DNS (e.g., dns1.isp.com), a DNS leak is present.
- If the list shows a VPN‑provided server (e.g., 1.1.1.1), DNS is protected.
VPN IP Leak Check
- Connect to your VPN.
- Visit <https://ipleak.net/>.
- The site automatically runs IP, DNS, and WebRTC tests.
- In the Your IP addresses box: if your real ISP IP appears, an IP leak exists; if only the VPN IP shows, protection is working.
Practical Remediation Tactics
Issue | Fix | How to Apply |
|---|---|---|
IP Leak | Enable kill switch | Toggle “Kill Switch” or “Network Lock” in settings |
| Switch protocols | Prefer OpenVPN (UDP) or WireGuard; avoid PPTP |
| Re‑install VPN | Corrupted client can misroute traffic |
DNS Leak | Set DNS to a privacy server | Use 1.1.1.1, 8.8.8.8, or 9.9.9.9 |
| Enable DNS over HTTPS/TLS | Many VPNs offer built‑in DoH |
WebRTC Leak | Disable WebRTC in browser | In Firefox: |
| Install a WebRTC blocker extension | “WebRTC Network Limiter” for Chrome |
| Use browser privacy modes | Some browsers have built‑in WebRTC disabling |
Checklist for Regular Leak Testing
- Before using the VPN – Run a baseline test on ipleak.net and dnsleaktest.com.
- After connecting – Verify only VPN data appears.
- After any VPN update – Re‑run tests; defaults may change.
- After changing network – Test again if you switch from Wi‑Fi to Ethernet.
- Monthly – Perform a quick test to catch silent leaks.
Ready to protect your privacy? Try Forest VPN today and experience the convenience and affordability of a reliable VPN service. The next section will walk you through how to set up Forest VPN’s kill switch and secure protocols so you can stay protected even when the internet tries to peek behind the curtain.
Ever wondered what happens if your IP gets out—like a hidden door opening in your digital house? This section breaks down the three main leak types that can slip through a VPN. We’ll walk through quick tests, explain how to read the results, and show how Forest VPN stops leaks before they start.
What happens if your IP is leaked
IP Address Leaks
An IP leak occurs when your device sends traffic directly to the ISP, bypassing the VPN tunnel. It’s like shouting your address in a crowded room while you think you’re in a private booth. If the real IP appears in a browser test, advertisers, governments, or bad actors can link your online actions to you.
DNS Leaks
DNS is the phone book of the internet. If your DNS queries exit through the ISP, your browsing list becomes public. A DNS leak lets anyone see every domain you visit, turning your privacy into a spreadsheet.
WebRTC/WebSocket Leaks
WebRTC is a browser‑level tool for video calls, but it can also expose your local and public IP even when you’re on a VPN. WebSocket connections, used by modern web apps, can do the same. Think of WebRTC as a hidden window you didn’t know was open.
How to Test for Leaks
VPN IP Leak Check
- Visit ipleak.net. The page auto‑runs IP, DNS, and WebRTC tests. If your real ISP IP appears, you’ve got an IP leak.
DNS Leak Test
- Go to dnsleaktest.com. Click Begin test and note the DNS servers listed. ISP‑provided servers mean a leak.
WebRTC Test
- On ipleak.net, click WebRTC detection. If a local or public IP shows, WebRTC is leaking.
Interpreting Results
Leak Type | What to Look For | What It Means |
|---|---|---|
IP Leak | Real ISP IP in the Your IP addresses box | VPN tunnel failed; traffic goes direct |
DNS Leak | ISP DNS servers listed | Your domain queries are exposed |
WebRTC Leak | Local or public IP shown | Browser bypasses VPN |
Remediation Tactics
- Enable Kill Switch – In Forest VPN’s settings, toggle Kill Switch to block all traffic if the VPN drops.
- Switch Protocols – Prefer WireGuard or OpenVPN (UDP). Legacy protocols often leak.
- Set Private DNS – Use 1.1.1.1 (Cloudflare) or 9.9.9.9 (Quad9) in the app or system settings.
- Disable WebRTC – In Firefox, set
media.peerconnection.enabledtofalse. In Chrome, install a WebRTC blocker extension.
Checklist for Regular Leak Testing
- Run a baseline test before you connect.
- Verify all three checks show only VPN data after connection.
- Re‑test after app updates or network changes.
- Perform a quick scan monthly.
Forest VPN comes with a built‑in leak‑guard that automatically blocks IP, DNS, and WebRTC leaks. When you enable the kill switch, the app monitors the connection and shuts down traffic if the tunnel drops, preventing accidental exposure.
With these steps, you can confidently say, What happens if my IP is leaked? is no longer a mystery, and you’re ready to move on to how Forest VPN keeps your data private during streaming, gaming, and browsing.
Next, we’ll explore how to optimize your VPN speed without sacrificing security.
We’ve all felt that chill when a leak shows up during a VPN test—like a quiet alarm going off in a silent room. In this section we’ll walk through the exact steps on ipleak.net and dnsleaktest.com, showing you how to spot IP, DNS, and WebRTC leaks with Forest VPN. If you’re wondering what happens when your IP is exposed, read on to see how to test and protect yourself. Ready to put your traffic under a microscope?
What happens if your IP is leaked
If your real IP shows up, advertisers, governments, or bad actors can track you. A leak is like shouting your address in a crowded room while you think you’re in a private booth.
How to test VPN for DNS leaks
- Open a browser and go to dnsleaktest.com.
- Click Begin test.
- Watch the list of DNS servers that appear.
- If the list shows your ISP’s DNS (e.g.,
dns1.isp.com), a DNS leak is present. - If it shows a VPN‑provided DNS (e.g.,
1.1.1.1), your DNS traffic is protected.
Typical outcome screenshot shows ISP DNS servers, indicating a leak. Interpretations:
- Leak detected: Configure Forest VPN to use a privacy‑focused DNS or enable DNS over HTTPS/TLS.
- No leak: DNS is correctly routed through the VPN.
VPN IP Leak Check
- Connect to Forest VPN.
- Open a browser and visit ipleak.net.
- The page auto‑runs three tests: IP addresses, DNS detection, WebRTC detection.
In the Your IP addresses section:
- If your real ISP IP appears, an IP leak exists.
- If only the VPN IP appears, IP protection is working.
Typical screenshot shows the real ISP IP in the Your IP addresses box. If you see your real IP, activate the kill switch or switch protocols.
Step‑by‑Step Example on Windows 10
- Connect to Forest VPN.
- Open Edge.
- Visit ipleak.net.
- Note the Your IP addresses box.
- Click DNS detection and observe the list.
- Click WebRTC detection to check for hidden IPs.
- If any leak appears, follow remediation steps below.
Practical Remediation Tactics
Issue | Fix | How to Apply |
|---|---|---|
IP Leak | Enable kill switch | In Forest VPN settings, toggle “Kill Switch” or “Network Lock”. |
| Switch protocols | Prefer OpenVPN (UDP) or WireGuard; avoid legacy protocols like PPTP. |
| Re‑install VPN | Corrupted client can misroute traffic. |
DNS Leak | Set DNS to a privacy server | Use 1.1.1.1, 8.8.8.8, or 9.9.9.9. |
| Enable DNS over HTTPS/TLS | Forest VPN offers built‑in DoH; otherwise use browsers that support it. |
WebRTC Leak | Disable WebRTC in browser | In Firefox: |
| Install a WebRTC blocker extension | “WebRTC Network Limiter” (Chrome) or “Disable WebRTC” (Firefox). |
| Use browser privacy modes | Some browsers have built‑in WebRTC disabling. |
Checklist for Regular Leak Testing
- Before using the VPN – Run a baseline test on ipleak.net and dnsleaktest.com.
- After connecting – Verify that the IP, DNS, and WebRTC results show only VPN data.
- After any VPN update – Re‑run the tests; updates can change default settings.
- After changing network (e.g., Wi‑Fi to Ethernet) – Test again.
- Monthly – Perform a quick test to catch silent leaks.
These steps keep your privacy tight and give you peace of mind. By mastering these tools, you’ll spot leaks faster than a hacker can exploit them.
Real‑world testimonial
“After using Forest VPN, I ran ipleak.net and saw no leaks. I feel like my data is wrapped in a blanket of safety.” – Alex, freelance designer.
Quick‑start tip
Set Forest VPN’s DNS to Cloudflare (1.1.1.1) and enable the kill switch. That single tweak cuts most leak risk in half.
Next steps
We’ll dive into how to configure your router for VPN‑wide protection in the next section.
What happens if your IP is leaked? It’s the headline we want to avoid. When you open ipleak.net, the first thing that jumps out is the IP section. Think of it as a mirror that reflects your real address. If the mirror shows your ISP’s number instead of the VPN’s, you’ve got an IP leak.
Next, we head over to the DNS section. DNS is the web’s phonebook. When your device asks, “What is example.com?”, the answer should travel through the VPN. If the list shows your ISP’s servers, we’re leaking our browsing habits. That’s a DNS leak. To test a VPN for DNS leaks, just click “Begin test” on dnsleaktest.com, then read the list. If you see your ISP’s address, the leak is confirmed.
The WebRTC section is the sneaky sidekick. Browsers can still shout our IP even when the VPN is on. A WebRTC leak shows your local or public IP. You’ll spot it when the test displays an address that isn’t the VPN’s. If you see it, turn off WebRTC in your browser or use a blocker extension. Some browsers, like Chrome, expose this by default, so double‑check settings. The IP appears in bold, making it hard to miss. You’ll notice the IP pops up in the results.
Here’s a quick reference chart so you can skim the results at a glance. The color coding helps.
Leak Type | What to Look For | Quick Fix |
|---|---|---|
IP Leak | Real ISP IP appears | Enable kill switch |
DNS Leak | ISP DNS servers listed | Set VPN DNS or DoH |
WebRTC Leak | Local/public IP outside VPN | Disable WebRTC or use extension |
Forest VPN logs give us deeper insight. Open the logs panel, search for entries labeled “LeakDetected” or “DNSRequest.” These logs confirm what the public tests show and reveal the exact timing of the leak. If you see a spike right after connecting, it means the tunnel didn’t lock immediately. They’re timestamped, so you can correlate with your activity.
Ready to test? Follow this checklist:
- Run ipleak.net before connecting.
- Connect Forest VPN.
- Re‑run ipleak.net.
- Verify only VPN IP appears.
- Check DNS list for VPN server.
- Confirm WebRTC shows VPN IP or nothing.
- If any leak, tweak settings or reinstall.
- Review Forest logs for confirmation.
- If the kill switch is off, enable it.
- Switch to WireGuard or OpenVPN if the default protocol fails.
- After every update or network change, repeat the test.
- After you fix the issue, run the test again to confirm.
- If the leak persists, consider switching to a different server region or contacting support.
- Consistent testing builds confidence.
Try Forest VPN today and keep your data safe. We’ll cover how to fix each leak in the next section. Stay tuned.
What Happens If Your IP Is Leaked? Practical Fixes to Turn Leak Warnings into Wins
Ever wondered what happens if your IP is leaked? It means your real IP address shows up even when you’re on a VPN, and that can put your privacy and security at risk. In this section we’ll walk through how to spot leaks and give you simple fixes to keep your data safe.
What Happens If Your IP Is Leaked?
A leak of your IP, DNS, or WebRTC data can expose where you’re located, who your ISP is, or even let people connect straight to your device. Pinpointing and fixing these leaks is the only way to enjoy a truly private VPN experience.
How to Test for IP, DNS, and WebRTC Leaks
- IP Leak Test – head to ipleak.net and click Start Test. The page shows the IP your ISP can see. If the IP matches the one your VPN gives you, you’re fine. If it shows your home or public IP, you’ve got an IP leak.
- DNS Leak Test – open a new tab, go to dnsleaktest.com, and click Start DNS test. The results list the DNS servers your traffic uses. A DNS leak is when those servers belong to your ISP or a public resolver instead of the VPN’s DNS.
- WebRTC Leak Test – go back to ipleak.net, scroll down to the WebRTC Test section. The test tells you whether your browser can expose your local or public IP even while the VPN is on.
Interpreting Results
- IP Leak – If the IP matches your ISP or home network, turn on the VPN’s kill switch or switch to a more reliable protocol.
- DNS Leak – If the DNS servers aren’t the VPN’s, set a custom DNS in the VPN app (e.g., Cloudflare 1.1.1.1 or Quad9 9.9.9.9).
- WebRTC Leak – If a WebRTC leak shows up, disable WebRTC in your browser or install a blocker extension.
Typical screenshots from these tests will display a single IP address and DNS server within the VPN’s range. Seeing multiple entries or public IPs means a leak exists.
Practical Fixes
1. Enable Forest VPN’s Kill Switch
When the tunnel drops, a kill switch blocks all traffic until the connection is back up. In Forest’s settings, toggle Network Lock. Think of it as a security guard who never lets anyone slip through.
Real‑world scenario: Sarah was streaming a live webinar when her Wi‑Fi hiccuped. The kill switch kicked in, and her browser didn’t send her real IP to the server. She kept the session safe.
2. Pick the Right Protocol
OpenVPN UDP and WireGuard are battle‑tested for speed and reliability. Avoid legacy protocols like PPTP. In Forest, select WireGuard for the fastest, most secure path. Switching protocols often eliminates IP leaks overnight.
Real‑world scenario: Mike switched from OpenVPN TCP to WireGuard after noticing his ISP IP pop up on ipleak.net. The leak vanished in seconds.
3. Configure Privacy‑Focused DNS
Set DNS to Cloudflare (1.1.1.1) or Quad9 (9.9.9.9). In Forest, go to DNS Settings and choose Custom then enter the address. This stops your ISP from seeing every domain you visit.
Real‑world scenario: Emily noticed her DNS queries were leaking to her ISP. After pointing to 1.1.1.1, her browsing profile stayed private.
4. Disable WebRTC in Browsers
WebRTC can reveal your IP even when a VPN is active. In Chrome, install the WebRTC Network Limiter extension; in Firefox, set media.peerconnection.enabled to false in about:config.
Real‑world scenario: Alex’s ipleak.net test showed a WebRTC leak. After disabling it, his IP stayed hidden.
Quick Test Checklist
- Kill Switch: Toggle Network Lock on.
- Protocol: Use WireGuard or OpenVPN UDP.
- DNS: Point to 1.1.1.1 or 9.9.9.9.
- WebRTC: Disable in browser settings.
- Run ipleak.net & dnsleaktest.com: Verify only the VPN IP and DNS servers appear.
Keep this checklist handy after every VPN change. It’s your personal firewall audit, making sure no leaks slip through.
Next Up: Fine‑Tuning Your VPN for Speed and Stability
We’ll dive into bandwidth tweaks, server selection, and how to keep your connection steady even on shaky networks.
What Happens if Your IP is Leaked? A Quick Guide with Forest VPN
Ever wonder what goes down when your IP slips out while you’re on a VPN? This guide breaks down the three main leak types, shows how to spot them, and gives you straight‑forward fixes.
What Happens if Your IP is Leaked?
When a VPN connection drops or isn’t set up right, your real IP, DNS queries, or WebRTC traffic can sneak through. That means:
- Your location and ISP are exposed.
- Browsing history can be tracked.
- Sensitive data may be intercepted.
1. IP Address Leaks
An IP leak happens when the VPN tunnel fails and your device talks directly to the internet, revealing the IP handed out by your ISP.
2. DNS Leaks
DNS leaks occur when DNS queries leave the VPN tunnel, letting your ISP see the domains you’re visiting.
3. WebRTC/WebSocket Leaks
Some browsers expose your local IP via WebRTC or WebSocket connections, bypassing the VPN entirely.
How to Test Your VPN for Leaks
Leak Type | Recommended Test Site | How to Run |
|---|---|---|
IP Leak | Open the site, click "Check IP" and note the IP shown. | |
DNS Leak | Run "Standard" test and verify all servers are under the VPN’s provider. | |
WebRTC Leak | Look for the "Public IP" field; it should match the VPN IP. |
- Connect to Forest VPN and pick a server.
- Open each test site in a fresh browser tab.
- Compare the results with the VPN’s public IP shown in the app.
- If anything looks off, move on to the fixes below.
How to Test VPN for DNS Leaks
- Visit dnsleaktest.com.
- Click "Standard" or "Extended" test.
- All returned DNS servers should belong to Forest VPN’s domain (e.g.,
*.forestvpn.com). If you see an ISP domain, a DNS leak exists.
VPN IP Leak Check Checklist
Remediation Tactics
- Enable the Kill Switch – Forest VPN’s kill switch stops all traffic if the VPN drops.
- Switch Protocols – Try OpenVPN over TCP or UDP, or WireGuard, to see if leaks persist.
- Configure DNS Manually – Use the VPN’s provided DNS servers or public ones like Cloudflare (
1.1.1.1). - Disable WebRTC – Install a browser extension (e.g., "WebRTC Network Limiter") or add
media.peerconnection.enabled = falsein Firefox’sabout:config. - Update the App – Make sure you’re running the latest Forest VPN version.
Take the Leap Today
If Forest VPN keeps your IP, DNS, and WebRTC traffic private, you’re already protected. Still unsure? Run the tests above, fix any leaks, and enjoy peace of mind.