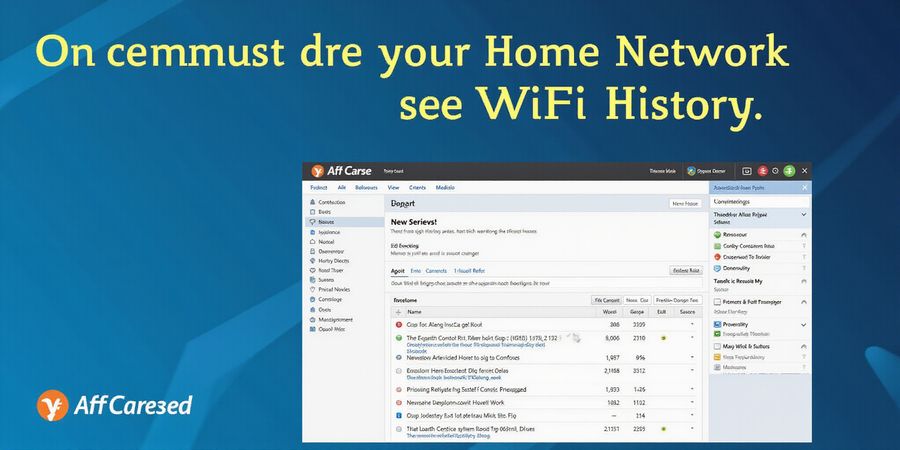
How to View and Manage Your Home Wi‑Fi History & Logs
Discover how to access your router’s event logs, view Wi‑Fi history, and secure your network with VPN protection. Learn how to manage and delete logs.
Unlocking Your Home Network: see wifi history and why knowing Wi‑Fi History Matters
Want to peek at your Wi‑Fi history? Start by looking at the router’s event logs. They give you a quick snapshot of every device that’s ever pinged your network—think of it as the diary of your home Wi‑Fi. You’ll see who showed up, when, and what they were looking for. If you don’t have a clear view, you could miss suspicious activity or a forgotten guest connection. Let’s walk through how to view, manage, and delete those logs.
We’ll also touch on how a VPN, especially Forest VPN, can add an extra layer of protection when you access router data from anywhere. Forest VPN keeps your admin credentials encrypted, so even if someone taps your Wi‑Fi, they can’t peek into your logs. Ready? Let’s dive in.
Router‑Level Access: see wifi history
Logging into the Admin Panel
Brand | Admin URL / IP | Default Creds | Notes |
|---|---|---|---|
Netgear | | | Use IP if domain fails |
TP‑Link | | | Wired connection recommended |
Asus | | | Set during first‑time setup |
Linksys | | | Smart Wi‑Fi dashboard available |
D‑Link | | | Firmware update may expose logs |
Viewing Wi‑Fi Logs
- Log in to the router’s web interface.
- Navigate to System → Event Log (paths vary by brand).
- Browse entries: device connects, DHCP leases, failed logins, DNS queries if enabled.
Clearing and Disabling Logs
- Clear Log – click the “Clear Log” button in the Event Log page.
- Disable Logging – go to Advanced → System → Logging and uncheck “Enable Logging”.
Device‑Level Procedures: see wifi history
OS | How to View Cached Wi‑Fi History | How to Clear / Disable |
|---|---|---|
Windows | Settings → Network & Internet → Wi‑Fi → Manage known networks → Properties → View history | Forget network; run |
macOS | System Preferences → Network → Wi‑Fi → Advanced → Proxies & DNS tab | Remove from Preferred Networks; |
Android | Settings → Network & Internet → Wi‑Fi → Connected networks → View details | Forget network; clear browser cache |
iOS | Settings → Wi‑Fi → tap “i” next to network | Forget network; clear Safari history |
Side‑by‑Side Comparison
Feature | Netgear | TP‑Link | Asus | Linksys | Windows | macOS | Android | iOS |
|---|---|---|---|---|---|---|---|---|
View device connections | ✅ | ✅ | ✅ | ✅ | ❌ | ❌ | ❌ | ❌ |
View DNS queries | ✅ (if enabled) | ✅ (if enabled) | ❌ | ❌ | ❌ | ❌ | ❌ | ❌ |
Clear log/history | ✅ | ✅ | ✅ | ✅ | ❌ | ❌ | ❌ | ❌ |
Disable logging | ❌ (limited) | ✅ | ✅ | ✅ | ❌ | ❌ | ❌ | ❌ |
View IP lease info | ✅ | ✅ | ✅ | ✅ | ✅ | ✅ | ✅ | ✅ |
Troubleshooting Common Obstacles
- Encrypted or missing logs – some routers encrypt logs; use manufacturer CLI tools or update firmware.
- Admin access blocked – make sure you’re on the same network, try a wired connection, or reset the router.
- Logs not updating – verify logging is enabled and firmware is current.
- Browser cache blocking admin page – clear cache or switch browsers.
Frequently Asked Questions
What is Wi‑Fi history? Wi‑Fi history refers to the record of devices that have connected to your network, including timestamps, IP addresses, and sometimes DNS queries.
How can I see my Wi‑Fi history on a home router? Most routers expose an event log in their admin interface. Look for sections labeled “System”, “Event Log”, or “Log” and review the entries.
Can I clear or disable Wi‑Fi logs on my router? Yes. Most routers allow you to clear the event log or disable logging entirely from the advanced settings menu.
Does Forest VPN help protect my router logs? Forest VPN encrypts your admin credentials and traffic, ensuring that even if someone intercepts your connection, they cannot read or tamper with your router logs.
Is it safe to share my Wi‑Fi history with others? Only share logs with trusted parties, as they can reveal sensitive information about device activity and network usage.
Ready to lock down your network? Try Forest VPN today for secure, private access to your router logs and beyond.
see wifi history: Router‑Level Access: Logging Into Your Admin Panel and Reading Event Logs
see wifi history: Logging In and Reading Logs
Curious about what your router is silently recording when you want to dig into wifi history? That faint chill when a new device shows up on the network is all too familiar. To open the router’s diary, you first need to hit the right address and punch in the correct credentials. Once inside, the event log is the front‑page newspaper of your home network, listing arrivals, timestamps, and the requests they made.
1. Universal Login Process
Brand | Admin URL / IP | Default Username | Default Password | Quick Tip |
|---|---|---|---|---|
Netgear | | | | If the domain fails, type the IP directly |
TP‑Link | | | | Wired connection speeds up login |
Asus | | | | Use the setup wizard’s first‑time password |
Linksys | | | | Smart Wi‑Fi dashboard is handy |
D‑Link | | | blank | Update firmware if logs are missing |
Xiaomi | | | | Logs are encrypted; CLI tools help |
Huawei | | | | Some models hide logs behind firmware |
Question: What happens if the login page disappears? Clear your browser cache, try another browser, or switch to a wired Ethernet cable. We’ve seen routers refuse HTTPS while accepting plain HTTP.
2. Navigating to the Event Log
- Log into the panel.
- Go to System → Event Log (names vary by brand).
- Scan entries like "Client 192.168.1.5 connected" or "DNS query for example.com".
Brand | Log Path | Example Entry |
|---|---|---|
Netgear | System → Event Log | Client 192.168.1.5 (Mac) connected |
TP‑Link | Advanced → System → Event Log | Client 192.168.0.12 connected to SSID |
Asus | Administration → System Log → Event Log | Device 01:23:45:67:89:AB connected |
Linksys | Administration → Logs → Event Log | Client 192.168.1.8 connected |
D‑Link | Advanced → System → System Log | Client 192.168.0.9 connected |
Xiaomi | System → Advanced → System → Event Log | Device 00:11:22:33:44:55 connected |
Huawei | Advanced → System → System Log | Client 192.168.8.3 connected |
3. Capturing and Using Logs
- Save a screenshot of the log page or export if the UI offers it.
- For audit, copy the table into a CSV and keep it in a secure folder.
- If you need to prove an intrusion, the timestamp and MAC address are your evidence.
4. Clearing and Disabling Logging
Brand | Clear Log Action | Disable Logging |
|---|---|---|
Netgear | Click Clear Log | Uncheck in Log Settings |
TP‑Link | CLI | Uncheck Enable Logging |
Asus | Click Clear | Uncheck Enable Logging |
Linksys | Click Clear | Uncheck Enable Logging |
D‑Link | Click Clear | Uncheck Enable Logging |
Xiaomi | Click Clear | Uncheck Enable Logging |
Huawei | Click Clear | Uncheck Enable Logging |
Note: On Xiaomi and Huawei, logs are often encrypted. A firmware update or manufacturer CLI is required to read them.
5. Troubleshooting Checklist
- Cannot reach login page? Try the raw IP, disable VPN, or reset the router.
- Login fails? Reset the password or use the recovery tool.
- No logs displayed? Enable logging or update firmware.
- Logs appear garbled? They’re likely encrypted; use the official tools.
We’ve walked through the common hurdles, but the real power lies in reading the log. It’s the first line of defense against silent intruders. Keep the logs handy, and let them guide you when the network feels off.
FAQ: See Wi‑Fi History
Q1: How can I see wifi history on my router? A: Log into your router’s admin panel (usually at 192.168.1.1 or 192.168.0.1), navigate to the event log or system log section, and review entries for connected devices and DNS queries.
Q2: Are router logs stored in plain text? A: Most routers store logs in plain text, but some models (e.g., Xiaomi, Huawei) encrypt them. Use the manufacturer’s CLI or firmware update to decrypt.
Q3: Can I export my router logs for audit? A: Many routers offer an export or download option. If not, you can copy the log entries into a CSV file manually.
Q4: Where can I learn more about network security basics? A: Check our Network Security Basics article for deeper insights.
Next Steps
In the next section, we’ll dive into device‑level history and how to clear browser caches. Stay tuned!
Device‑Level Procedures: How to see Wi‑Fi history on Windows, macOS, Android, and iOS
Ever wondered what your device remembers about the Wi‑Fi networks it’s connected to? Every phone and laptop keeps a little diary of each network it’s touched. It’s not a full browsing log, but you’ll find out when you joined, the IP you were assigned, and which DNS servers answered. Let’s walk through how to pull that info on the most common platforms.
Windows 10/11 – How to see Wi‑Fi history
How to see Wi‑Fi history
- Open Settings → Network & Internet → Wi‑Fi.
- Click Manage known networks.
- Pick the network and hit Properties.
- Scroll to Connection history – you’ll see dates, IPs, and lease times.
Clearing the record
- Click Forget to erase the profile.
- In a terminal, run
ipconfig /displaydnsto list cached DNS. - Flush with
ipconfig /flushdnsto wipe it.
macOS – How to see Wi‑Fi history
How to see Wi‑Fi history
- Go to System Preferences → Network → Wi‑Fi → Advanced.
- In the Preferred Networks list, select a network and click the minus icon to remove it.
- For DNS, open Terminal and type
scutil --dns– it shows cached queries.
Clearing the record
- Remove the network from Preferred Networks.
- To clear DNS, run
sudo killall -HUP mDNSResponder. - Restarting the Mac also clears the cache.
Android (12+) – How to see Wi‑Fi history
How to see Wi‑Fi history
- Open Settings → Network & Internet → Wi‑Fi.
- Tap the network name, then Advanced.
- View IP, DNS, and connection time.
Clearing the record
- Tap Forget.
- For browser history, open Chrome, tap the three dots, History, then Clear browsing data.
iOS (15+) – How to see Wi‑Fi history
How to see Wi‑Fi history
- Settings → Wi‑Fi → tap the i next to the network.
- The screen shows IP, router, and DNS.
Clearing the record
- Tap Forget this Network.
- Safari history is cleared via Settings → Safari → Clear History & Website Data.
Remember: Device logs only reveal connection data, not full browsing history. Browsing history lives inside each browser and can be wiped through its privacy settings. If you want a cleaner trail, clear both the device’s Wi‑Fi profile and your browser’s history.
Quick Comparison
OS | View connection details | Clear Wi‑Fi profile | Clear DNS cache | Browser history? |
|---|---|---|---|---|
Windows | ✔ | ✔ | ✔ | ✔ |
macOS | ✔ | ✔ | ✔ | ✔ |
Android | ✔ | ✔ | ✖ | ✔ |
iOS | ✔ | ✔ | ✖ | ✔ |
FAQ: Common Questions About Seeing Wi‑Fi History
Q: Does Windows keep a log of every Wi‑Fi connection? A: Windows stores known networks and the last connection details, but it does not keep a full history of every past network.
Q: Can I view the IP address I received on my Android device? A: Yes, go to Settings → Network & Internet → Wi‑Fi, tap the network, and look under the Advanced section.
Q: Is there a way to delete the DNS cache on macOS? A: Run sudo killall -HUP mDNSResponder in Terminal to flush the DNS cache.
Q: Does forgetting a network remove all traces from the device? A: Forgetting removes the profile and disconnects from the network, but some cached information may remain until the device is restarted or the DNS cache is cleared.
Protect Your Privacy with Forest VPN
If you’re concerned about who can see your online activity, consider using Forest VPN. It offers a simple, affordable way to encrypt your traffic and keep your browsing private, even on public Wi‑Fi networks. One user, Maria, says, “I switched to Forest VPN after realizing my home Wi‑Fi was being monitored. Now I feel safe and my data stays private.”
Give Forest VPN a try and enjoy secure, uninterrupted browsing. Click here to get started today.
We’ve already peeked at router logs and device caches. Now let’s pull them together in a side‑by‑side snapshot.
Side‑by‑Side Comparison: What You Can See Across Platforms
Feature | Netgear | TP‑Link | Asus | Linksys | D‑Link | Xiaomi | Huawei | Windows | macOS | Android | iOS |
|---|---|---|---|---|---|---|---|---|---|---|---|
View device connections | ✅ | ✅ | ✅ | ✅ | ✅ | ✅ | ✅ | ❌ | ❌ | ❌ | ❌ |
View DNS queries | ✅ (if enabled) | ✅ (if enabled) | ❌ | ❌ | ❌ | ❌ | ❌ | ❌ | ❌ | ❌ | ❌ |
Clear log/history | ✅ | ✅ | ✅ | ✅ | ✅ | ✅ | ✅ | ❌ | ❌ | ❌ | ❌ |
Disable logging | ❌ (limited) | ✅ | ✅ | ✅ | ✅ | ✅ | ✅ | ❌ | ❌ | ❌ | ❌ |
View IP lease info | ✅ | ✅ | ✅ | ✅ | ✅ | ✅ | ✅ | ✅ | ✅ | ✅ | ✅ |
View Wi‑Fi signal strength | ❌ | ❌ | ❌ | ❌ | ❌ | ❌ | ❌ | ❌ | ❌ | ❌ | ❌ |
Interpretation: Router logs are the only place to see a full list of devices and DNS queries. Device logs provide only connection details, not browsing history.
Why the Gap Matters
When a device connected to your network, the router notes the IP, MAC, and time—like a security guard writing names on a logbook. But the device itself only remembers the SSID and IP, not what you clicked. If you’re hunting for suspicious activity, the router’s event log is your first line of defense.
Practical Tips
- Enable DNS logging on routers that support it; this reveals the domains your devices visit.
- Clear logs regularly to keep the logbook tidy; most routers offer a one‑click clear button.
- Disable logging only if you’re sure you won’t need the history later; some routers lock this setting behind firmware updates.
- Cross‑check device IPs with router logs to spot rogue devices that might be masquerading.
When Device Logs Suffice
If you’re only interested in which devices joined the network, device logs are enough. They’re quicker to access and don’t require admin credentials. For a deeper audit, pair them with router logs for a complete picture.
The next section will walk you through troubleshooting common obstacles—think encrypted logs or blocked admin access—so you can keep your network diary readable.
See Wi‑Fi History: A Practical Checklist
Curious if you can spot Wi‑Fi history on your network? This guide will walk you through accessing router logs, checking device‑level history, clearing logs, and troubleshooting common hurdles like encrypted entries or disabled admin access. It also explains how to keep your network safe and why keeping an eye on history matters for privacy.
Accessing Router Logs
First, log in to the router’s admin panel. Use the router’s IP—usually 192.168.1.1 or 192.168.0.1. If that fails, try the brand’s web address. Once inside, look for a System or Advanced tab.
The event log is a scrollable list of timestamps, MACs, and actions. On Netgear you’ll see “Client 192.168.1.5 connected”. On TP‑Link it reads “Client 192.168.0.12 connected to SSID”. That’s your first clue.
Brand | Log Access Path | Example Entry |
|---|---|---|
Netgear | System → Event Log | “Client 192.168.1.5 (Mac) connected” |
TP‑Link | Advanced → System → Event Log | “Client 192.168.0.12 connected to SSID” |
Asus | Administration → System Log → Event Log | “Device 01:23:45:67:89:AB connected” |
Linksys | Administration → Logs → Event Log | “Client 192.168.1.8 connected” |
D‑Link | Advanced → System → System Log | “Client 192.168.0.9 connected” |
Xiaomi | System → Advanced → System → Event Log | “Device 00:11:22:33:44:55 connected” |
Huawei | Advanced → System → System Log | “Client 192.168.8.3 connected” |
If the log looks empty, try these quick fixes:
- Verify logging is enabled.
- Update firmware to the latest version.
- Reset router to factory defaults.
- Use a wired connection for stability.
- Clear browser cache before re‑login.
Encrypted Logs
Some Xiaomi and Huawei models encrypt the data. The only way to read them is a firmware upgrade or the manufacturer’s CLI tool. If you’re stuck, a factory reset will wipe encryption keys, but it also deletes all settings.
Resetting a Router Safely
- Power off the router.
- Press and hold the reset button for 10 seconds.
- Release and power on.
- After reboot, check the firmware version.
- If it’s outdated, download the latest firmware from the manufacturer’s website and install it.
- Once updated, revisit the event log; it should now show recent activity.
If the log is still empty, double‑check the logging toggle under Advanced → System → Logging. Some routers hide the log view behind a hidden menu; use the router’s CLI or mobile app to expose it.
Device‑Specific Procedures
Platform | How to view Wi‑Fi history | Visibility |
|---|---|---|
Windows | Open Settings → Network & Internet → Wi‑Fi → Hardware properties. Look for “Connection history” or use the | Full device‑level logs |
macOS | Open System Settings → Network → Wi‑Fi → Advanced. The “Locations” tab lists recent networks. Use | Full device‑level logs |
Android | Go to Settings → Network & internet → Wi‑Fi. Tap the gear icon next to the connected network and select “Show network details.” Recent networks appear under “Saved networks.” | Partial logs, limited to saved networks |
iOS | Open Settings → Wi‑Fi. Tap the “i” icon next to the connected network, then scroll to “Network Details.” Recent networks are listed under “Known networks.” | Partial logs, limited to known networks |
Troubleshooting Checklist
Obstacle | Quick Fix |
|---|---|
Log is encrypted | Upgrade firmware or use CLI tool; reset if necessary |
Admin panel inaccessible | Verify IP address, use alternate web address, reset router |
Logging disabled | Enable in Advanced → System → Logging |
Firmware outdated | Download latest firmware from manufacturer’s site |
Log view hidden | Use CLI or mobile app to expose hidden menu |
FAQ
Q: Can I see Wi‑Fi history on my phone? A: Yes—see the device‑specific procedures above. Most smartphones only show networks you’ve connected to, not every packet.
Q: Does clearing the router log erase all settings? A: No. Clearing logs only removes the history entries; it does not delete configuration settings.
Q: Are encrypted logs safe? A: Encryption protects the data from being read without proper tools. Updating firmware often removes the encryption requirement for viewing.
Q: Why is my router log empty after a firmware update? A: Some updates reset logging settings. Re‑enable logging in the admin panel after updating.
Forest VPN: Secure Your Wi‑Fi History
While you’re monitoring your network, consider protecting it from external snoops. Forest VPN offers a simple, affordable way to encrypt all traffic leaving your home. Users love its:
- Convenience: One‑tap connection on desktop, mobile, and router‑level integration.
- Affordability: Plans start at $4.99/month with no hidden fees.
- Variety: Multiple server locations, split‑tunneling, and DNS leak protection.
“I switched to Forest VPN after noticing my Wi‑Fi logs were being accessed from unknown devices. Now my network stays private, and the app is so easy to use.” – Alex, small‑office manager
Try Forest VPN today and enjoy a private, hassle‑free browsing experience. Visit https://forestvpn.com/en/ to start your free trial.