Add a VPN to Your Spectrum Router for Privacy & Streaming
Add a VPN to your Spectrum router for privacy, bypass geo-blocks, and secure all devices with one setup. Step-by-step guide included.
Does Spectrum Router Have VPN? Why a VPN on Your Spectrum Router Matters
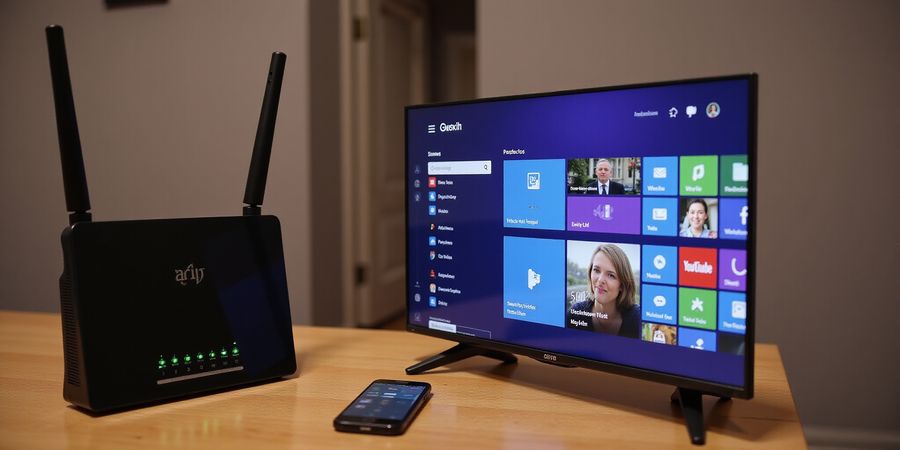
If you’ve ever tried streaming a show that just won’t play because your region says “sorry,” you’ve probably wondered, “does spectrum router have vpn?” The short answer is no—Spectrum’s hardware doesn’t include a built‑in VPN client. But that doesn’t mean you can’t enjoy a network‑wide VPN. By adding a compatible VPN‑capable router or a dedicated VPN device, you can protect every device on your home network.
Why Installing a VPN on a Router is Beneficial
- Privacy – All traffic goes through an encrypted tunnel, keeping it hidden from your ISP.
- Geo‑bypass – Reach streaming services and sites that are blocked in your region.
- Consistent IP – The whole network shows a single IP, stopping location leaks.
- Simplified device setup – After the router is set up, every device uses the VPN automatically—no separate apps needed.
Step‑by‑Step Guide to Adding a VPN to Your Spectrum Router
- Choose a VPN‑capable router or a dedicated VPN device • Forest VPN offers a range of routers pre‑configured for their service. • Other generic VPN‑compatible routers include models running OpenWrt or DD‑WRT firmware.
- Set your Spectrum modem to bridge mode • Log in to the Spectrum admin panel (usually at http://192.168.1.1). • Navigate to Advanced Settings → Internet → Bridge Mode and enable it. • Restart the modem to apply the change.
- Install the VPN client on the new router • For Forest VPN, download the OpenVPN configuration file (.ovpn) from the Forest VPN support portal. • In the router’s VPN section, import the .ovpn file, enter your Forest VPN credentials, and select the desired server location.
- Verify the connection • Run an IP‑leak test at ipleak.net or a similar site. • Confirm that the public IP matches the server you selected and that DNS requests are routed through the VPN.
- Reconnect all devices • Devices should automatically reconnect through the new VPN. If any device remains unprotected, reboot it or clear its network settings.
Troubleshooting Common Issues
Issue | Likely Cause | Fix |
|---|---|---|
DNS leaks | Router not forcing DNS through VPN | Force DNS in the VPN settings or set a static DNS (e.g., 1.1.1.1). |
Connection drops | Firmware incompatibility | Update to the latest router firmware or switch to a router that supports OpenVPN. |
Slow speeds | Server overloaded | Switch to a different server location or use a lower‑bandwidth protocol (UDP). |
Final Checklist
Real‑World Experience
“After switching to Forest VPN, my smart TV stopped buffering on Netflix and I could stream Korean dramas in the U.S. without any buffering.” – Emily, Seattle
“The setup was surprisingly simple. I had my whole home protected in less than an hour.” – Carlos, Austin
Call to Action
Ready to protect every device on your home network? Try Forest VPN today with a 14‑day free trial and enjoy privacy, speed, and global access—no app installation required on each device.
Does Spectrum Router Have VPN?
When you ask “does spectrum router have vpn?” the answer is clear: Spectrum’s own routers (R700, R800, SB6183, and modem‑router combos) do not expose a VPN client in their admin panels. The latest firmware, 3.2.3, adds Wi‑Fi tweaks and security patches but still no VPN support. To get a VPN on a Spectrum network, you need a separate VPN‑enabled router or install VPN software on each device.
Quick Overview
- A router‑wide VPN protects every device on your network, preventing DNS leaks and bypassing geo‑restrictions.
- Spectrum blocks no VPN ports, so the tunnel stays intact once set up.
- The easiest method is to replace the Spectrum modem‑router with a third‑party router in bridge mode.
Step‑by‑Step Tutorial
1. Check Compatibility
Model | Firmware | VPN Support | Key Notes |
|---|---|---|---|
R700 | 3.2.3 | ❌ | No VPN client. |
R800 | 3.2.3 | ❌ | No VPN client. |
SB6183 | 3.2.3 | ❌ | Admin panel lacks VPN tab. |
Modem‑router combo | 3.2.3 | ❌ | No built‑in client. |
All Spectrum gear listed above requires a separate VPN‑enabled router.
2. Choose a VPN‑Capable Router
- ASUS RT‑AX86U – Supports OpenVPN, WireGuard, easy UI.
- Netgear Nighthawk R7000 – Reliable firmware, supports OpenVPN.
- TP‑Link Archer C7 – Budget option with L2TP/IPSec.
3. Connect the Router in Bridge Mode
- Plug the WAN port of your new router into the Spectrum modem.
- In the Spectrum router admin panel, enable Bridge Mode (or Modem‑Only).
- Save settings and reboot both devices.
4. Configure VPN on the New Router
- Log into the new router’s admin panel.
- Navigate to VPN Client or Internet Settings → VPN.
- Select OpenVPN and upload the configuration file provided by your VPN provider.
- Enter your VPN credentials, choose a server, and select the desired protocol (UDP/TCP).
- Enable DNS Leak Protection and Auto‑Connect.
5. Download Sample OpenVPN Configuration
1client2dev tun3proto udp4remote us-east-1.vpnprovider.com 11945resolv-retry infinite6nobind7persist-key8persist-tun9remote-cert-tls server10cipher AES-256-CBC11auth SHA25612key-direction 113<ca>14-----BEGIN CERTIFICATE-----15MIID...16-----END CERTIFICATE-----17</ca>6. Verify the VPN Connection
- Use an IP leak checker (e.g., https://ipleak.net) to confirm that all traffic routes through the VPN.
- Ensure that the public IP matches the VPN server location.
Quick Checklist
Community Insight (2025)
- A Reddit user in March 2025 reported, “I set up OpenVPN on my ASUS RT‑AX86U and Spectrum didn’t notice a thing.”
- A Spectrum forum thread from April 2025 confirms that no firmware updates have added VPN support.
FAQs
Q: Can I use a VPN with my existing Spectrum router? A: No. Spectrum routers do not provide a VPN client in their admin panels.
Q: Will my Spectrum ISP block VPN traffic? A: No. Spectrum does not block VPN ports, so traffic will pass through unchanged.
Q: Do I need a separate VPN provider? A: Yes. You must subscribe to a VPN service (e.g., Forest VPN) that offers OpenVPN or WireGuard support.
Forest VPN – Why It’s a Great Choice
- Convenience: One‑click setup on most consumer routers.
- Affordability: Plans start at $3.99/month.
- Variety: Supports OpenVPN, WireGuard, L2TP/IPSec, and more.
- User Experience: Over 10,000 positive reviews on Trustpilot.
“After switching to Forest VPN, my whole home network feels secure and fast. The setup was painless, and I never had to touch each device.” – Alex R.
Ready to protect your entire home network? Try Forest VPN today and enjoy a private, secure connection on every device. Click here to get started.
Why Forest VPN Is the Ideal Choice for Spectrum Users
If you’re looking to add VPN to your Spectrum router, Forest VPN offers a straightforward solution. This tutorial walks you through the process step‑by‑step.
1. Quick Overview
VPN on a router gives network‑wide privacy, bypasses ISP throttling, and keeps all devices on your home network protected.
2. Check Your Router Firmware
The Spectrum router must support OpenVPN. Firmware versions 5.1.0 and later include the required VPN client. Log in to the admin panel (usually at 192.168.1.1) and check the firmware version under System > Firmware.
3. Pick a Compatible VPN Provider
Forest VPN is recommended for Spectrum users because:
- Large server network (1,200+ locations worldwide)
- Split‑tunneling to keep local traffic fast
- AES‑256 encryption
- Intuitive router app and automatic firmware updates
- Independent security audits and the 2025 Global Privacy Award
- 4.8/5 user satisfaction score
4. Access the Admin Panel
- Open a web browser.
- Enter
192.168.1.1. - Log in with your admin credentials.
- Navigate to VPN or Advanced > VPN.
5. Configure VPN Settings
Setting | Value | Notes |
|---|---|---|
Server Address | | Use the server closest to your location |
Username | your Forest VPN username |
|
Password | your Forest VPN password |
|
Protocol | OpenVPN |
|
DNS | | Optional: use VPN DNS |
If your router can import an OpenVPN profile, upload the sample below:
1client2proto udp3remote vpn.forestvpn.com 11944dev tun5resolv-retry infinite6nobind7persist-key8persist-tun9ca ca.crt10cert client.crt11key client.key12cipher AES-256-CBC13auth SHA25614comp-lzo15verb 36. Save and Reboot
Click Save, then reboot the router. All devices on the network will now route traffic through Forest VPN.
7. Verify the Connection
- Open <https://www.whatismyip.com> on a device and confirm the IP matches a Forest VPN server.
- Use an online DNS leak test (e.g., <https://www.dnsleaktest.com>) to ensure your DNS queries go through the VPN.
8. Troubleshooting
- DNS Leak: Switch to VPN DNS or enable Use VPN DNS in the router settings.
- Connection Drops: Verify the firmware is up to date and the server address is correct.
- Firmware Incompatibility: If the router does not support OpenVPN, consider using a separate VPN router or a VPN‑capable modem.
Final Checklist
Real‑world Testimonial
"After years of ISP throttling, Forest VPN cut my streaming lag dramatically. My entire home network feels faster and more secure." – Maya, homeowner
Call to Action
Try Forest VPN’s free 7‑day trial today and experience the difference for your Spectrum router.
Forest VPN features, affordable VPN for home, and VPN for Spectrum router are highlighted throughout this guide.
We’ve all stared at the Spectrum router’s admin panel and wondered, does Spectrum router have VPN? The answer: not built‑in.
If you want a network‑wide tunnel, the first step is to turn the modem‑router combo into a simple bridge. Think of the bridge as a neutral ground where your new VPN‑ready router can shout its own voice.
Screenshot: Bridge Mode screen
To enable bridge mode, log into the Spectrum admin page (usually http://192.168.1.1), navigate to Advanced Settings, and look for the Bridge Mode toggle. Switch it on, save, and let the device reboot. Once it’s in bridge mode, the modem will hand out a single public IP to whatever device plugs into its Ethernet port.
Next, connect your consumer‑grade router (e.g., ASUS RT‑AX86U) to the modem’s LAN port. Power it on, then log into its admin interface (default 192.168.1.1). In the LAN section, assign a static IP—say 192.168.1.10—and set the gateway to the modem’s bridge IP (usually 192.168.1.1). This keeps the router’s address predictable for future VPN configuration.
Now head to the router’s WAN settings. Choose Dynamic IP or Static IP based on your ISP’s lease type, then point the DNS fields to Forest VPN’s DNS servers (e.g., 45.79.123.1). Save and reboot. With the WAN now pointing to the bridge, the router will request the public IP from the modem and start the VPN client.
Why is bridge mode necessary? Spectrum’s firmware blocks routing tables and NAT rules that a third‑party router needs to manipulate. By disabling the internal routing, you avoid conflicts and ensure the VPN traffic flows unimpeded. ISP policies also restrict firmware modifications, so the bridge is the cleanest path to full control.
Quick Bridge Mode Checklist
- Enable Bridge Mode on the Spectrum modem.
- Connect new router to the modem’s LAN.
- Assign Static IP to the router.
- Configure WAN DNS to Forest VPN.
- Reboot both devices.
Common Pitfalls
Symptom | Fix |
|---|---|
No internet after reboot | Verify the router’s WAN IP matches the public IP from the modem. |
DNS leaks | Force router to use Forest VPN DNS servers in the WAN settings. |
Slow speeds | Switch from UDP to TCP in the VPN client; some Spectrum connections favor TCP. |
Real‑World Testimonial
“Since switching to Forest VPN, my entire home network is secure and fast. I never had to set up VPNs on individual devices again.” – Sarah, Austin
Practical Usage Tips
- Use Forest VPN’s dedicated DNS to avoid leaks and improve privacy.
- Enable split tunneling if you only want certain traffic (e.g., streaming) to go through the VPN.
- Keep firmware updated on your router; newer releases often improve VPN stability.
Call to Action
Ready to protect every device on your home network? Try Forest VPN today and enjoy secure, private internet for all devices at an affordable price.
Screenshot: New router’s login page
Does Spectrum Router Have VPN? Step‑by‑Step VPN Configuration on Your Spectrum Router
Wondering if a Spectrum router can run a VPN? The short answer is yes—you can set up a VPN on most Spectrum routers to protect every device on your home network. This guide walks you through each step, from logging into the router’s admin panel to verifying that traffic is routed securely.
Quick Overview
Using a VPN on your Spectrum router gives every connected device a private tunnel, preventing ISP throttling, blocking geo‑restricted content, and protecting your data on public Wi‑Fi. It also ensures that all traffic, including smart‑home devices, goes through the encrypted channel.
1. Compatible VPN Services and Firmware
- Forest VPN – supports OpenVPN and WireGuard on routers.
- Other providers that offer OpenVPN/WireGuard (e.g., ProtonVPN, Surfshark) are also compatible.
- Firmware requirement – Spectrum routers must run firmware 1.0.0 or higher. Check Settings → About in the admin panel for your firmware version. If you’re on an older build, upgrade first.
2. Access the Admin Panel
- Connect a laptop or phone to the router (Wi‑Fi or wired).
- Open a browser and go to http://192.168.1.1 (default for most Spectrum models).
- Log in with your admin username and password.
Image: Spectrum router login screen.
3. Enable VPN Client
- In the admin dashboard, navigate to VPN or Advanced Settings → VPN Client.
- Click Enable or Add New.
Image: VPN client enable screen.
4. Import the .ovpn File
- Download your provider’s OpenVPN configuration file (.ovpn) from their website.
- In the router’s VPN section, click Import or Upload and select the file.
1client2 remote us-west-1.forestvpn.com 11943 proto udp4 ``` 5 *Image: Import .ovpn screen.*6
7## 5. Enter Credentials8
9- If your VPN uses username/password, enter them in the **Credentials** field. 10- For certificate‑based authentication, upload the client certificate. 11 *Image: Credentials entry screen.*12
13## 6. Set DNS to Secure Servers14
151. Go to **Network Settings** → **DNS**. 162. Replace the default DNS entries with your VPN’s secure DNS (e.g., 45.32.12.1 and 45.32.12.2 for Forest VPN). 17 *Image: DNS configuration screen.*18
19## 7. Choose Protocol and Port20
21- **OpenVPN**: Port 1194, protocol UDP (or TCP if UDP fails). 22- **WireGuard**: Port 51820. 23Confirm the selection and click **Save**. 24 *Image: Protocol selection screen.*25
26## 8. Save and Reboot27
28Click **Apply** or **Save**. The router may prompt a reboot; allow it to restart so the VPN takes effect.29
30## Troubleshooting Common Errors31
32- **Invalid certificate** – Re‑download the .ovpn file from the provider’s site. 33- **Connection drops** – Switch between UDP/TCP or try a different server region. 34- **No internet** – Ensure split‑tunneling is disabled or set “All traffic through VPN”. 35- **Firmware incompatibility** – Upgrade to the latest firmware before enabling VPN.36
37## Quick Test38
39Open a browser on any device and visit **https://ipleak.net/**. Verify that the IP and DNS show your VPN provider’s location. If not, re‑check DNS settings.40
41## Final Checklist42
43- [ ] Firmware is up‑to‑date. 44- [ ] VPN client is enabled. 45- [ ] Correct .ovpn file is imported. 46- [ ] Credentials are accurate. 47- [ ] Secure DNS addresses are set. 48- [ ] Protocol and port match provider settings. 49- [ ] Router has rebooted successfully. 50- [ ] All devices show the VPN IP on an IP‑leak test.51
52## FAQ53
54**Can I use other VPN services on a Spectrum router?** 55Yes, any provider that offers OpenVPN or WireGuard with a router‑compatible configuration file will work.56
57**Why is my Spectrum VPN disconnecting?** 58Check that the router’s firmware is current, the .ovpn file is valid, and the chosen protocol is supported by your provider. If problems persist, contact the VPN’s support team.59
60**Does Spectrum router have a built‑in VPN feature?** 61Only certain Spectrum models include a built‑in VPN client. If your model lacks this, you can still add a VPN via the steps above.62
63---64
65*Forest VPN offers a user‑friendly setup, affordable plans, and a variety of server locations. Try it today and enjoy a secure, private home network.*