Master Router Logs: Boost Home Network Security
Learn how to read and interpret your router logs to spot malware, control bandwidth, and keep your home network safe. Get alerts for traffic spikes.
Hooking Into Your Home Network: Why Router Logs Matter
Ever notice a sudden spike in your home network traffic and wonder who—or what—caused it? We’ve all clicked that link and felt a chill. Router website history can reveal the culprit, from a curious child’s game to an unnoticed malware download. Curious? Let’s dig in. We’ll also help you receive alerts when traffic spikes.
Why Router Logs Matter
The logs are the router’s diary, keeping a timestamped record of every request that passes through. They’re the first line of defense against intrusions and the key to troubleshooting slow Wi‑Fi. When we check router browsing history, we can spot patterns that look like fingerprints: repeated visits to a site, odd hours, or traffic from unfamiliar MAC addresses.
Imagine your router as a guard dog; its log viewer is the bark you hear when something amiss happens. It lets us see who’s sniffing around our network.
Raw data can feel like a river full of fish. That’s why we’ll use a router log viewer tool to filter, search, and export the data we need. Logs reveal hidden malware, unauthorized access, or misconfigured devices. They also help track bandwidth hogs and pinpoint slow connections. These logs give you control.
We’ll also explore how to view Wi‑Fi activity logs on popular brands such as Netgear, TP‑Link, and Asus. Each brand has its own menu path, but the goal is the same: to unlock the hidden activity.
Privacy is paramount. We’ll discuss how to protect log data by changing admin passwords, disabling remote access, and using HTTPS for the admin panel.
We’ll also cover log retention settings—whether you want automatic clearing, manual deletion, or continuous logging on an SD card.
Remember, monitoring your network is not surveillance of family members. We’ll outline best practices for respecting privacy while maintaining security.
With a clear understanding of what router website history holds, you can make informed decisions about bandwidth allocation, device performance, and threat detection.
Our next sections will walk through the exact steps to pull these logs from any popular router. We’ll show you how to export them into a CSV file for easy analysis.
Then we’ll demonstrate how to protect that data with a simple, affordable solution that keeps your logs private and secure.
We’ll also give you quick reference tables so you can navigate to the log section in seconds, no matter which brand you own.
Finally, we’ll provide practical usage tips, real‑world examples, and a natural call‑to‑action that encourages readers to try Forest VPN to shield your browsing history.
Ready to become the master of your home network? Let’s dive deeper and unlock the power of router logs.
Ever notice that uneasy click when your router’s LED flickers faster than a hummingbird? That flicker is the network’s heartbeat, and the router’s log is the diary it keeps. If you’ve ever wondered how to view Wi‑Fi activity logs or why your router website history feels like a mystery novel, we’re here to decode it.
Router logs capture every request that zips through your gateway. Each entry usually includes a timestamp, the source IP/MAC, the destination URL or IP, the protocol (HTTP, HTTPS, FTP), and the outcome (success, blocked, timeout). Think of it as a traffic cop’s report card: it tells you who was on the road, when they arrived, where they went, and whether they obeyed the rules.
Why does this matter? Because a single mis‑typed command can turn a quiet home network into a covert data exfiltration channel. In one real‑world audit, a family’s router logged a 400‑MB burst to a domain flagged by Cisco Talos as malicious—a clear sign that a device had been compromised. By spotting such spikes, we can detect security breaches before the malware spreads.
Bandwidth hogs also show up in the logs. Imagine a toddler’s tablet streaming 4K videos while the office laptop is stuck on a video call. The router’s log will flag the excessive data usage, letting us balance traffic or set QoS rules.
Parental concerns? Logs can reveal whether a child is surfing the deep web or downloading pirated content. Instead of guessing, we can filter by source MAC and see exactly what sites are being accessed.
However, many home routers miss logs by default. A recent Cisco study found that 67% of consumer devices disable persistent logging unless manually enabled. That’s why we recommend checking your router’s firmware settings and turning on continuous logging if you want a full audit trail.
Actionable steps
- Log into your router’s admin panel.
- Navigate to the Log or System Log section.
- Export the log to a CSV file.
- Use spreadsheet filters to search by URL, time, or MAC.
- Set alerts for traffic spikes or blocked domains.
By treating the router log as your first line of defense, you can spot intrusions, manage bandwidth, and protect your family’s digital life.
Quick reference: What to look for in a log entry
Element | What it tells you | Why it matters |
|---|---|---|
Timestamp | When the event happened | Detects time‑based attacks |
Source IP/MAC | Which device initiated | Identifies rogue devices |
Destination URL | Where traffic went | Spot malicious domains |
Protocol | Type of traffic | Helps enforce firewall rules |
Result | Success or block | Shows effectiveness of security controls |
A note on privacy
Logs can reveal sensitive browsing habits. Always discuss monitoring with household members and use built‑in parental‑control filters instead of raw logs when possible.
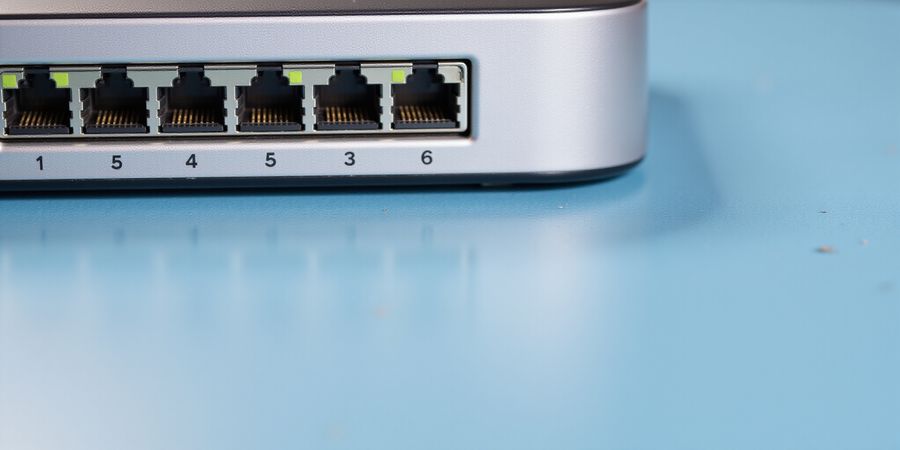
Ever wondered how to peek at what’s going on behind your router’s curtain? We’re going to turn that mystery into a straightforward walk‑through. Think of the admin panel as the router’s command center—every request gets logged like a detective following footprints. We’ll walk you through the gateway, the login bits, and the common hiccups so you can access that treasure safely.
Step‑by‑Step: Reaching the Admin Panel on Netgear, TP‑Link, and Asus
1. Connect to the Router
First, make sure your device is on the same network. Hook up via Ethernet or join the Wi‑Fi; the router’s IP is the key.
2. Default Gateway IPs
Brand | Default URL |
|---|---|
Netgear | http://192.168.1.1 |
TP‑Link | http://192.168.0.1 |
Asus | http://192.168.1.1 |
Type the URL into a browser and press Enter.
3. Login Credentials
Most routers ship with a default username of admin. The password varies: Netgear uses password or the one you set, TP‑Link defaults to admin, and Asus also starts with admin. If you’ve changed it, use your custom credentials.
4. Troubleshooting Login Failures
- Wrong IP? Double‑check your subnet mask; 192.168.0.x vs 192.168.1.x.
- Password reset? Press the reset button for 10 seconds; the router reverts to factory defaults.
- HTTPS required? Some models force HTTPS; add
https://in front of the IP.
5. Quick Navigation Path Table
Brand | Path to Logs |
|---|---|
Netgear | Advanced → Advanced Setup → Log |
TP‑Link | Advanced → System Tools → System Log |
Asus | Advanced Settings → System Log |
Once inside, you’ll see entries labeled with timestamps, source IP, destination URL, and status.
6. Official Support Resources
For more detailed instructions, consult the official support pages:
- Netgear – Netgear Support – Router Login
- TP‑Link – TP‑Link Support
- Asus – Asus Support – Routers
7. Protecting Your Router
We’ve walked through the admin panel, but remember to secure it. Change the default password, disable remote management, and enable HTTPS whenever possible.
8. Respecting Household Privacy
If you’re accessing logs for troubleshooting, be mindful of other household members’ privacy. When monitoring or restricting usage, consider enabling the router’s parental‑control features.
Next, we’ll learn how to locate and interpret the logs themselves.
Curious about what your router is recording? We’ll walk you through how to find the log viewer on the most common brands. Think of the log section as a treasure chest—you just need the right map to open it. Ready to dive in?
Finding the Log Section: Navigation Paths for Every Brand
Brand | Firmware (2024) | Navigation Path | Log Storage | Key Columns | Pattern Tips |
|---|---|---|---|---|---|
Netgear | Nighthawk X4 | Advanced → Advanced Setup → Log | Memory (default) | Time, Source, Destination, Protocol, Result | Look for repeated blocked entries or sudden spikes in traffic |
TP‑Link | Archer AX50 | Advanced → System Tools → System Log | SD card (optional) | Time, MAC, URL, Result | A cluster of timeout lines may signal a DDoS attempt |
Asus | RT‑AX86U | Advanced Settings → System Log | Memory or SD card | Time, Device, Destination, Action | Continuous logs reveal long‑term patterns, like nightly backups |
The firmware version matters because menu labels shift. Older Netgear models label the section simply Log, whereas newer firmware nests it under Advanced Setup. TP‑Link’s AX series moved System Log into System Tools, while Asus keeps it in Advanced Settings. If a router supports SD logging, the path often ends with Enable SD Log; you’ll need to insert a card and then the logs appear in the same view.
Interpreting the Entries
- Timestamp tells you when the event happened. Look for odd hours or sudden bursts.
- Source IP/MAC identifies the device. A single MAC with many requests may be a bot.
- Destination URL or IP is the target. Watch for unfamiliar domains.
- Protocol shows the traffic type. Unexpected FTP or Telnet lines raise flags.
- Result (Success, Blocked, Timeout) indicates the firewall’s action.
When you spot a blocked entry at 02:13 AM from a device you don’t own, that’s a red flag. Similarly, a streak of timeout entries can mean a rogue scan. Use the search box or export the log to a spreadsheet; then filter by the Result column to isolate anomalies.
Tips for Memory vs. SD Logs
- Memory logs roll over quickly; they’re great for short‑term troubleshooting but lose history after a reboot.
- SD logs persist until the card fills. Insert a 32 GB card, enable logging, and you’ll have weeks of data.
- To keep logs from growing out of control, set a retention policy: Auto‑Clear after 500 entries or Continuous with a daily backup.
By mastering these paths and knowing what each column means, you can turn raw router logs into a clear story of who’s browsing, when, and what they’re accessing. Stay tuned for the next section where we’ll teach you how to export and analyze these logs in depth.
router website history
Logs have been piling up like a mountain of breadcrumbs. Want to learn how to view, interpret, and manage the router website history? Want to turn that chaos into clear insight? Let’s learn how to export, filter, and search so you can spot patterns and troubleshoot faster.
Export, Filter, and Search: Turning Raw Logs into Actionable Insights
1. Accessing the Router Admin Panel
- Open a web browser and enter the router’s IP address (commonly 192.168.0.1, 192.168.1.1, or 10.0.0.1).
- Log in with your admin credentials.
- Navigate to the Logs or System Log section.
- Netgear: Advanced → Log → System Log
- TP‑Link: System → System Log
- Asus: Advanced Settings → System Log
2. Exporting Logs
Exporting is the first step toward offline analysis. Most routers let you download logs as TXT or CSV. CSV files are great because they open in Excel or Google Sheets, letting you sort columns like a spreadsheet wizard. TXT files are handy for quick text‑based searches.
3. Quick Filter Tricks
Once you have the file, filtering is your best friend. In a spreadsheet, click the header of Source MAC or Destination URL and choose Filter. Want to find every request from the smart fridge? Just type its MAC and watch rows vanish like magic.
If you prefer the command line, we’ve got you covered:
grep "192.168.1.5" router_log.txt | grep "http"pulls all HTTP calls from that device.awk -F"," '$3 ~ /example\.com/ {print}' router_log.csvpulls rows where the third column contains a specific domain.
The router log viewer built into the admin panel makes quick checks even easier.
4. Spotting Patterns
Filtering can expose repeated visits to a suspicious site. Imagine a log that shows a device pinging badsite.com every five minutes. That pattern signals malware or a compromised device.
Another common use case: diagnosing a slow connection. Filter for latency or timeout columns. If you see a spike at 3:45 PM, you know exactly when the hiccup happened. That data helps you talk to your ISP or tweak QoS settings.
5. Log Retention Settings
Most routers keep a limited number of log entries. To adjust:
- Netgear: Settings → Log → Log Retention (days)
- TP‑Link: System → Log → Log Retention
- Asus: Advanced Settings → System Log → Log Retention
Enable continuous logging if you need a longer history, but remember that larger logs consume more storage.
6. Protecting Your Log Data
- Change the admin password regularly.
- Disable remote management unless you truly need it.
- Consider encrypting the exported log file if you’ll store it long‑term.
7. Quick Reference Table
Router Brand | Log Section | Export Format | Retention Settings |
|---|---|---|---|
Netgear | System Log | TXT / CSV | Days (configurable) |
TP‑Link | System Log | TXT / CSV | Days (configurable) |
Asus | System Log | TXT / CSV | Days (configurable) |
8. Privacy Caution
Respect the privacy of other household members. If you’re monitoring shared devices, use parental‑control features or obtain consent before inspecting logs.
9. Advanced Tips
- Use
sed 's/\t/,/g' router_log.txt > cleaned.csvto convert tabs to commas for CSV. - Combine
grepandawkin a pipeline to isolate high‑latency entries:awk -F"," '$5 > 200 {print}' router_log.csvprints rows where the latency column exceeds 200 ms.
10. Takeaway
Export, filter, and search turn raw data into a narrative. Whether you’re a homeowner, a network admin, or a privacy advocate, these skills let you check router browsing history with confidence. By turning logs into actionable insights, you keep your network safe, fast, and transparent.
Router website history is a powerful way to understand what’s happening on your home network. By learning how long logs stay on your router and how to manage them, you can keep your network secure, troubleshoot issues, and maintain privacy for everyone in the household.
Retention Modes
Mode | Description | Pros | Cons |
|---|---|---|---|
Auto‑Clear | Deletes after a set number of entries or on reboot | Saves space automatically | Misses historic data |
Manual | User deletes logs manually | Full control | Requires effort |
Continuous | Saves every entry to an SD card, never deletes | Long‑term audit trail | Uses storage |
Auto‑Clear
Auto‑Clear automatically trims logs after a set number of entries or a reboot. It saves space, but you lose historic data, so you can’t investigate past incidents.
Manual
Manual lets you delete logs whenever you wish. It gives you full control, but you must remember to clear logs. If you forget, the log will grow until memory is full.
Continuous
Continuous logging writes every entry to an SD card, so you have a permanent trail. It’s ideal for audits, but the SD card fills up fast, and you’ll need to replace it or manage space.
How to Access Logs on Common Routers
- Log in to the admin panel
- Netgear:
http://192.168.1.1→ Advanced → Log → Enable SD Card Logging - TP‑Link Archer:
http://192.168.0.1→ System Tools → System Log → SD Log - Asus:
http://192.168.50.1→ Advanced Settings → System Log → Enable SD Log
- Exporting logs – In the log view, click Export or Download to save a copy to your computer.
- Filtering logs – Use the built‑in filters (date, URL, MAC address) to narrow down entries.
- Searching logs – The search bar allows you to find specific URLs, timestamps, or device MAC addresses.
Protecting Your Log Data
- Change the default admin password immediately after setting up the router.
- Disable remote access unless you absolutely need it.
- Enable WPA3 on your Wi‑Fi to prevent unauthorized connections.
- Use a router‑log viewer (many routers include a built‑in viewer) to keep an eye on activity without downloading entire files.
Privacy and Parental Controls
Always respect the privacy of other household members. If you need to monitor or restrict browsing, consider enabling the router’s parental‑control features instead of manually inspecting logs.
Quick Reference Table
Router Model | Log Navigation Path | SD Card Support |
|---|---|---|
Netgear Nighthawk | Advanced → Log → Enable SD Card Logging | Yes |
TP‑Link Archer | System Tools → System Log → SD Log | Yes |
Asus RT‑AC68U | Advanced Settings → System Log → Enable SD Log | Yes |
Linksys EA7500 | Administration → System Log → Log Settings | No |
D‑Link DIR‑825 | Setup → System Log | Yes |
Tip: A 32 GB SD card can hold roughly 200 000 log entries. If you log every ping, you’ll hit capacity in weeks. Plan to swap cards every 3–6 months or use a larger card if your firmware allows.
Conclusion
If you need long‑term audit trails for compliance or security investigations, enable continuous logging on an SD card. For quick snapshots, stick to auto‑clear or manual and clear logs weekly. For power users, set a retention policy that balances space and insight.
Remember, a well‑managed log is your network’s safety net. By configuring the right retention mode, protecting your log data, and respecting privacy, you keep your home network secure and your browsing history in check.