Spot and Stop VPN Leaks: Protect Your Privacy Today
Learn how to detect and fix VPN leaks—IP, DNS, WebRTC—using free tests, and protect your online privacy with practical steps and tools.
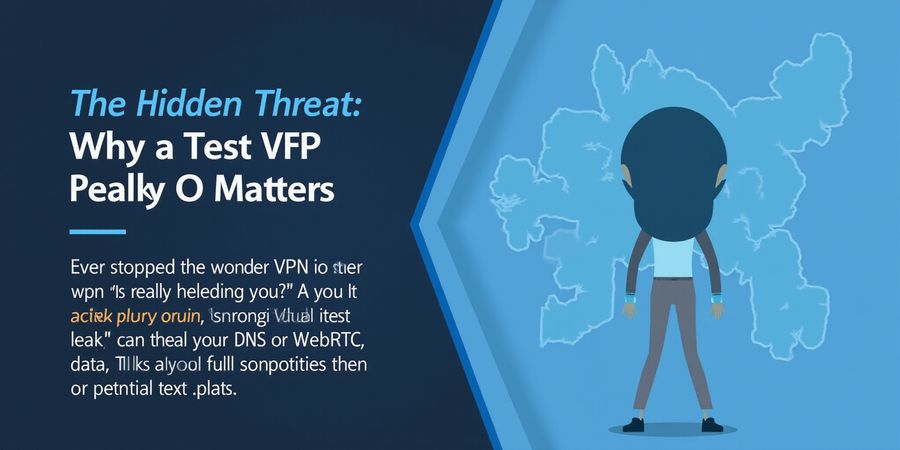
Unmasking the Hidden Threat: Why a Test VPN Leak Matters
Ever stopped to wonder if your VPN is really hiding you? A test vpn leak can spill your real IP, DNS, or WebRTC data.
When a leak slips through, your privacy crumbles like a sandcastle in a storm.
We’re here to help you spot and stop those sneaky leaks before they catch you.
With Forest VPN, you get a reliable, affordable shield that keeps every test clean.
Let’s dive into why a test vpn leak matters and how you can fix it.
Why a Test VPN Leak Matters
A leak is like a crack in a fortress wall—anyone can slip through.
Leak Type | What It Exposes | Typical Test Tool |
|---|---|---|
IP Address Leak | Your public IP and ISP | |
DNS Leak | DNS queries outside VPN | |
WebRTC/WebSocket Leak | Real IP via browser APIs | browserleaks.com/webrtc, browserleaks.com/websockets |
How to Test VPN for DNS Leaks
- Connect to your VPN, pick a familiar server.
- Open ipleak.net and note the IP under “Your IP addresses.” It should match the VPN server.
- Visit dnsleaktest.com, run a Standard Test, and watch for your ISP’s DNS servers.
- Go to browserleaks.com/webrtc, check the WebRTC Leak Test; a ✔ means safe.
- (Optional) Test WebSockets at browserleaks.com/websockets; disabling them is wise if you don’t use real‑time services.
VPN IP Leak Check
Test | What to Look For | Meaning |
|---|---|---|
IP | Same as your ISP when VPN is on | IP leak |
DNS | Non‑VPN DNS servers | DNS leak |
WebRTC | ✖ Leak | WebRTC leak |
WebSocket | Support enabled | Potential WebSocket leak |
Remediation Tactics
Issue | Fix | How to Enable |
|---|---|---|
IP Leak | VPN kill switch | Toggle “Kill Switch” in the client settings |
DNS Leak | Use VPN‑provided DNS or public DNS (e.g., Cloudflare 1.1.1.1) | Set DNS to “Use VPN DNS” in OS or client |
WebRTC Leak | Disable WebRTC in browser | Firefox: about:config → media.peerconnection.enabled = false; Chrome: install “WebRTC Network Limiter” |
WebSocket Leak | Block WebSockets via extension | Install “WebSocket Blocker” |
Protocol Choice | Switch to leak‑resistant protocol (OpenVPN, WireGuard, IKEv2) | Choose under “Advanced Settings” |
Checklist for Regular Leak Testing
- Run all tests with VPN off to establish a baseline.
- Repeat tests immediately after connecting.
- Re‑run after any VPN setting change.
- Perform a quick IP and DNS check monthly.
- Test again after switching devices or browsers.
“Forest VPN gave me peace of mind; I never had to worry about my IP leaking again.” – John D., New York
Ready to keep your privacy tight? Try Forest VPN today and keep those leaks at bay.
If you’re hunting for a test VPN leak, you’re looking for those hidden fingerprints that slip through your VPN. We’ve seen folks get blindsided when a single packet reveals their true location. Protecting your privacy is essential, but leaks can undo it. Understanding the anatomy of a leak lets us patch holes before a threat exploits them. Let’s break down the three main culprits.
Test VPN Leak: The Anatomy of a Leak
1. IP Address Leak
Your public IP is the digital name tag everyone sees. When the VPN tunnel breaks, that tag falls out, revealing your ISP and country. We call this an IP leak. Real‑world example: a gamer in Brazil noticed his gaming server pinging from the U.S. after a VPN hiccup, alerting competitors to his location.
2. VPN DNS Leak
When your browser asks a DNS server for a website address, it should ask the VPN’s resolver. A VPN DNS leak happens when the query goes to your ISP instead. In 2025, a privacy‑conscious user discovered their DNS requests were still hitting 8.8.8.8 even with the VPN on, exposing browsing habits.
3. WebRTC/WebSocket Leak
WebRTC lets browsers talk directly, bypassing the VPN tunnel. A WebRTC leak means your real IP surfaces in the browser’s metadata. WebSocket leaks are similar but involve real‑time data streams. A journalist in 2025 had their location revealed through a WebRTC call, compromising source safety.
Leak Type | What It Exposes | Typical Test Tool |
|---|---|---|
IP Address Leak | Public IP & ISP | ipleak.net |
VPN DNS Leak | DNS queries outside VPN | dnsleaktest.com |
WebRTC/WebSocket Leak | Browser‑level IP via WebRTC | browserleaks.com/webrtc |
Quick Test Flow
- Connect your VPN.
- Open ipleak.net – check the “Your IP addresses” section.
- Run dnsleaktest.com – ensure listed DNS servers belong to the VPN.
- Visit browserleaks.com/webrtc – look for a “✔ No Leak” status.
If any step shows your real data, a leak exists. Fixes include enabling the kill switch, switching to a leak‑resistant protocol, configuring DNS to the VPN provider, and disabling WebRTC in browser settings.
Why Choose Forest VPN?
- Convenience – One‑click connections on all devices.
- Affordability – Plans start at just a few dollars per month.
- Variety – Multiple server locations and protocols for every need.
“Since switching to Forest VPN, my browsing has been faster and my data stays private. I never had to worry about leaks again.” – Maya, freelance designer
Regular Leak‑Testing Checklist
- After installing or updating Forest VPN, run the Quick Test Flow.
- Verify that the VPN kill switch is active.
- Disable WebRTC in your browser settings if you need maximum privacy.
- Re‑run the tests every month or after any VPN configuration change.
Call to Action
Try Forest VPN today and enjoy secure, private, and hassle‑free browsing. Sign up now for a free trial and experience the difference.
We’ve all heard the saying “a VPN is only as strong as its weakest link.” When that link breaks, your real IP, DNS, or WebRTC data leaks out like a secret whisper. This guide walks you through step‑by‑step tests on ipleak.net, dnsleaktest.com, and browserleaks.com so you can see exactly what’s happening.
Test VPN Leak: IP Leak Check
- Turn on Forest VPN and pick a server you normally use.
- Open <https://ipleak.net/>.
- Find the Your IP addresses section.
- Make sure the IP shown matches the VPN server, not your ISP.
- If the ISP name or country matches your real provider, you have an IP leak.
How to Test VPN for DNS Leaks
- With the VPN still active, go to <https://dnsleaktest.com/>.
- Click Standard Test.
- Watch the list of DNS servers that appear.
- If any server belongs to your ISP (e.g., your ISP’s DNS server), a DNS leak exists.
WebRTC Leak Test
- Visit <https://browserleaks.com/webrtc>.
- The WebRTC Leak Test should read ✔ No Leak.
- If it shows ✖ Leak, your browser is exposing your real IP.
Interpreting Results
Test | What to Look For | What It Means |
|---|---|---|
IP | Same as ISP when VPN is on | IP leak |
DNS | ISP‑owned DNS servers | DNS leak |
WebRTC | ✖ Leak | WebRTC leak |
Remediation Tactics
- Enable Kill Switch: Stops all traffic if the VPN drops.
- Force VPN DNS: Use Forest VPN’s DNS or a public resolver like 1.1.1.1.
- Disable WebRTC: In Firefox, set
media.peerconnection.enabled = false; in Chrome, install a WebRTC blocker. - Choose Leak‑Resistant Protocols: OpenVPN, WireGuard, or IKEv2.
Checklist for Regular Leak Testing
- Run all tests with VPN off to set a baseline.
- Re‑run immediately after connecting.
- After any VPN setting change, test again.
- Monthly, perform a quick IP and DNS check.
- If you switch devices or browsers, test again.
By following these steps, you’ll spot and fix leaks before they become a problem.
Next Step
Stay tuned for our upcoming section on configuring Forest VPN’s advanced settings for maximum privacy.
When we read the leak‑test report, it’s like getting a backstage pass to our privacy. The IP field tells us whether the VPN mask is active. The DNS list shows if our queries are slipping through. The WebRTC status is the sneaky side‑kick that can still expose us.
If any of those lines look like your home address, the test has found a leak. Let’s walk through each one so you can spot exactly what’s leaking and why.
Decision Matrix: Matching Outcomes to Leak Types
Observation | Likely Leak | What to Do |
|---|---|---|
IP shows ISP or your real IP | IP leak | Enable kill switch, switch server |
DNS list contains public ISP DNS (e.g., 8.8.8.8) | DNS leak | Force VPN DNS, use 1.1.1.1 |
WebRTC status shows "Leak" or shows local IP | WebRTC/WebSocket leak | Disable WebRTC in browser, install extension |
WebSocket support is active but not used | Potential WebSocket leak | Block WebSocket via extension |
Interpreting the Numbers
- IP column: If the IP matches your ISP’s country, you’re leaking your real location.
- DNS column: Mixed servers (VPN + ISP) mean your queries are leaking.
- WebRTC/WebSocket column: A “Leak” icon is the red flag; a green check means safe.
Troubleshooting Ambiguous Results
- Mixed IP and DNS: Run the test with a different VPN protocol (WireGuard vs OpenVPN). If the issue disappears, the protocol was the culprit.
- No clear leak but still uneasy: Verify with a second tool. For DNS, try dnsleaktest.com; for WebRTC, browserleaks.com/webrtc.
- False positives: Some sites auto‑detect VPNs and show a local IP. Confirm by disconnecting the VPN; if the same IP appears, it’s a real leak.
Sample Screenshot Illustration
Screenshot of ipleak.net: The IP section shows203.0.113.45with ISPExample ISP. The DNS list lists8.8.8.8and1.1.1.1. The WebRTC status displays a red “✖ Leak” icon. This combination signals an IP leak, a DNS leak, and a WebRTC leak all at once.
Quick Fix Checklist
- Turn on the VPN kill switch.
- Force the VPN to use its own DNS servers.
- Disable WebRTC in browser settings or install a limiter extension.
- Switch to a leak‑resistant protocol like WireGuard.
- Re‑run the tests after each change.
With this decode in hand, you’re ready to fine‑tune your VPN settings. Next, we’ll explore how to tweak Forest VPN to lock down each leak type.
Test VPN Leak: Fixing the Leaks – Practical Remedies for Every Scenario
Test VPN Leak
Leaks still sneak past even the best VPNs. When you run a test vpn leak—looking for IP, DNS, or WebRTC leaks—your privacy is on the line. Fixing them is easier than you think. Let’s walk through each remedy, see how Forest VPN simplifies the process, and give you a handy cheat sheet.
1. Enable the VPN Kill Switch
Turning on the kill switch is like putting a firewall on your connection. In Forest VPN, tap Settings → Advanced → Kill Switch and toggle it ON. If the tunnel drops, every packet stops immediately, keeping your real IP hidden. The trade‑off? You lose connectivity until the VPN reconnects, but that brief outage is worth the extra privacy.
2. Pick a Leak‑Resistant Protocol
Not all protocols are created equal. OpenVPN and WireGuard seal the tunnel tighter than older options. In the app, go to Settings → Protocols and pick WireGuard for speed or OpenVPN for maximum compatibility. Switching is a one‑click tweak; just remember to test after you change.
3. Configure DNS to Use VPN or Public Resolvers
DNS leaks happen when your system asks your ISP’s servers for domain names. Forest VPN offers a built‑in “Use VPN DNS” toggle. If you prefer public resolvers, set 1.1.1.1 (Cloudflare) or 8.8.8.8 (Google) in your device’s network settings. The benefit? DNS traffic stays inside the tunnel or goes through a trusted resolver. The downside? Manual setup on some OSes can be a bit tedious.
4. Disable WebRTC in Browsers
WebRTC can expose your real IP even when a VPN is active. In Chrome, install “WebRTC Network Limiter” or add the extension “Disable WebRTC.” In Firefox, set media.peerconnection.enabled to false in about:config. Forest VPN’s “WebRTC Block” button in Settings instantly turns this feature off for all browsers. The catch? Some video‑chat sites may misbehave when WebRTC is blocked.
Quick‑Reference Cheat Sheet
Action | Forest VPN Setting | Manual Alternative | Notes |
|---|---|---|---|
Kill Switch | Settings → Advanced → Kill Switch | None | Must be ON for full protection |
Protocol | Settings → Protocols | Reboot to change | WireGuard = fastest |
DNS | Settings → DNS → Use VPN DNS | 1.1.1.1 / 8.8.8.8 | Avoid ISP DNS |
WebRTC | Settings → Privacy → Block WebRTC | Browser extension | Some sites need WebRTC |
Actionable Tips & Safety Checks
- Run a leak test after each tweak. Visit ipleak.net and confirm no IP or DNS leak, or try dnsleaktest.com.
- Keep the app updated. Updates often patch new leak vectors.
- Use a trusted public DNS if you’re on a public Wi‑Fi hotspot; it adds an extra layer of obfuscation.
- Enable “Auto‑Connect” on startup so the kill switch protects you from the first moment you hit the network.
- Back up your device’s network profile before changing DNS; a quick rollback saves headaches.
Ready to stop the leaks? Forest VPN’s one‑click settings make it feel like flipping a light switch. In the next section, we’ll explore how to schedule automatic leak checks so you never miss a breach.
We’ve all felt that uneasy itch when our VPN seems to slip up—like a hidden crack in a fortress. If you’re wondering how to test for VPN leaks, a single leak can turn your masked identity into a public headline. Forest VPN’s affordable, diverse lineup keeps the walls high, but a monthly routine seals any gaps. Ready to lock down your privacy every month?
Test VPN Leak Monthly Checklist
Step | Action | Tool | What to Look For |
|---|---|---|---|
1 | Run an IP leak test | ipleak.net | VPN IP matches server IP |
2 | Check DNS leakage | dnsleaktest.com | DNS servers belong to VPN |
3 | Verify WebRTC status | browserleaks.com/webrtc | “✔ No Leak” |
4 | Test WebSocket (optional) | browserleaks.com/websockets | No active WebSocket connections |
5 | Review kill‑switch | Forest VPN settings | Traffic stops if connection drops |
Repeat after any device swap, browser update, or VPN change.
Real‑World Success Stories
“After adding the checklist to my routine, I noticed no leaks even after switching from Chrome to Edge. Forest VPN’s price point made it a no‑risk upgrade—my privacy stayed solid, and my budget stayed happy.” – Maya, 29, freelance designer
“I was skeptical about VPNs, but Forest VPN’s kill‑switch and easy DNS setup proved its worth. The monthly test gave me peace of mind, and the variety of servers kept my connection fast.” – Omar, 35, software engineer
Why the Routine Matters
Do you ever wonder if a single leak could expose your location? Think of your VPN as a vault; a leak is a tiny crack that lets in light. A monthly check is like a locksmith inspecting the vault—quick, simple, and essential. If the test shows a mismatch, you can act fast: toggle the kill‑switch, switch protocols, or set custom DNS. Forest VPN’s interface makes each fix feel like flipping a switch.
Actionable Remediation Tips
- Enable the kill‑switch: in Forest VPN, tap Settings → Advanced → Kill Switch.
- Use VPN‑provided DNS: set DNS to “Use VPN DNS” in the app.
- Disable WebRTC: add the “WebRTC Network Limiter” extension to Chrome or tweak Firefox’s about:config.
- Choose a leak‑resistant protocol: OpenVPN, WireGuard, or IKEv2 are battle‑tested.
A clean test is your green light. A leak is a red flag that needs immediate action. Forest VPN’s affordable plans and wide server spread let you stay protected without breaking the bank.
Ready to Protect Your Privacy?
Ready to protect your privacy? Download Forest VPN today and start your leak‑free routine.
Keep the Momentum
After you master the checklist, share your results on social media or a private group. Knowing others are doing the same builds community trust and keeps everyone safer. The next section will dive into advanced monitoring tools that automate these checks, so stay tuned.
Take Control Today: Why Forest VPN Is Your Best Choice for Leak‑Free Privacy
Ever wonder if your VPN really hides you? A test vpn leak can expose your real IP, DNS, or WebRTC data. When a leak slips through, your privacy crumbles like a sandcastle in a storm. We’re here to help you spot and stop those sneaky leaks before they catch you. With Forest VPN, you get a reliable, affordable shield that keeps every test clean and convenient.
Let’s dive into why a test vpn leak matters and how you can fix it.
Why a Test VPN Leak Matters
When a leak happens, your real IP, DNS, or WebRTC data can be seen by anyone. That means your location and browsing habits are no longer hidden. It also opens doors for targeted attacks.
- Privacy loss – your true identity becomes public.
- Security risk – attackers can target your device.
- Compliance issues – some industries require strict IP masking.
How to Test VPN for DNS Leaks
We’ll walk you through three key tests. Each test checks a different leak type.
1. IP Leak Check
- Connect to your VPN (pick a server you normally use).
- Open ipleak.net.
- Scroll to Your IP addresses – the IP should match the VPN server.
- If the ISP or country shows your real provider, a leak exists.
2. DNS Leak Check
- With VPN still connected, visit dnsleaktest.com.
- Click Standard Test.
- If the list shows your ISP’s DNS, a DNS leak is present.
3. WebRTC Leak Check
- Open browserleaks.com/webrtc.
- Look for WebRTC Leak Test – it should read ✔ No Leak.
- If it shows ✖ Leak, your browser is exposing your real IP.
Remediation Tactics
Fixing leaks is easier than you think. Here’s what to do.
Issue | Fix | How to Enable |
|---|---|---|
IP Leak | Kill Switch | Toggle Kill Switch in Forest VPN settings. |
DNS Leak | Use VPN DNS | Enable Use VPN DNS in the app. |
WebRTC Leak | Disable WebRTC | Install a browser extension or adjust settings. |
Protocol | Switch to leak‑resistant | Choose OpenVPN or WireGuard in Advanced. |
FAQ
What is a VPN leak? A VPN leak occurs when data that should travel through the VPN tunnel is sent outside, exposing your real identity.
How do I know if my VPN is leaking DNS? Run a DNS leak test while connected. If the servers belong to your ISP, a leak exists.
Can I fix a VPN leak without changing providers? Yes. Enable the kill switch, configure DNS, disable WebRTC, and choose a leak‑resistant protocol.
Ready to lock down your privacy? Download Forest VPN now and experience leak‑free protection every day.